This is how I left it last time after welding in the fillet pieces for indicator holes.
Horror of horrors.........the RH hole is 3/4" inch too far from the centre. At first I tried to make a template modification by adding on some small sections but broke both jigsaw blades extending the pointy end of the hole. So, rarely for me, I removed the patch completely and made another one. This time I popped to my local hardware shop for supplies of jigsaw blades and other stuff. I made the template properly. That is by drilling a 3/8" holes at strategic points to allow the blade to turn 90 degrees. Guess what, Never broke another blade..whoopee ! My welding skills had deteriorated though and ground most of the weld away.
Below is the rather complex template I was going to make before I decided to renew the whole insert.
As you can see I've used the old door skin to make the patch. The skin has come in very handy as I've used it endlessly for the rear inner wheel arch, Rear side window bottom, Inside rear strengthening (where P.O had cut through it to mount a speaker) window winder base bracket and many other things. So, it shows I'm keen on recycling ( not really, just a tightwad).
As a diversion I got from the shed the front chrome bumper, bought years ago from down south when I was travelling as a sales-specialist. I also bought yonks ago some mounting irons (stored in conservatory) and set to to give it a good clean with the sponge pad in the drill.
Armed with an array of cleaning products I thought I'd get it looking like new, well almost.
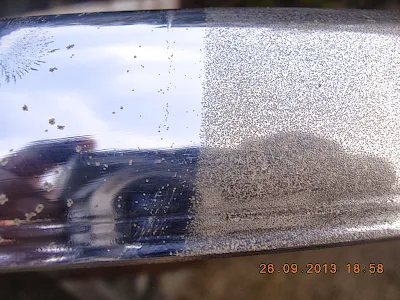
Look at the stuff I used on it. Note that the bumper had an over-rider on but I've decided to go with a sleeker 60's look without so the chrome does have a distinct line where it was covered up. That's the area I started on first to see which product worked best.
See below
Answer.................................................None of them. I had visions of the chrome looking brand new.
Epic fail. To be fair the T-cut, Vinegar and Peek chrome cleaner were all about the same. It'll have to go off for re-chroming at some point in the future, but that's for much later on when finances are in better shape.
Since the welder was out I fashioned two gigantic captive nuts to hold the bumper iron onto the chassis rail. These were made from the old rubber bumper brackets and were being saved by wifey in the conservatory for her arty farty projects. I just reclaimed them, chopped them about and hey presto.
With two rectangular infills added to the front lip the front end was complete. I've discovered high build primer !. Painted that on the welded area, sanded ,filled, sprayed primer ( the cheapo £1 tin stuff) and job done !
Before
After
Next up is rebuilding a wall around the base of (as was) giant fir tree, again. Did it 20 years ago so can't grumble, but wifey can !


