Saturday, October 23, 2021

From bad to worse

 So, the front sidelights work from the switch as they should.

But and it's a big but, the car won't start. Not so much as a click, tick, grunt or whine.

Just a deafening silence.       And, the front lights plus indicators are all on permanently.

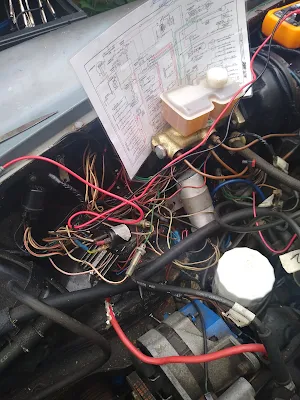
I have been checking and maybe fiddling with the ignition relay and starter relay. It seems I have an extra brown/white wire at the relay....wtf.

Just look at the mess of spaghetti. And I still have an errant brown and errant green wire near the coil. 

I hope I've not fried the internals of the coil or relay.


I took the opportunity to link up wifeys car with a full battery, not that it made any difference. 
I cannot understand why the indicators are on, FFS they are on different circuit.

I'm beginning to think I'm in over my head as I've had about for days of staring at the wiring diagram, testing continuity, checking connections and sŵapping wires as per advance auto wire diagram.

So any comments or advice would be massively appreciated, even better pop round my place and help.

Even wifey is getting somewhat irate at me spending so much time on it and not cutting the grass etc.

Not posting any more till I've made some progress. 
There, that's me throwing toys out of the pram.

I did trim my beard though, time for wine and spotify to try and improve the mood


Saturday, September 25, 2021

Wiring woes

 Well at least I got the headlights and sidelights working. Was relatively simple once I worked out the wire positions.


One really annoying thing was that the rubber bullet connector housings in the left/right transition had no internal metal ring to hold the bullets each end. It was reliant of the bullets being pushed in far enough for their ends to touch. No wonder it took so long to check the continuity before snipping wires. So, I attached new spade terminals to the green and red wires each side, deleted the rubber bumper sidelights in the headlamp bowl and bingo. Main headlights both sides, dipped beam both sides. The puzzle from the last post has been resolved, it was a poor bullet connector on the blue/ red circuit.

That took all day whilst waiting for the phone to ring as I was on call. So far well into Saturday night It's still not rung, so far so good.


That only leaves the relay to fathom out. What bodge job has been done god only knows. The original rubber bumper indicators had odd yellow wires going to a "Fiat" relay and a yellow wire wedged into the bulb with a small screw !!!!


Like an Idiot I forgot to note all the connections to and from, but did discover the live wire ( purple ). I had bought a few weeks ago a spare relay from Halfords so I'll probably wire that in instead of the crusty one above. I've YouTubed the connections to death this last hour so tomorrow (Sunday) I will give it a go weather permitting.

After consulting the wiring diagram for hours on end I realised the hazard warning switch could be important so, as it was the only switch that didn't disintegrate years ago on, I took a look.

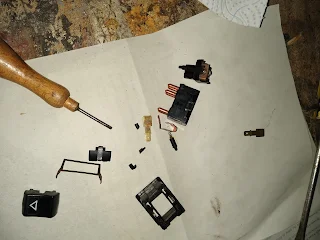
Disaster struck. That too fell apart on inspection. Completely unrepairable, the pivot lugs had snapped and it all fell into the footwell. One thing I have noted about Lucas electrics is the electrical parts are really good, logical and quality. The mechanicals of the switches are not. Tiny, crude, fiddly and prone to wear.

Happiness


Sadness

Still don't know what the loose purple wire is close to the ignition wiring , plus a stray live red wire above the accelerator pedal.  Let me know in the comments if you do............please


To recap, more fiddling and staring at the wiring diagram till I can get the indicators flashing front and rear. I'll settle for just the fronts for now though. Might have half a morning of tomorrow , go for a walk and coffee or might just stay in bed late, if only. More soon.


Sunday, September 19, 2021

A little more done.

 Looked at the rear wiring harness this afternoon. Only had to snip off the upper bullit connectors on the rear lights and add a spade connectors to both. Fitted them and hey ho they work.........in a fashion. They appear to be on as soon as the ingnition barrel is turned to the first position, regardless of where the headlight switch is  i,e off, sidelights or main lights. I think the same happens at the front too. The brake light or indicators don't come on either.

I guess I'll wait till I get the front indicators fitted next week to troubleshoot this Issue. I bet its raining all next weekend though. Still it will be payday, but have a 24 hour on call Saturday. 

Looked at the boot floor now its dry and it looks good.


Next up was to paint the inside rear of the wings behind the light and boot floor. Since I had run out of trusty £1 per can of matt black ( non in stock at any Poundlands, apparently caused by lack of lorry drivers with the flammable goods certification. A real bummer as this stuff and its brother Grey primer are by far the best value around. Non of this corporate price hiking for motorists ) I used a small tin of black Hammerite that was skulking in the shed.


Did both sides, obviously then stood back and admired my work. Whilst I was on a roll I decided to make cardboard templates for the tops of the rear light " boat-tails".  I don't why at the time I didn't slice the bottoms off the light fascia straight and level. It would have made the job much easier. The only conundrum is do they sit on top of the boat-tail or underneath ?. I decided underneath. Means a bit of fiddly nibbling with the grinder and a few spot welds but no biggie. I think I'll also drill a drain hole in the bottom as It looks like it could be a rust trap.


The left one shown is not so bad. The right has a sloping face which is impossible to get and and make level. None are visible though as its covered by the light and foam seal. Still the light fittings both sides fit well. So next job will be adding black wiring harness tape to the exposed parts of the rear loom, but thats after another coat of matt black (on order from Europarts, £ 5.06 per 350 ml. Still begrudge paying this though but had no choice).

All of this only took a couple of hours after a nice walk in the wonderful Derbyshire countryside, coffee and bun.

Hopefully next weekend the weather plays fair and wifey don't find me a load of chores that have to be done. 

Here's hoping.


Thursday, September 16, 2021

Busy Busy Busy.............!

Even more so since typing this last night I somehow managed to delete the whole post. Anyways, let me fill you in since the last post.

The front windscreen trim strip is in. Yay . After the long long faff of fitting the tailgate trim strip ( 3 days of cursing and swearing then leaving the last 14" dangling free) I set too fitting the front one starting mid lower screen and working towards the drivers side ( Right hand side ).

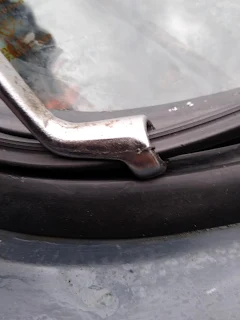
But this time I fitted it the correct way up with the pointy edge down into the groove. These are the tools used. A careful note is don't go mad with the fairy liquid. I found it better to smear a small amount on the underside of the strip about 2 to 3 inches ahead of the fitting.


It took about 90 minutes to fit 10 inches. The angled ring spanner mentioned in earlier post was rubbish. 
I even made a trim insertion tool from a thick wire coathanger, this too was rubbish. But probably I was too impatient and wanted to crack on. I left it at that for the day as the palm of my hand was killing me from the pushing and finagling. The technique was to push the top edge ( the inside edge) in, hold it, then lever the lower outside edge into the thin flimsy lip.

The following day I had inspiration. I used a mole grip to hold the trim tool and changed technique. 
This time I fitted the lower outside delicate edge first and finagled and levered and pressed the middle domed part into the upper lip, levering as I went along. I got the bottom and RH vertical part in in about 60 minutes. I got the remainder done in about another 30 minutes, getting better as I went along.

So the question remains should I remove the rear trim strip and put it the corrwct way up ? Yes I will but not for a while though.

Next up was the front lights. All cleaned up and various nuts and adjusters and bulbs arrived from MGOC.

The wiring though ! That wiring, previous owner/s dodgy wiring and some illogical and puzzling switches. Firstly I had to make two good headlight bowls from two slightly corroded ones and a completely rotten one caked in 50 year old underseal.


What needed replacing was about two inches of outer rim on each plus the spring tabs at the bottom. 
So after some cutting, welding and filing job done.

As a side note I fitted the dash weeks earlier, mostly, but struggled to tighten one nut on the left side. Twas then I noticed I was stripping the threaded stud poking out from the scuttle. It was not the correct nut. So I did what I normally do when faced with a conundrum and a mountain of other work to do, I ignored it.

As another side note, the wifeys car failed its mot due to rear shocks and rust in sills front left and right rear. Job done in 3 days with much welding and only a minimum of filler. Saved £ 300 I/ we didn't have so alls well and wifey joyous.


Here is the finished Left headlight showing the chrome surround spring fabricated and fixed. It took hours to make. They are only pence to buy but that was not the point, I enjoyed the process and got to work in the new shed.

Now to make sence of the wiring in the grill aperture and switches at dashboard. F@&+ me what a mess !

I had to do a lit of continuity tests with lots of cleaning and puzzling just to understand it all. Then I had to  work out the switching. It might seem odd to say but I didn't really know how to turn the lights on and what were the sidelight switches. Anyway after a lot of staring at the wiring diagrams, staring at switches and the dash loom I eventually realised there was a headlight switch residing in the box reserved for the headlight refurb.


Sadly I didn't take any photos of the wiring before I commenced as I think I was too absorbed in sorting it out.

 Power was flowing to both headlights  then not, then to one sidelight but not the other, then not at all. The headlight switch is mounted to the steering column binnacle, in my case just dangling down into the footwell. For some reason there was an extra  8 inches of wiring going to the switch ending in a triangular type connector one end ( with just 3 wires, all red) to the dreaded terminal block the other. 

After lots and lots of staring at the WD and staring at the wiring loom switch I finally figured it out.

The switch was wired wrong. Anyways I noted how wrong it was ( just in case) and rewired correctly.

Hey ho !  Headlight main beam, sidelight both sides. Then not, then the other, pppppfffftttt!

It turns out that in the grillë recess, several single bullet connectors had no inside inside the hard rubber outer covering thing. They were just pushed in from each side and hope they were touching. A bit of soldering, spade terminal crimping and done. TFFT !!

But.................on testing for some reason the drivers headlight is not on under one condition ( position ) of either the switch itself or the right column stalk position. That's for another day though.

Next up was the rear lights. The wiring was easy to follow and all there except for a few extra wires relating to the heated rear window, plus extra ones not connected to anything, all black or white.

The rear light pods I have had for years and are the correct type for pre rubber bumper cars, a little pitted but otherwise good. Cleaned, bulbs in and foam gaskets purchased and special nuts found so ready to go.

But no................... look at that boot floor. It's typical one job leads to another.


When I purchased the car the boot floor was immaculate. It looked brand new. Alas years of rear window missing, tools and stuff constantly in and out, weather and general time has taken its toll. The car was originally white but thoroughly sprayed black early on in its life. 

So I decided to spruce it up before fitting the rear lights. A good Vac, clean with white spirit, areas treated with Ku-rust and applying seal sealer to inner wheel arches and a quick spray with Matt black 


Lo..............it looks good and much better. It needs another coat though, but I had run out of  spray.

Next up is to buy a new pair of front indicator units. I have a pair given to me when I bought the front chrome bumper. The guy gave me a box of misc lights and things, hence why I have 3 headlights, four  reversing light lens's, three headlight bowls. They were all a bit cruddy but at the time I already knew I was converting to CB so I gratefully accepted them and left them in the shed for about 8 years untouched.

Sadly one indicator body is beyond redemption and rusted throughout. The other is not much better. Strangely enough it's as expensive to buy just the body as the complete unit with wiring. 

That's next months purchase though so I might as well get on with the boot floor painting, rear corner boot/ wing inner area and continuity check the rear lights along with a myriad of other jobs.

My minds now made up to make it a rolling restoration and get it to a point to pass an mot. 

Either way some real progress has been make and I'm determined to crack on until winter so I can save up for the interior. 

More soon, I promise.


Monday, May 31, 2021

More rubber struggles despite the pain - 2

 So I left off last time explaining how an offset ring spanner was good for forcing the rubber apart and the trip strip in. No, its not easy. The trim strip twists and turns, pops out and back in again. Refuses to go into place and some places goes in rather easily. 

I must admit using washing up liquid did not help. Yes it helps things slide in easily, it also helps them slide out easier too.

So a week later I was ready to try the front screen, which I was dreading. Again this was in the loft so a very tentative lowering down of the aluminium ladder armed with glass was done ok, with a little helpm from wifey.

Spent a long time cleaning the glass and getting the old "glue" and silicone type stuff from the outside edge.

The fitting of the rubber around the steel lip of the windscreen was not so bad as the last effort on the rear. Ah, the bliss of experience. The same problem of too much rubber length in the middle of the screen top edge still presented but I expected this.

Lo


Also in view is the dash top Glued in position. I must admit before I glued it in place it looked presetable. Now after a week or so of housebricks weighing it down it does not look as good. Also one of thr vent slots has snirped rightb up. I know the steel vent frame will cover it but Im afraid the vinyl looks old. Hey ho, on with the master plan, dash in.

This was very tricky and took 2 whole days, each several days apart. Why I hear you ask ?

Well, attempting to adjust the handbrake cable on wifeys Fiat I slipped belly first off the seat and onto the sill, mighty crack in the left rib area and much pain. So rather annoyed, frustrated and pissed off I had a couple of days off work while the pain eased.

Then I did a very fufferfour thing, thought I could overcome the pain and get the glass in one bank holiday Saturday. It was about quarter way in at the left lower corner when I left it last and held secure with gorilla tape to stop it slipping off the car altogether.

Wifey did assist for a full 12 minutes before she got fed up and went off in a sulk muttering about more important things to do.

My fu@%&£~ word, what an epic struggle. Left lower corner sort of in, Right lower corner miles away. Lots of grunting, pushing, groaning and yelps of pain the right corner was much closer. 

Fu@%&£~ me, the left corner pops up and out. Repeat till your soul is ready for beelzebub and life appears meaningless x10.

All this time the sun was beating down on mi head, ribs hurt like f&%£ and the gorilla tape " handles" were starting to slide on the glass like Bambi on ice.

Progress was slow and very hard. But press on I did. After what seemed like eternity I had about half of the left and right vertical edges in the groove, just.

Then f%&£ me again, the top centre of the rubber trim had come off the edge of the ole. 


Words fail me at this point. However of all things that helped was two peices of dry garden cane. Twaz the only way to keep the rubber from popping off wedged on the dash top and the underside of the rubber edge.With a little lateral thinking and pushing the rubber up from inside onto the glass edge was some degree on sucess acheived. A little light pushing of the glass inwards and some pokey red rounded tool unfurling of rubber edges it was done. 

I can promise I will never attempt this again !

That night my rib was killing me and I had the worse nights sleep in a long time.

But it was done. I only have to put the  rubber trip strip in now...............eek ! 

That methinks my be just as tough too, maybe.

Next also on the agenda is the fitting of the dash and heater pipes, yay.

 I should have fitted all the lights this weekend but sadly the parts ordered from MGOC have not arrived, normally they get here after a couple of days. Boo Royal Mail. Still I had fun and pain, mostly, the kids came to visit and I fell in love with daughters Mercedes AMG , oooh very nice.

.

Sunday, May 30, 2021

More Rubber struggles despite the pain

 So, for some reason the typing interface appears ok for now so no crazy layouts. 

The rear tailgate screen cleaned up nicely by using an old fashioned razorblade, green fuzzy pad and windowlene ( glass cleaner) The terminals for the heated rear window looked a bit iffy and the spade connectors for the wiring loom a bit cruddy but hey ho, they'll not be seen. Anyway its a long way off me testing the thing and will I ever use it, as well as the fact the switch on the dash disintegrated  years ago when it was removed. All part of the master plan of " get it ready to drive on the basics" plan. 


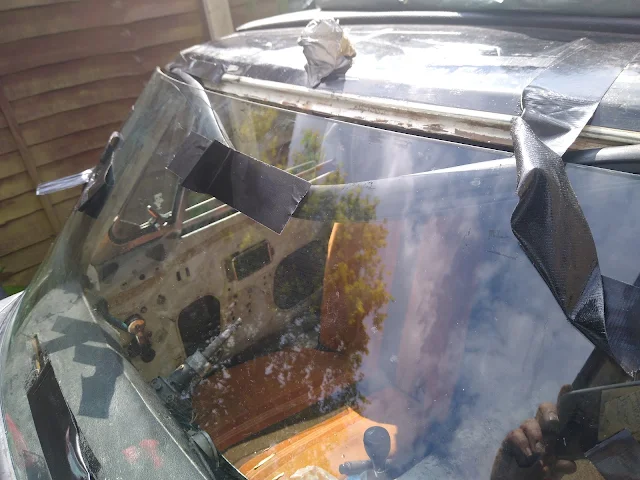
Here it is halfway in and yet another struggle. The main problem was the glass groove in the rubber is relatively small and finagleing it caused the dreaded rubber surround to dismount. Not just a little bit either, it came off the frame in great swathes. Plus the glass lip being so fine and delicate I was afraid of damaging it.

Here you see the red trim removal tools that proved so useful in getting the rubber to behave (sometimes)
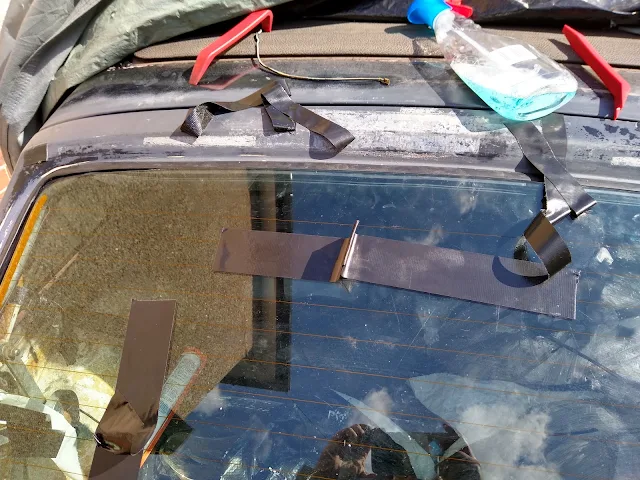
You might also notice the unique way I had of moving the glass when faffing with alignment (gorilla tape, yet again !) It worked though,,,,,,,,,,,this time, more later.

Anyways in the glass went......undamaged and seated, or so I thought. 
Next was to fit the central groove trim sealing piece. 
For this is required a special tool. Me being a Yorkshireman and a bit skint I thought I'd improvise. The groove trim is not a round section that pops in. Its diamond shape, sort of, with a roundish portion on the underside but angled on the top face.
Its job is to push the outer trim outwards onto the frame and the inner rubber edge in, onto the glas as well as pushing the glass into its groove. Since the rear screen is relatively flat appears not too a difficult job, especially with the gorilla tape "handles" and judisious use of washing up liquid, smooth round trim tool.

How wrong I was. In my infinite wisdom I decided to  make the special "tool" from a stout wire coathanger. However, when testing the force required to expand thr groove I quickly regretted this action. A Yorkshireman is not defeated so easily, or a skint devisive and determined chap. So I used this
SEE BELOW


A 13mm offset angled ring spanner. It worked fairly well. Enough meat to spread the rubber and by pushing down pushing the trim ............ sort of.

Time is tight right now so must sign off. More on this later.


New Rubber. .........A trial of patience and frustration


So, its obvious I,ve not yet got to grips with the new ipad, new phone and the several Google accounts since we got rid of the "old Laptop". And the way the new Blogspot interface works.


Someventually I downloaded all of my MG photos to Google drive and at least that seems sorted, if not the crazy way the typing settings work. I promise I,ll eventually work out how to get rid of the underscore.So on with the story. New larger shed has not improved things ! In fact its made them worse , There is now more places to look when I try to get things done.However, I think i signed off last time with..............errr I forgot.I have spent the last few months making lists of parts required, many lists, lists of lists and rethinks.The strong decision was to get the MG somewhat watertight by re-installing the rear screen glass   ( tailgate) by buying a new rubber trim surround and insert. The guy at the MGOC said " it may appear that its too large but its not, there supposed to be like that".He was not wrong ! Every inch of he way it was a struggle to get the thing to stay on. It has a double lip on the outer edge and a double lip on the inner.Starting at the top middle and working outwards on both sides it just kept slipping off. I gave up and left it a few days. On re-commencing  I decided to use gorilla tape to hold it in place. After many hours of faffing and cursing I was eventually getting somewhere.That is until I got to the bottom edge. There was way too much rubber to fit. As in  about six inches too much !!!!!!SeeAfter even more faffing and frustration, sweating and cursing, shouting and walking away in a sulk I eventually managed to get it all in with lots of strips og gorilla tape to hold it there.