Monday, May 31, 2021

More rubber struggles despite the pain - 2

 So I left off last time explaining how an offset ring spanner was good for forcing the rubber apart and the trip strip in. No, its not easy. The trim strip twists and turns, pops out and back in again. Refuses to go into place and some places goes in rather easily. 

I must admit using washing up liquid did not help. Yes it helps things slide in easily, it also helps them slide out easier too.

So a week later I was ready to try the front screen, which I was dreading. Again this was in the loft so a very tentative lowering down of the aluminium ladder armed with glass was done ok, with a little helpm from wifey.

Spent a long time cleaning the glass and getting the old "glue" and silicone type stuff from the outside edge.

The fitting of the rubber around the steel lip of the windscreen was not so bad as the last effort on the rear. Ah, the bliss of experience. The same problem of too much rubber length in the middle of the screen top edge still presented but I expected this.

Lo


Also in view is the dash top Glued in position. I must admit before I glued it in place it looked presetable. Now after a week or so of housebricks weighing it down it does not look as good. Also one of thr vent slots has snirped rightb up. I know the steel vent frame will cover it but Im afraid the vinyl looks old. Hey ho, on with the master plan, dash in.

This was very tricky and took 2 whole days, each several days apart. Why I hear you ask ?

Well, attempting to adjust the handbrake cable on wifeys Fiat I slipped belly first off the seat and onto the sill, mighty crack in the left rib area and much pain. So rather annoyed, frustrated and pissed off I had a couple of days off work while the pain eased.

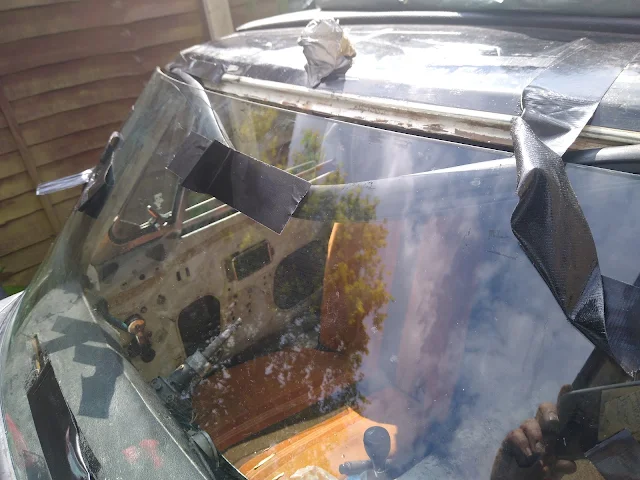
Then I did a very fufferfour thing, thought I could overcome the pain and get the glass in one bank holiday Saturday. It was about quarter way in at the left lower corner when I left it last and held secure with gorilla tape to stop it slipping off the car altogether.

Wifey did assist for a full 12 minutes before she got fed up and went off in a sulk muttering about more important things to do.

My fu@%&£~ word, what an epic struggle. Left lower corner sort of in, Right lower corner miles away. Lots of grunting, pushing, groaning and yelps of pain the right corner was much closer. 

Fu@%&£~ me, the left corner pops up and out. Repeat till your soul is ready for beelzebub and life appears meaningless x10.

All this time the sun was beating down on mi head, ribs hurt like f&%£ and the gorilla tape " handles" were starting to slide on the glass like Bambi on ice.

Progress was slow and very hard. But press on I did. After what seemed like eternity I had about half of the left and right vertical edges in the groove, just.

Then f%&£ me again, the top centre of the rubber trim had come off the edge of the ole. 


Words fail me at this point. However of all things that helped was two peices of dry garden cane. Twaz the only way to keep the rubber from popping off wedged on the dash top and the underside of the rubber edge.With a little lateral thinking and pushing the rubber up from inside onto the glass edge was some degree on sucess acheived. A little light pushing of the glass inwards and some pokey red rounded tool unfurling of rubber edges it was done. 

I can promise I will never attempt this again !

That night my rib was killing me and I had the worse nights sleep in a long time.

But it was done. I only have to put the  rubber trip strip in now...............eek ! 

That methinks my be just as tough too, maybe.

Next also on the agenda is the fitting of the dash and heater pipes, yay.

 I should have fitted all the lights this weekend but sadly the parts ordered from MGOC have not arrived, normally they get here after a couple of days. Boo Royal Mail. Still I had fun and pain, mostly, the kids came to visit and I fell in love with daughters Mercedes AMG , oooh very nice.

.

Sunday, May 30, 2021

More Rubber struggles despite the pain

 So, for some reason the typing interface appears ok for now so no crazy layouts. 

The rear tailgate screen cleaned up nicely by using an old fashioned razorblade, green fuzzy pad and windowlene ( glass cleaner) The terminals for the heated rear window looked a bit iffy and the spade connectors for the wiring loom a bit cruddy but hey ho, they'll not be seen. Anyway its a long way off me testing the thing and will I ever use it, as well as the fact the switch on the dash disintegrated  years ago when it was removed. All part of the master plan of " get it ready to drive on the basics" plan. 


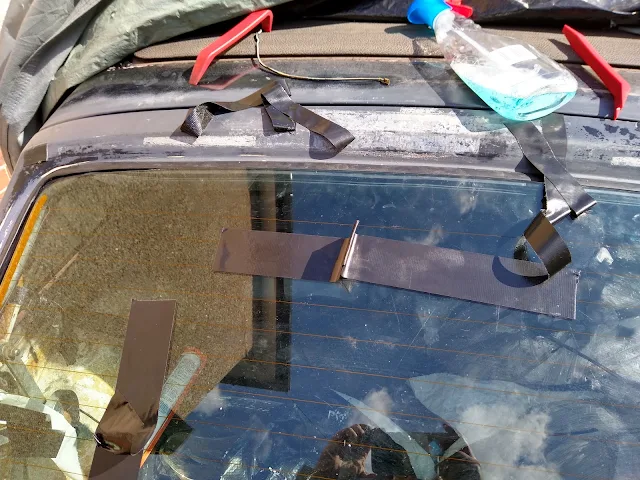
Here it is halfway in and yet another struggle. The main problem was the glass groove in the rubber is relatively small and finagleing it caused the dreaded rubber surround to dismount. Not just a little bit either, it came off the frame in great swathes. Plus the glass lip being so fine and delicate I was afraid of damaging it.

Here you see the red trim removal tools that proved so useful in getting the rubber to behave (sometimes)
You might also notice the unique way I had of moving the glass when faffing with alignment (gorilla tape, yet again !) It worked though,,,,,,,,,,,this time, more later.

Anyways in the glass went......undamaged and seated, or so I thought. 
Next was to fit the central groove trim sealing piece. 
For this is required a special tool. Me being a Yorkshireman and a bit skint I thought I'd improvise. The groove trim is not a round section that pops in. Its diamond shape, sort of, with a roundish portion on the underside but angled on the top face.
Its job is to push the outer trim outwards onto the frame and the inner rubber edge in, onto the glas as well as pushing the glass into its groove. Since the rear screen is relatively flat appears not too a difficult job, especially with the gorilla tape "handles" and judisious use of washing up liquid, smooth round trim tool.

How wrong I was. In my infinite wisdom I decided to  make the special "tool" from a stout wire coathanger. However, when testing the force required to expand thr groove I quickly regretted this action. A Yorkshireman is not defeated so easily, or a skint devisive and determined chap. So I used this
SEE BELOW


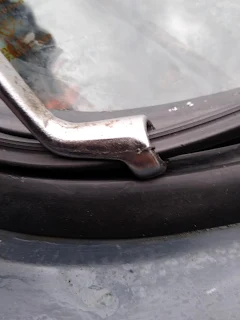
A 13mm offset angled ring spanner. It worked fairly well. Enough meat to spread the rubber and by pushing down pushing the trim ............ sort of.

Time is tight right now so must sign off. More on this later.


New Rubber. .........A trial of patience and frustration


So, its obvious I,ve not yet got to grips with the new ipad, new phone and the several Google accounts since we got rid of the "old Laptop". And the way the new Blogspot interface works.


Someventually I downloaded all of my MG photos to Google drive and at least that seems sorted, if not the crazy way the typing settings work. I promise I,ll eventually work out how to get rid of the underscore.So on with the story. New larger shed has not improved things ! In fact its made them worse , There is now more places to look when I try to get things done.However, I think i signed off last time with..............errr I forgot.I have spent the last few months making lists of parts required, many lists, lists of lists and rethinks.The strong decision was to get the MG somewhat watertight by re-installing the rear screen glass   ( tailgate) by buying a new rubber trim surround and insert. The guy at the MGOC said " it may appear that its too large but its not, there supposed to be like that".He was not wrong ! Every inch of he way it was a struggle to get the thing to stay on. It has a double lip on the outer edge and a double lip on the inner.Starting at the top middle and working outwards on both sides it just kept slipping off. I gave up and left it a few days. On re-commencing  I decided to use gorilla tape to hold it in place. After many hours of faffing and cursing I was eventually getting somewhere.That is until I got to the bottom edge. There was way too much rubber to fit. As in  about six inches too much !!!!!!SeeAfter even more faffing and frustration, sweating and cursing, shouting and walking away in a sulk I eventually managed to get it all in with lots of strips og gorilla tape to hold it there.