Thursday, September 02, 2010

suspended suspension...or suspension suspened ! Part One

Enigmatic title ? Yes that refers to my attempts to undo all the rusted and oily tough nuts on the front RH side.
Since I have no form of oxy/acetylene torch ( or common blowlamp come to that) it was an uphill struggle all the way. Or even an upside down struggle at least.
I last touched the MG a good few weeks ago prior to my exams and subsequent re-sit ( result pending ).
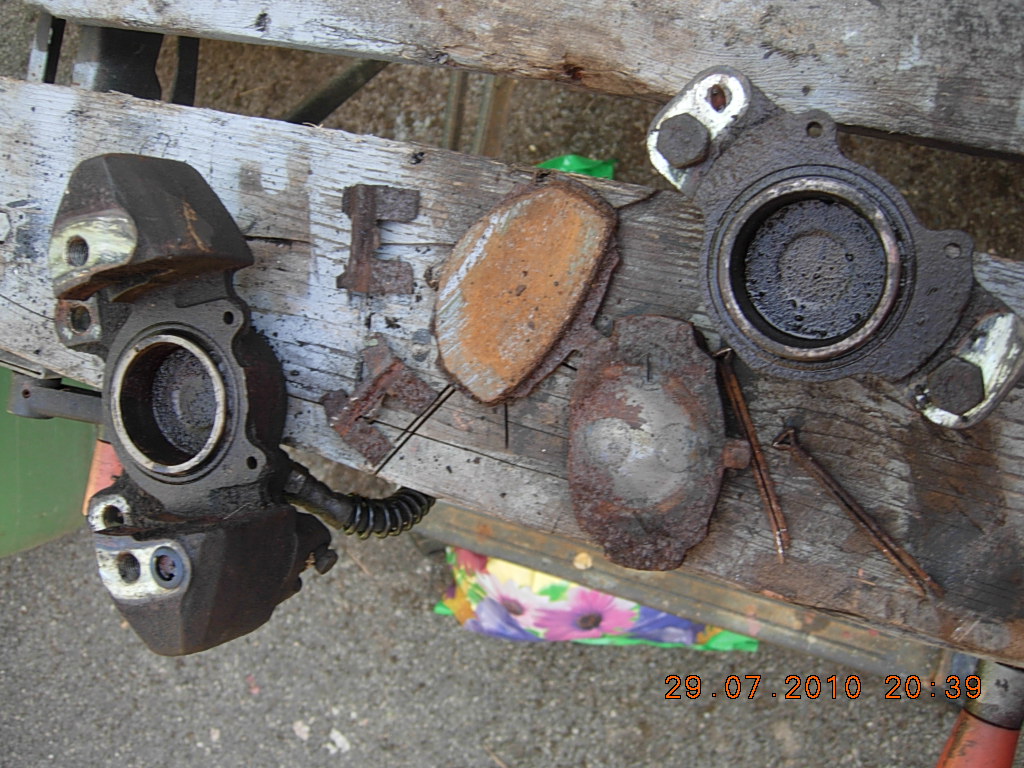
I had managed to remove the brake caliper, split the caliper on the bench the tried to remove the hub as a whole. It was then I discovered I didn't have a socket large enough for the hub centre ( Inch & 1/8th AF)
I tried in vain all the local tool shops in town ( 6 in total) only to be given the same bemused look from all when asking for Imperial sockets.
Good ole E-bay sorted it in minutes, and had it a few days later. When it arrived I tested it on the rear.
I had a shock, the rears are  larger nuts. At first I thought I'd bought the wrong one, but turned out I was just too lazy to lift the front cover to look at the front hub. Why did BL make them different sizes ??
Anyways, I'm not touching the rear hubs, only the front.
So in a fit of pique and guilt trip of non revision I did what I normally do, nothing, for a good few weeks
That is until yesterday.
With most of the day ahead of me I set about the front RH unit again, but this time with the correct size socket. Split pin out and nut off easy peasy, off came the rusty disc and even rustier hub.
Spent some frustrating time trying to undo the outer hub from the disc hub..........impossible.
The workmate with jury rigged "new " jaws is rapidly disintegrating.
It has 4 bolts in from the back with well recessed heads, nuts at the front but even more recessed. And there is very little room at the back, in fact no room to fit a socket over the bolt head.
So, after another liberal dousing with the sweet smelling penetrating fluid I put it to one side and set about removing the spring pan + arms and upper arms.
Disconnecting the ball joint steering arm was easy with some synchronised bashing of two hammers. Timing was essential, as was "feel" since one hammer was of the "claw" type and the other "lump" type = gross weight mismatch. It took about 15 blows in various directions and swing timings then viola, it was free.
The front anti roll bar ( sway bar for U.S readers) came away easily.
Then the problems started. Or one problem in particular.
The bolt and nut through the end ( narrow end) of the top  "A" frame where it attaches to the vertical trunnion had been ...............wait for it

Welded to the frame each side !!!!!!!      It was not even the correct bolt. One side had been a domed head with a spot of weld on the arm to stop it spinning. Tuther side had weld wire and gobs of weld on the nut and arm to stop it spinning.
A nifty slice with the super thin cutting disc in the scary grinder saw the heads sliced off expertly.
Trouble was I was left with two flush faces and a bolt that had been in situ gawd knows how long.
Repeated bashing with punch and lump hammer did nothing, either direction.
So I decided the whole assembly had to come off ( Armstrong damper with two upper wishbones, trunnion connected.
At this point sense prevailed and I took the lower pan A frame outer mountings off.
This was a scary move as there is a lot of force since the spring is forcing it apart.
Fortunately the car was supported on two axle stands so I used the trolley jack to lift up the lower pan to take the strain, undid the and nut and tapped the bolt through.
This was surprisingly easy, and it was the part I thought to be the most difficult job on suspension overhaul.
Careful lowering of the jack let the pan down gently, a few taps with lumpy ( my new best friend) and the spring was free.
I was still left with the top "a" frame connected and the lower one too !!!! albeit at the subframe side.
Since the top bolt ( welded ) would not shift the Armstrong unit complete with drop link had to come off ,so I tried to remove the Armstrong bolts (4).
The front two easy, the rear..............................gawd what a performance. RH side was slow.
LH side near impossible. No socket with my extension would fit ( if I had an extension half its length it may have worked ) but a spanner was a real tight fit movement wise. I think I moved it 1/2 a flat at a time with approx 45 seconds of fiddling to get the ring end located properly each turn, 40 minutes later the last bolt came out. The total time for the other three was about 15 minutes.
Bear in mind this was done with bleeding and sore hands, oily as f*** parts and sideways laying down right on top of our cast iron castelated sewer cover.
Then off the top half came, to join its other partly reassembled friend, fiend and co partner the hub assembly on the trusty workmate, to enjoy some time off in the sunshine bestowed on us this very late summer. As a gesture of complete juvenile frustration and envy I took enormous joy in drowning both twats in perfumey penetrating fluid..

Since that's a lot of text..........and no pictures ( hands and body too oily to get camera from bedroom) I'll leave it for now. More this weekend.

Thursday, July 29, 2010

More grunt and groan.....with pictures

Instead of doing the right thing today and yesterday ( revising for exam ) I had a major potter with the MG.

So, fitted all new copper brake pipes. Cor, they ain't half long and complex. The bending them part was easy, too easy in fact. I had the idea I'd get them straight as a die looking ever so neat and tidy. Not a chance !. Still their in and fastened. Some of the P clips were a swine to re-fasten. Namely the one directly below the master cylinder. Two pipes almost went side by side ( with some ungentlemanly language and "persuasion"), the clutch pipe (steel) was in the way as was two thick cables and starter motor solenoid with mass of other wires. The  P clips distort like buggery when bent back then forward as their holes then don't line up.
One under the rear seat was also tough as it was a strap clamp holding the fuel line and another pipe/cable + the new copper line, all had to be fitted into a rubber 1/2 grommet.

The bad news is I have 3 leaks. One oil leak cured easily on the front oil cooler/pipe union. The union was leaking, cured by buying and fitting a new oil pipe. I was dreading removing the nut from the pipe as where it attaches to the Aluminium oil cooler as last time I sheared off the base thus ruined the oil cooler. The new cooler was a second hand purchase from good ole E-bay, bought and fitted a least two years ago. Trouble was I used the old pipes that came with it ( attached at oil cooler end) since they were better than mine.
Unwise move. During the last start up it leaked/ nay dribbled out.
So its repaired now with a brand new pipe. I have to buy another pipe now as I'm not risking the other one.
as you can see from the photo I still have the  Union to undo from the cooler. Tried today and it wont budge.
I'll leave it to absorb some penetrating fluid for a few days.
The other oil leak was at the engine end of the oil gauge pipe. Again I'd bought and fitted a new one ages ago but noticed a very small leak again at start up. I knew it would though. To fit it was a nightmare as its very inaccessible and I crossed/stripped the threads in the end of the hose. So another one is needed..again.
This time I've removed as much as possible to gain better access so as not to make a balls up of it.

The other leak is new, its hydraulic,  coming from the connection of the short rubber pipe to the clutch housing cylinder. This again is in the most inaccessible of places, below the starter motor solenoid and very close to the new copper brake line installed and between the gearbox and engine chassis rail.

So I did what I normally do on these occasions.........did something else on the car.

Removed the brake caliper + hose and attempted to remove the hub. Failed miserably. I didn't have a 1-1/8" socket. So whilst all I thought I would need would be new pads then all new rubber bushes it looks like I now need new discs, back plate and maybe pistons too. They are also soaking in penetrating fuel as we speak.


 Here's a view of the somewhat bare disc as I left it today. Incidentally, last night I fractured a rib falling down some ladders at bedtime ( Long story don't ask ) so its all been a bit of a struggle in more ways than one.

Here is one member of the family ( Ruby ) who loves the car....she sleeps in it till the early hours. How the hell does she get in when the covers over and the rubber strap/hook  thingies are on ?


More soon when I've got money to buy parts and the exams out of the way.

Monday, July 26, 2010

Minor potterings lead to (near) disaster and treason

So, fitted the water pump and  fan belt without too much trauma. Quite easy really.
Then decided to tighten the cylinder head bolts and set tappet clearances before starting engine....again.

During the process, well, at the very start I noticed a tappet arm well off centre, how strange !!!
Further investigation showed the tappet rod loose and flapping around at the bottom of its shaft.
More investigation by removing the small valve/tappet chest cover at the front.

!!!!!!!!!!!!!!!!!!!!!!!!!!!!!!!!!!!!!!!!!!!!!!!!!!

There resting on its side and hiding in a puddle of oil was a tappet follower.
It was for the inlet/outlet (forgot now) of No 2 cylinder. I must have not put it back correctly during the head re-furb. They are very fiddly. They are about 2" long ( 50mm) and 3/4" diameter (15mm) with a hole in the end for the tappet rod to drop into. You need fingers like a deformed midget to get them in position and the grip of a python to hold them.
Anyways, did that eventually.
The big problem was getting the valve/tappet chest cover and gasket back on properly. It and the holding nut are directly under the manifold. No finger room at all. Bear in mind its oily too. I must have tried 15 times before biting the bullet and removing loads to access it.
viz. 
carb fuel feed pipe.
Heatshield
4 boingy springs
throttle cable
choke cable
Manifold nuts and stepped washers
4 of the most fiddly and awkward carb mounting nuts ever made
4 gaskets to carbs
inlet manifold
exhaust manifold

After that the cover and thick rubber gasket were a piece of cake.

Which reminds me, during some of the attempts at starting and trying to cure why it won't start unless off the jump leads means plug no 2 mystery solved.

Some time after starting the first time, inspection of said plug was clean as a whistle. No wonder, no spark, no compression, no exhaust ala no valve movement due to errant tappet follower.
No wonder the engine when started sounded a bit loud and rough.
Anyway, now I can't wait to restart, or at least attempt to.

I still have the oil gauge connector seal at the engine to replace, one oil cooler pipe( leaking at its union) at the oil cooler end to refit and replace some cracked fuel rubber pipes ( noticed during makeshift fuel filler /gatorade bottle).

I did remove the ancient selmer alarm fitted together with loads of bodged wiring and find where the mystery switch wires led to ( across the coil connections/ some sort of home made immobiliser device )
I've left this though to remove later.

I also solved the damper arm problem. After buying the kit to lower the rear from MGOC the Armstrong dampers looked at a too vertical angle.
A quick call ( well 2 months after fitting) to MGOC and they sent me the correct ones ( longer, you should still use the RB links even when lowering to CB height )
Spent a frustrating 3 hours replacing since it involved laying on my side and spannering away forever.

Next job is to replace the brake pipes from rear axle to front end, both front corners ( bought and waiting)
Then replace the front suspension bushes.( not purchased yet )
Then rebuild front and rear brakes. Ditto.
Between which I'll probably try the engine electrics again.

The Treason is ........horror of horrors I've been fancying a Lotus Esprit.
And , it was my hero Ed China who started it. A recent episode of Wheeler Dealer whetted my appetite for what must be the most beautiful of all sports cars ever designed. Trust my luck they are a real pain to work on though. Maybe one day well after the MG is sorted and I have money. A V8 would be nice.

Life goes on for poor old Lostsock, having an exam re-sit late August which has really ruined my summer.
Son No 1 behaves like lord rising from bed at afternoon and lounging in jimjams all day. Daughter No1 is just the opposite, full of action and plans giving us no rest. Wifey continues to nag re DIY on the house. So I'm torn between all this and revision for a tough exam in 4 weeks time.
Lets hope for some sunshine and cash.

More soon

Tuesday, June 15, 2010

Faffing around with fuel..... part IV

What I forgot to say between parts II & III is that I did try again to start the car after the first successful attempts some days later.
It would not start. never, No way.
The cause...........................bad fuel !

Remember I don't have an unleaded head. The fuel was about 10/14  days old. I should ahve known since it was a light tea colour. I dismissed this as mild contam from the plastic ( approved) container I'd previously had Diesel in.
After some research ont tinterweb I found out that fuel loses quite an amount of its octane rating if its just stood, particularly if its small amounts like less than 2 litres.
That's the reason it won't start.....................I'm sure........ish.

One tip I can pass on for all would be restorers of MG's is use a site called BBS.
Its a web ring for MG car restorers and has the best ever Forum. Post any question, General or Technical and your guaranteed to get some sound and experienced advice.
This is the link >BBS Forum   You have to register ( its free and very easy with NO commercial spam/hassles.

Its them who assisted me with my spring conundrum ( yet to be resolved- replacement wise).
Apologies for the delay in getting to the point of the thread. You knew we'd get there in the end though didn't you ?

I have a spare day from Uni/Placement Friday. So, before the big match and work in the p.m I'll put on the new fuel pump, replace the oil cooler pipe with a new one, replace the oil gauge engine block connector, re tighten cylinder head bolt, renew fan belt, set tappet clearances and renew the old wrinkly engine bay fuel pipe, get some new fuel and have another go at starting her up in attempt to find if the alternators charging and the leaks have stopped.

To keep you Interested here's  pictures of new and old fuel pumps.

 p.s I also have yet to finish fitting the new copper brake pipes from rear to front and front to L & R.
So thats enough to keep me busy for a while.
More trials and tribulations soon.