Thursday, June 10, 2010

Faffing around with fuel

So, as the title says fuel and faffing around
Let me explain. I decided, after the confusion with the rear spring dampers to move on to something else.
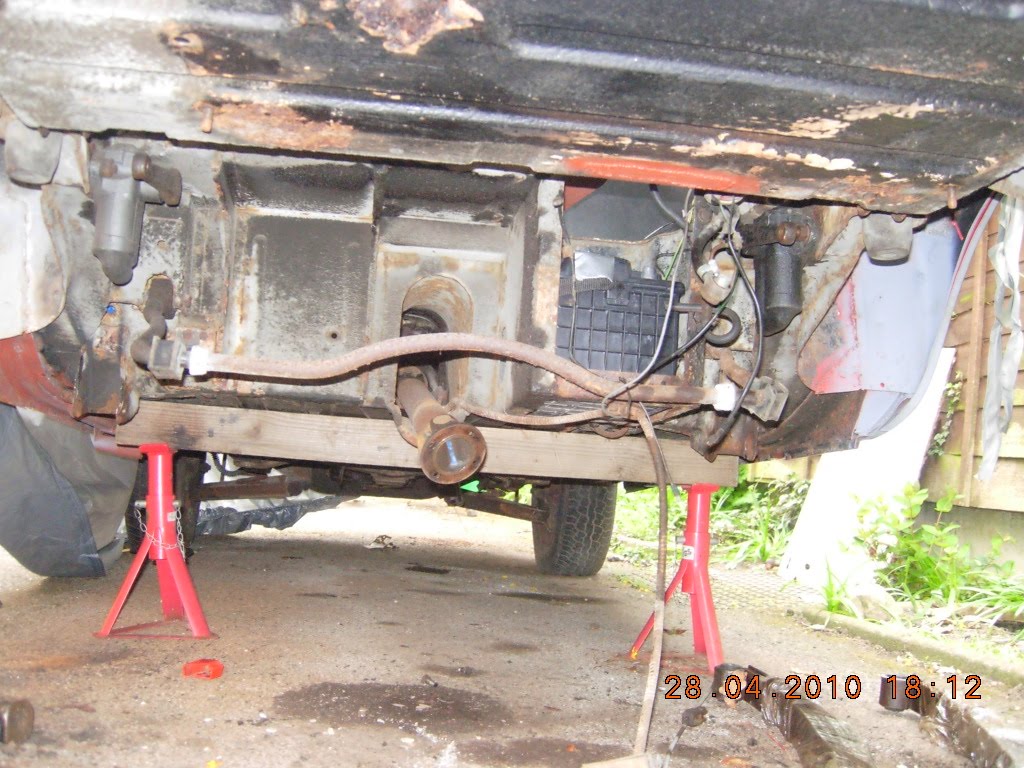
What I decided to do was fit the rear copper brake pipes. This I did without too much fuss and crossed threads. Only one and that was stupid. How I wish now I'd fitted them onto the axle whilst it was on the bench. The RH side was a swine to attach since now the axle and fuel tank/fuel pump and associated lines were also in position. Not until I got up in a fit of severe arm ache and frustration did I realise the 3 way union causing all the swearing was oh so easily accessible from the inside behind the battery hole. Doh !
              So what to do next ?? It was a nice sunny day, nothing else doing ( DIY etc, well lots really but I was trying to ignore it) so I decided to fire it up.
This time I would be well prepared. I needed two sets of jumpleads though. Mine don't reach from front of wifeys car to inside backseat of MG. Borrowed neighbours jumpleads then it went a little downhill.
I could'nt find my/our jumpleads. They've been in the MG for the best part of 5 years skulking in the rear wheelarch. A few months ago I had a clearout of the MG but where the hell did I put the leads ?
After about 45 mins they were found hiding at the bottom of the electrical parts way down on the bottom of a pile of stuff in the shed.
Next job get fuel. Easy peasy. 2 litres minimum.
Then..........make gravity feed fuel pipe from household plastic bottle.  Not as easy as it sounds. The day before me and wifey, as usual deposited all the plastic into the council recycle skips during our early morning grocery shopping............hmmmm.
Anyways, eventually found Gatorade bottle donated by son No 1 after some shouting and pleading round the house for  assistance in finding suitable receptacle. This was great as it even had the soft inside spout that sealed the old discarded rubber section of fuel line.
Connected up battery and jump leads. Found that my own leads did the job without having to borrow an extra set. Result No 1.
Filled makeshift funnel/Gatorade receptacle with fuel. Mopped up a few leaks and re-plumbed the few hoses responsible.
Started up wifeys car then got ready to turn the MG key..........................

HHHHrrrrrrrrrrrrrrrrrrrrrrrrrrrrrrrrrrrrrrrrrrrrhhhhhhhhhhhhhhhhhhhh
HHHHrrrrrrrrrrrrrrrrrrrrrrrrrrrrrrrrrrrrrrrrrrrrrrrrrrrrhhhhhhhhhh
HHHHrrrrrrrrrrrrrrrrrrrrrrrrrrrrrrrrrrrrrrrrrrrrrrrrrrrrrrrrrrrrrrrrrhh
HHrrrrrrrr.....rrrrrrrrrrrr...........rrrrrrrrrrrrr.......................rrrrrrrrrrrrrr
Hrrr..............rrr.........rrr........rrrrrrr...........rrrrrrrrrr..rrrrrrrrrrrrrrrrrrr.rrrrrrrrrrrrrrrrrrrrrrrr

.
.
.
.
.
.
.
.
.
.ROOOOOAAAAARRRRR!!!!!!!!!!!!!!!

Yes it actually fired up ( the above is the best way i can describe its initial reluctance to fire then its gradual ppfut/ppfutp/pfutfutfut)

I couldn't stop laughing. It sounded like the loudest thing on earth. ( Bear in mind no exhaust on )
It revved and revved and sounded like a WW1 tank.............Fantastic. Even the next door neighbour comment on it.
I was beaming ear to ear, all the family came out to see a grown man nearly crying with joy. It made my day/week/month/year/decade.

To be continued !


Saturday, May 08, 2010

Lets ave' em' !!

Comments please. Just to let me know someones reading and god forbid, enjoying.

Additional hints and tips would be nice too...................hard cash even better !

Thursday, May 06, 2010

spring lowering conundrum

Springs fitted and lowering block/bushes fitted without too many problems.

Except !

Fitting according to common wisdom saw the lower most plate which holds the bottom of the damper link arm far too low. That is the link arm was fully down and the lever arm damper was fully down. What alerted me was the fact that the top attachment of link arm was butting up to the anti roll bar.
See below


So as you see ( the RH side) the end of the drop link is miles away from the mounting hole and out of shot the lever arm it is attached to is fully  (almost) down.
So what to do ?
At this point I thought I'd been sent the wrong link arms, so a quick tinterweb surf showed that the CB links are shorter than the RB links. Puzzling ? You bet. I'd still got the original arms ( which had to be ground off ) and these looked like they would do the job a treat. That is, fit in the hole and keep the lever arm almost parallel with the floor and not foul the anti-roll bar.
So whats wrong then ?
I solved it this way.....................................see below


The plate that is normally on the very bottom of the stack of stuff was moved up on top of the spring.
It mounts good, locates well and does not foul on anything plus the lever arm is almost parallel.

Everything else is connected up except the handbrake/drum levers ( waiting for spilt pins to arrive, ditto brake lines/connectors)
I'll tell yer what though. Its definitely lower. It was a real scramble on my back fastening up all the other stuff.

I've now removed the wheels and got the car on the axle stands since this weekend I'll be fitting the brake pipes, fuel pump/hoses and fuel tank. That should see the rear end just about complete.

I've even been tinkering with leaving the front end suspension alone ( except for the fitting of a shorter pair of springs [ bought 18 months ago from E-Bay very locally])
If that's the case the time to start on the electrics..................ooooh errrr !!!!
Maybe I'll finish the odd jobs like door internals/seam sealing/ additional welding/ surface de-rusting/ tidying up shed/ polishing up chrome/ trial fitting chrome bumpers/ staring engine/ replacing engine oil pipe union ( again).

oh descisions descisions.


Wednesday, May 05, 2010

Is that a leaf spring in your eye 2.........No its on my head !

After a lot of huffing and puffing, cursing, sweating blood and almost tears I've had enough of the MG, well for a few days at least.
Getting the rear axle on was a struggle of mammoth proportions. But that's not all !
My wonderful son was enlisted to help move axle onto trolley jack. This took 15 minutes just to get him of his beloved X-box and outside. Then grumbled and whinged at the weight. Typical teenager, Hrrphh, ooohh, mmmmh, why, why. Wot yer want me for. Wifey shouts time for tea young son.............great.
Problem 1.
He was worse than useless.
How I wished in an ideal world he would show some real interest in my project instead of complete indifference.
So I managed ( with his help to get it as far as the back of the car ) before he departed.
That's when the struggled started.
Problem 2.
The axle would not sit nicely on the trolley jack. It kept sliding backwards/sideways/forward/off/down/up.
Then after a brainwave I fitted the rear wheels to aid with movement.
A Master stroke..
.
.
.
.
.Not !
It was easy to push/pull but the diff was heavy (very heavy) and wanted to stay flange down.
Moved TJ to support diff flange..................better.
I needed to align a mark on the diff flange with corresponding mark on flange of propshaft.
Problem  3.
Every time I moved wheels/axle forward/back the flange on diff turned away from said mark on propshaft.
Brainwave 2.
Get scissor jack from wifeys car to support diff flange.
Problem 4
The scissor jack don't slide with the diff.
Brainwave 3
Use TJ to support diff and take weight off wheels.
Problem 5
Where the **** are the diff nuts and bolts ( I'd  ground through 2 to get them off )
Eventually found and fitted without too much drama.
Moved on to fitting rear springs.
Done without too much drama.
Fit Poly bushes to rear mount and shackles.
Problem 6.
Very difficult. They kept popping out when the shackle went in.
Solved by fitting all bushes except one to shackle and ( after lots of puffing and swearing fitted it)
That was the LH side. The RH side was a different matter.
No matter what I did the poly bushes were not having any of it.
At this point I tried the same tactic as the LH side.
Still a struggle.
Finally, as I was flat on my back directly under the end of the spring hammering furiously to remove one bush.
BANG.
It dropped down on cracked me directly between the eyes.
To say It hurt a bit was an understatement !
So I rapidly packed the attempt in an went for my tea ( it was 8 p.m by this time)
A facial inspection saw a nice horizontal cut across the top of my nose, huge bruise where it initially impacted on my glabella ( lower forehead for non medical people) and a huge lump on my temple where it grazed on the way down.
So my head and face hurt a bit.
My ego is bruised since I could not wait for the brake pipes to arrive and the weekend, so I'd  done the normal Fufferfour trick and rushed it a bit instead of waiting for a more appropriate time ( the weekend).
Still, I've got a FULL set of brake pipes coming ( with flared ends and unions) + diff bolts/nuts+lost nut+ rubber gaiters for brake hubs.
I'm having some time off to concentrate on getting a better class of headache by studying for Uni..

Monday, May 03, 2010

All dresed up


OOOOOhh I say.

To be honest the picture doesn't do it justice. Its matt black and smooth as a babys bottom thanks to a few hours with the grinder/wire brush cup thingy.
Now for the exciting bit.....fitting it all.

Friday, April 30, 2010

where's the diff ?

A fit of yet another activity saw me grinding through two of the four bolts holding the back axle/diff to the prop shaft. And that was it, away it came, albeit very heavy and awkward to drag along the drive and onto the trusty B&D workmate. In fact I had to get son No1 to help heave it skywards. The brake pipes were a swine to remove despite at least 5 soakings with penetrating fluid.
Why is it that the MG is never symmetrically easy..........or difficult.......viz the same both sides.
The wings rusted differently each side. Two prop shaft bolt came undone easily, two had to be ground off, one sides brake pipe union came off with spanner, other didn't budge. One damper spanner ed off quick as a flash, the other took some real force. One rear side window base rusted as hell, the other OK. ???????????????????????????.

Look..............Spot the back axle


Its here  !!


So now I need some new copper brake pipes, the existing were marmalised during removal. Well they have been there 33 years and subject to all this fair Isles winters and summers. I'm havingg them as a birthday present !
The 3 way Brass union has cleaned up a treat and as we speak I'm fettling the axle with angle grinder/wire brush. Its then going to have the Matt black paint, so too is the fuel tank base then time for re-fitting. On second thoughts maybe I'll wire brush the roll bar and paint.
Just as I want to make progress I think/decide on more to do..........its gonna be a long summer, and painful too !

p.s the Matt black on the axle looks great...........I'll post photos soon.

Wednesday, April 28, 2010

Quick update

Well, I ordered said replacement bushes ( Cheap from MGB hive - £ 2.95 ish) new bump stop pedestal ( £4.95, galvanised, a real bargain) & replacement rubber brake hose. They came at 8.00 am the following morning.
So, pleased with that I legged it to Halfords and bought a can of matt black brush on enamel and PENETRATING OIL ( funnily enough the product is made by WD40 brand..ha....It smells loverly, not the metallic sickly smell I remember)
My big dilemma was Halfords prices. £9 for spray on Hammerite Matte Black, £6 for own brand matte black spray, £ 7 for brush on hammerite and £4.75 own make. In a fit of economy I bought the cheapest, feeling guilty over my recent spending spree.
I've used it and am mildly disappointed. I should have bought the gloss. The parts look ok matt, but can't help thinking they would look much better gloss and be easier to clean in the future.
            The big plus point is I've fitted the bushes into the spring fronts.
It was easy peasy. This was the part I was dreading. I have no garage/workshop, few tools and am apt to rushing things. However, with the use of the trusty B&D workmate, oversize socket and lump hammer they went in easy.Well a few ( lots) of well aimed blows in they crept, seated and positioned correctly.
            Now it seems a shame to leave the axle and brake pipes all crusty with crud. Its not easy to get down & under to attack them in situ as well as the body underside.
So, I decided to remove the axle complete, wire brush with grinder then paint before fitting the fuel tank. Then replace the rear copper brake line.
In order to do this I have to disconnect the prop-shaft at the diff.
PROBLEM. 1/. The bolts have very short heads and the nuts don't allow to get a socket on them.
I've doused them liberally several times with penetrating oil.
PROBLEM 2/. the RH brake line came undone from the hub easy, the LH wont budge. The main problem is the fear of rounding out the flats on brake nut and diff nuts. Its only possible to get a tiny thin 1/2" spanner on them and that just spins.
So its a waiting game hoping the penetrating fluid does its stuff.

Hopefully the next post will see it all fitted and looking superdooper new like.

Saturday, April 24, 2010

Onward and Inward or its spring time, literally !

Oh the joys of MG ownership.

After a long bout of thriftiness, I manage to save some money towards the rear suspension, So, from three different places I bought :-  set of Polybushes for rear spring shackles, lowering kit "u" bolts and spacers with attendant polybush covers, pair of chrome bumper shorter link arms and shorter rebound straps. That was a month or two ago. But being too cold to work outside, I decided to wait till the weather improved. I did have a half hearted attempt at removing the rear axle and springs. It was easy................ish. The "U" bolts nuts came away OK, so did the bottom end of the rear spring. The handbrake cable was a complete enigma on how to detatch. The rubber brake pipe mounted  from the battery box union bracket to the 3 way union on the axle would not budge, either end, so I left it be. The axle is supported on a trolley jack and the car on a stout timber 4x4 with 2 axle stands. Sounds a bit illogical but that's the way it is. The front end of the rear leaf spring would not budge, either side. Neither would one link arm come away from the Armstrong damper. After one mistake viz spraying liberally with WD40, they still would not budge. TECHNICAL NOTE . WD40 is not a releasing fluid, it a water dispersant. So if you need to "soak" nuts and bolts etc use PENETRATING FLUID, like Duck oil or whatever. Thanks to Octarine Engine services for pointing that out.

So, that's what it looked like for both sides.


The RH side was probably the most difficult as the battery  box and wires all impeded a good heavy swing of the trusty claw hammer. After more ( incorrect ) dousing of WD40 they ( LH & RH front spring bolts, RH drop link) still would not budge. Obvious.......................bigger hammer.
Off to brother in laws for lump/club hammer. Still no joy and still more dousing with WD40.
By this time better weather was upon us so I was going to devote a whole weekend to the jobs to do.
Besides I was itching to get the new stuff on.
Come the weekend the first job was to locate the live feed wire to the fuel pump and the earth. Their are four wires, all dirty black-ish plus a couple of dangley earth wires. I did many years ago label the wires but the elements worked their magic to make them useless. Still I'm a clever git sometimes and I've even got a multimeter ( £2.99 from Wilko's- only the best for me...hehe) and wiring diagram, so I should be able to work out the wire feed & earth. No.No.No. Even with battery connected there was no current flowing with the ignition turned on. Now here is the start of another story not yet told.....................the car immobiliser, fitted circa 1978-ish with sh** loads of red wires under the LH dash + secret on/off switch under RH dash. Methinks these have an effect on the current flowing but I'm not that much of a clever git to understand that load of spaghetti.
So we'll leave that for when I attempt the electrics proper.
For now all I wanted to know is which wire and does the fuel pump work ? I settled for the does the pump work ?
Simple answer..........................No. Rats rats and more rats. Even the recommended tap on the side didn't do the trick. I left it a day to re-think.  Moved on to more nut bashing with the lump hammer. Still no joy. The LH spring mounting bracket had taken a few hits and was beginning to bend inwards. Time for some more thinking and formulating.
BBS webring and MG forum gave the answers. Loads of em. varying from use a "sawzall" ( From the U.S bless em, they mean a reciprocating linear saw blade, i.e jigsaw or power blade ) to cut the bolt heads off, to drill through the bolt ends each side. I opted for Octarines method. Use a thin grinding disc and grind up between the spring and bracket through the bolt each side. It worked a treat. Marmalised the end of the spring a little but ,hey its off and usable.

here's proof................and them bloomin bee's are back.


The spring has had a good clean up with the wire thingy in the angle grinder. Looks almost new. Gave it a liberal soaking in thin oil and cling film wrapped it till I'm ready for the next bit.
As of yet I've not tackled the other spring removal. This is only because today ( Saturday) I forgot to buy a new thin grinding disc and I'm working most of the weekend in the pub. I chilled out and caught some rays in the garden. Uni has been manic, with a 6 week placement just ended, one exam the first week,1st day back. Essay to do + another exam + Dissertation proposal hand in.
What I did do a few weeks back is :-


All the parts holding the axle were wire brushed clean using the angle grinder then primered ready for a nice coat of black paint. Top shows the spring and tools I used for the rubber bush removal. Its a composite bush inside the end. As you can see I had to destroy it to get it out. I think destroy is a little understatement. It was rusted solid and no way was it going to shift. Even if I had a press of 100 tonnes, i doubted it would have moved. The Bush is a thin outer of tough steel, a thick rubber inner then another thin steel  inner. The offending bolt that would not come out was stuck to this surface. Its the rubber that causes all the problems. It does its job and resists and dampens any forces applied. I drilled several holes through the ruber and chisseled down the outer shell pushing it inwards as I went on. I bet the fitting of a new one will be even tougher. Which reminds me. I don't have a replacement. Thats why I'm working all weekend, I will need two, plus bolts/nuts and the rubber bump-stop pedestal. Mine disintegrated when the original "U" bolts came off. Anyways. Up until yeaterday I was also convinced I needed a new fuel pump. I tried several times time connect it and make it work.Stripped it down, cleaned it and the contacts, but to no avail. Not even a murmur. So, I checked You-Tube, John Twist of University motors again. These are wonderful clips from an MG man through and through. The clips show all the tricky probs and remedies for loads of mg makes. Tiz a pity its no longer in business.
This time I cleaned the testing wires thoroughly and the battery terminals. Rechecked and cleaned the points with emery and Bingo........................buzzzzbuzzzzzzbuzzzzzz. It now works a treat. So, since I have a day off from Uni Monday I'm ordering said parts + paint and next weekend will see me remove rear spring, clean it up, paint parts black, remove some ( lots) crud from axle, fit RH armstrong damper ( thats how I removed RH lever arm - with damper in situ and attacked on the bench- easy peasy) fit fuel tank and hopefully Sunday fit spring and new parts. If I can re-fit new front bushes. This is going to be a drama, I can feel it already !
Just to prove the car and project is politically correct and in line with all green issues I'm recycling as much of the car as possible. I've used the old doorskin for most of the patch panels on the rear and will be using it again for the door slider bracket. These have rusted badly and needed removal when I replaced the doorskins. I kept one to use as a template. They are handed too, so I made a paper template. 
Look !                                                                                                                                                                

More soon folks !


Monday, January 11, 2010

Let It Snow, eh ! .........yer want more ?

So we did have a white christmas after all. I can't honestly remember when the last one was but probably over 25 years ago. Well properly anyway. Most of the snow in the last decade has been of the very wet slushy type gone after a tiny rainfall. It still manages to disrupt things thought on almost biblical proportions. Why in the UK are we so unprepared for snow in winter, heatwaves-ish in summer, rain in autumn and insects in spring ?

         Enough winges. Christmas was good (In an overindulging kind of way ) but bad for the MG. It must feel unloved and neglected, abandoned and cold over the last few months. All I've done is repair the vynyl cover and make the rear window a mesh of duck tape. After a particularly rainy, nay torrent of a downpours for a few days I noticed the rain had collected to such an extent the cover had sagged right into the spare wheel area holding about 30 gallons of water. Some expert juggling and inexperienced manipulation saw only a little spilled inside. It did happen again but not on such a grand scale so thats when I hit on the idea of how to support the cover over the gentle slope of the rear window. It may look like the base of a well upholstered seat base but its doing its job under all that snow. I do hope my worse fears of a radiator leak is not apparent after all the freezing temperatures. Its funny how you get good intentions ( I thought of this mid repair to the rear window duck tape episode) "don't forget to empty the coolant before it gets too cold". Did I ?. well you should know the answer to that by now ( NO)
Hopefully I'll be lucky ( Never) or just completely forget come spring. 
      Any further musings car related have been regarding the colour. I think its going to be an off shade of white......................maybe. I just scared rust bubbles will show through after the expensive respray. Some slight (very slight at last look) surface rust is showing on gutter seams over the primer. Gawd knows what its like come warmer weather.  Uni/work keeps me from other thoughts, and of course the wife and kids are high maintenance at this time of year. I'll keep checking the lottery though .

Monday, December 21, 2009

I'm still here...........honest !

So as the title says I'm as committed as ever to get the MG done, its just that I aint had the cash or fortitude to work in wind, snow & Ice out on the drive lately.
The last job I did was to partially remove the rear springs. The Axles free, that was easy peasy. The rear spring mountings were easy too. The front mountings won't budge. Despite several soakings during the Autumn in petetrating fluid the bolt will not knock out. Neither will one drop link too ??.
Fairly easy to solve though......................borrow a bigger hammer ( from B in L )
 So thats how the car has stayed for the last couple of months. Under its shiney silver Argos cover.  Actuallythe cover is not so good as I first thought. During some very windy days it ripped along its supposedly "welded" seams. Easily cured with a stapler and duck tape. Methinks the recent snow will preclude some more duck tape though.
Work/Placement and Uni has taken most of my time the last couple of months, that and dreaming of money.
I have worked a little, as student ambassador on open days and after christmas as barman in my local Saturday nights.
Uni is getting very intense with the following months requiring three essays and a poster plus another 12 weeks of Placement.
Roll on Summer.........................and I aint even started on the Christmas food and drink yet !

Sunday, September 27, 2009

What to do next............its not that tricky

( Me being attacked by a swarm of angry bee's...... for having dirty hands ?)
Yes, exactly what to do next ?.
Last post saw me having undone the rear half of the spring, undone the axle "u bolts" and one damper drop link.
Thats exatly how the situation is now, only worse.
So how can it be worse if I've not done anything ?
The situation at Uni is :-
1st week, all week, very fast paced and lots to imbibe and inwardly digest.
2nd week, easier but the real enormity of 1st week hits home with and essay to finish by end of the month.
3/. Knowing this would happen at Uni since the drop of the axle/springs, I looked up the parts and cost involved to get the back end sorted.
It went something like this :-
Plan 1/.
a/. All new bushes at the back, deffo. Poly bushes and Blue "fast road use".
b/. New "lowered" pair of leaf springs. ( to suit chrome bumper model ride height, mine was a rubber bumper model to be lowered )
c/. New Chrome bumper shorter drop link ( pair of )
d/. Spax suspension would be nice ( so would a pair of parabolic springs too) but they are all out of the question, money wise.
e/. new bumpstops top & bottom.
f/. new rebound straps.
g/. Lowering kit from MGOC
Reality after a few searches ont tinterweb..................way too expensive !!!!.
I'm not sure if the spring price was per pair or each, either way £80 is a lot.
It all came to ....................wait for it ............. £ 330 approx.

So plan 2/.
a/. as 1/.
b/. Second hand springs.....................price dunno yet
c/. Second hand drop links.................£ 5.oo each
d/. Forget............too expensive
e/. as 1/.
f/. as 1/.
g/. Is it really needed ?, some stuff can be re-used or I already have it above.
Reality.......................Still too expensive. Its just over budget.
By the way at this point it would be good to mention what my budget is - see below


NOTHING !!!
yes, thats right. I've got bugger all.
So in light of this and my new found wisdom a re-think was done. The reality is this.
a/. Poly bushes @ £ 37.00 set ( rear only) OR Std stock rubber ones ( Noooooooooooo!!)
b/. Refurb the springs ( they have sagged anyway, shorter drop links will tell)
c/. Second hand drop links £ 10.00 total
d/. Second hand rebound strap.........price......dunnoo ( but less than £10.00 total )
e/. - g/. forget.
So I might as well be planning a total new re-shell since thats about as realistic as the above when you aint got no cash.
So thats why the post is called " What to do next ". Its definitely not tricky. The answer is Nothing.
Uni will keep me busy for the next 3 weeks anyway with the dreaded assignment essay. After that the weather will turn and maybe a little too cold but much more likely too wet.
I'm determined though that its not going to be one of the dreaded "Unfinished projects" for sale.
I might have to think of ways to improve the lot of Lostsock and family, after the essy though.
More soon.


Monday, September 21, 2009

Is that an axle in your eye ? No its a leaf spring actually.

What a strange title. Let me explain. You knew I would anyway.


Many years ago, when I had money, time and a restless nature I had a desire to fulfill a long lost dream. That was to restore an old car. So I looked on good old e-bay and bought an old banger from 1977, well in need of renovation and with a good supply of parts suppliers and knowledge base available. So In good old Lostsock fashion I decided to document its renovation.
That's what started me on the blog thing. Rather than take loads of photos, why not make a narrative text as well to assist others and maybe solicit some help for myself.
I did and the oddities of the chosen Blog supplier prevented me from linking both of my blogs each way.
Now the real reason for the post and a little light reflection and observation on our good old health system.
During the last few weeks prior to Uni starting I've done some work on the car. Its sort of well on the way to being finished after years of body work repair. Next job on the list was replace rear springs and bushes, clean up and paint with whatever ( Underseal, Red lead, etc)


This involved me with some time flat on my back......careful.... working spanners and hammers on nuts that have not been touched for 33 years. So, 33 years worth rust fell onto my drive during said operation, only taking a detour into my Right eye. For some months my Left eye has been odd in the morning ( Deduced by wifey to be the same cause). Insomuch as sticky eyelids and a general soreness. So after said weekend and the start of Uni saw Lostsock not his usual chirpy self. Plagued by a dull headache behind the eyes and head.
So, Monday morning saw me attend the Docs at 8 am sharp. Not to see a doctor. Simply to stand in line when the surgery opens so I could book an appointment as soon as.

Its pointless trying to telephone as it rings for ages once you get the answerphone message and options. Then appointments are for in at least 1 months time. Well not really but generally far enough away to stop people with trivial illnesses wanting to attend.
I was 4th in line at the reception desk. The desk is manned by the Practice Manager. Not a woman who would win any charm contests. So I heard all the 3 previous peoples illnesses since the PM had to ascertain to whom to send them ( Nurse, Doctor or Room for arguments) , their age and date of birth and their address.
So What happened to patient confidentiality then ?................
Is the P.M medically trained ?....................methinks not ( Hope the Practice is Insured )

It didn't help when the guy in front of me insisted he needed his blood testing because his wife is Ill ???????????? and they didn't do it at the hospital last night because he'd he fainted. Is this a breach of confidentiality ?. There's been lots posted on various sites regarding this topic and say, Facebook. A certain Government ministers wife revealed some potentially sensitive details... allegedly. Some excellent medical related sites have even closed down voluntarily for fear of the dreaded Confidentiality police. Hope they don't come knocking for me...............errrrrrrrhemmmm.

But seriously, should we have to do this ?. I fully understand why the Practice Manager is a sourpuss ( The general Public...) but it should still not be allowed for the jaded, impatient and almost rude to be people facing. Neither should Non medically trained staff be making clinical decisions. Don't you agree ?. Could we do it as radiographers , i.e I.D patients in the waiting area. No. Tell them they have a nasty break ?. No. I am full of praise for all aspects of our wonderful NHS. It is still the envy of the world, has some great people and services. It is Europe's biggest employer and thereby is its problem. Its very difficult to employ 100% perfect and professional people. Unfortunately its the minority that stick in peoples minds. I for one am determined not to be a whingeing employee. Its depressing anyway listening to some people whingeing to others.

I have Conjunctivitis by the way so my vision today is a little cloudy................heeee heee. That's because there's been most of a 1977 British Leyland axle and leaf spring in it the last few months ( Nay years).