Thursday, July 20, 2017

Update

I'm still at it..................I think.

Money is tight, the sun is high and work long.

Struggling to keep up the enthusiasm without cash.........the kids need new shoes......blah blah.

Seriously, having money issues with life in gereral but thought I'd post just to let you all know I'm still here, the MG's still under tarps on the drive and still in my dreams.

Promise I'll post soon.........now I know my google account and password !
This is what the wind did in early January 2017 to the Tarps !!!!

Monday, October 03, 2016

3 strikes and your out ! not quite.

Another odd title.

Its because that's how many colours I've tried on the engine bay. Bear in mind the engine bay should be the same colour as the rest of the car.
So, in theory I had to make this monumental  decision  NOW ! as I was keen to get all the stuff I'd taken off, back on before I either lost the parts or forgot from where or both. The Inner engine bay sits in a nice shade of fresh grey primer. The pedal box, Vacuum cover, coil, expansion tank, heater and various brackets, nuts , screws and bolts have all been cleaned and are looking great in Black gloss  (Halfords).


Thing of beauty, Brass Expansion tank. Seems a pity to cover it but needs must. Came up excellent after 2 coats of black gloss and probably the best looking thing so far. The cap looked good in Plasti-cote Silver too.


Above was the Vacuum cover before cleaning with wire cup in drill for 20 mins 


After 2 primer coats and 2 Black coats


Same treatment for heater  too. ( Note it looked this good 4 years ago when I first did it )

So now the real gripe of late and cryptic answer of title thread.
                  The colour took three attempts at a costly £8.00 per can to decide, and I'm still not convinced but went ahead anyway.
First Attempt was Plasti-cote Brushed Aluminium Silver. Lovely coverage but oh so very silver and reflective. It also showed any flaws in the bodywork ( several small patch welds by P.O ) like a poke to the eyeball. Was very surprised how metallic it was, but not a good look for under the engine bay.

Next attempt was Peugeot Iron Grey Metallic. This I thought would be very close to the body Colour I envisaged. WRONG ! Very WRONG. It was almost Iridescent bluey/green. I don't have photos as I'm too embarrassed. Besides, money was low and I needed to crack on.

My Third and final option was the Halfords Gloss Black. I bought this at the time of the Iron Grey so I could re-coat some bolts and brackets etc. But in it went to coat the bay, quickly, the original colour I bought it with...doh

Below is the engine bay in 1 & 2 wire wool'ed and cleaned then 3 & 4  just Grey primered


How I wish I'd left it in grey primer, it looked good. But the deed was done and there was not a lot of time left in Lostsocks weekend.

An early start saw the heater go back in without drama. Pedal box too, although some BSF bolts seemed to strip partially or at least grab gingerly. The vertical bolts on the outside were a swine for me with my fat-ish mitts.

This is where I hit the frustrating and typical Leyland enigma !

The coil bracket (2 fasteners), Pedal box (7 Fasteners) Fuse box (2 fasteners) electronic Ignition (2 fasteners) earth screw ( 1 fastener)  2 relays ( 2 DIFFERENT fasteners) and overflow tank brackets ( 2 Fasteners)

WERE ALL DIFFERENT SIZED BOLTS/SCREWS !!!!

So In an act of complete rebellion and a vote against BREXIT I used M5 bolts, nuts and washers for the fuse box, relays, earth screw and Ignition box !!
It looks good, has a shiny chrome Phillips heads in the bay and M5 nuts in wheel arch but who cares !

I must admit it was very frustrating when undoing them, as if rusty , old, gnarled heads were not enough to deal with a different method was required. In truth most needed mole grips as the phillips heads were well rounded or slotted heads gnarled.

So this is how I left it. Look at that expansion tank and cap gleam.  Still needs more work after spending hours cleaning the mess of wiring with WD40 and brillo pad thing. It shines. Just ordered some new black wiring tape from Frost Auto, so when that's done I may actually start the engine before winter, I may not, who knows. Here's praying for a mild winter or money and a garage/shed

Keeeeeep restoring !!


Friday, September 09, 2016

Just a little bit more

The recovery from my three nightshifts and fair weather saw me set too with some more restoration.

I managed to get the pedal box and Vacuum cover back on easily enough with wifeys help ( I only swore once) and all the bushes, washers, split pin and screws back where they belong plus the Brake pedal.
I left the Clutch pedal since this has to be done from under the car as both pedals won't fit through the nasty hole in the engine bay as well as many wires and pipes have to be "persuaded" to move even with just the Brake pedal attached. It has to be done this way as access to the brake pedal bush, screw and mechanism are impossible to attach solely from the top access of the pedal box.

Then the bit I was dreading, cleaning the engine bay.

These are these slightly after shots, as I think its going to take a lot of effort over the coming months.
I put these on as inspiration, comparison and achievement for when its complete. Hopefully !!

The four below are general shots of the current state, alas with no garage to work in its a case of two steps forward four back.


This shows the pedal box hole after setting too with white spirit, scraper/screwdriver & wire wool.
Look at the shine of the LH wiring loom. Good Ole WD40. Bet its back to cruddy next time I look though.

I think I may remove the heater box too and re-paint it the Peugeot black I used on the vacuum cover. I did it some years ago in "Pound shop Gloss black" but it looks weather beaten and dull now, besides the heater core is leaking so that's another for the list to buy, at some point !.


The big question is though What colour do I paint the engine bay ?

For those of you who can't be arsed to read from 10 years ( yes 10 years !) of restoration the car was originally White ( which White though, for a  77 model ?)   but had a thorough re-spray early on in its life to Black. Its now mostly several shades of primer grey. Wifey wants "Old English White". I'm afraid this will show up any imperfections, poor filler repairs ( with rust surfacing) and crap shut lines.

I'm thinking a slate metallic grey, very similar to my current Renault, which I think will look good against the Black sunroof and chrome finishings. Let me know what you think........please. The comments appear to have stopped.

Tuesday, August 30, 2016

Well. I've been at it again. Today was my last day of bank holiday fun and spent most of it with Wifey at Carsington water and Bakewell.

Later on I set to with new workstand ( £10 Lidl...bargain !, the B&D one only lasted 18 years) electric drill, wire brush cup, curved hand wire brush and white spirit plus my old fave..autosol grey primer ( £1...poundshop) I'm often seen carting five of these round town Saturday mornings.
Here it is after its first light coat.


 I then set too cleaning the pedal box and cover. The pedal box was too complex and internally greasy to do too much with so after a clean on the outside I gave it a light dusting of Peugeot black gloss left over from the previous chariot.


The thing didn't half look bad to say its not really visible. The diaphram looks brand new  and a quick wire brush on the back half of the vacuum cover and all was good to go.

So the I gave the main cover a couple of coats of gloss black. It looks bloody marvellous and brand new. the pedal box cover too gave the same result as did the 8 screws holding it on.


Overall for very little effort, paint and time the results are not in proportion. See the previous post for the state of the cover before I removed it. I've still to try to assemble the cover back on yet with its giant conical spring but a least today has given me renewed optimism.

What to do about the big hole and area where its come from though. It looks very fiddly to try and look reasonable. What colour should I paint it ? Will all the pedals, bushings and pipes all go back together ?
That's for next time, anyway back to irradiating the ill and accident prone folks of the east midlands for the next five days including 3 night shifts...ho hum !

Monday, August 29, 2016

Still at it

Bank holiday weekend saw me at it again.

I've managed to finish welding a fillet to the RH side light aperture ( did the LH one some months ago) filled and sanded to look acceptable. The holes cut out during the moving from Rubber bumper back to chrome don't look pretty but at least they won't be seen. Likewise with the fillets welded in but at least they give the lower valance below the sidelights some strength. I'm amazed the welding works at all as the cheap 2nd hand MIG welder is on its last legs.

Today I removed the brake servo and pedal box. A bit of a faff reaching the bolts below and behind the pedals but done easily enough. The reason I removed it was the servo looked "Orrible", all rusty and decrepit with surrounding area of paint ( black  & white) bubbling from what I presume is spilt brake fluid on my many attempts to replace the brake master seals. Well I broke the master cylinder last year so I though might as well go the whole hog.

Not a pretty sight is it. The hole it left is just as bad.
 So my plan is to wire brush ( in drill) the servo cover. It was much easier to remove than I expected with a gentle tap with chisel and hammer after bending some of the wavy crimps  back.
The cover shot of with a mighty ping as did the huge spiral servo spring. One good thing is the diaphragm is in good shape. In fact all the internals of it are, so methinks there was just probably a leak with the servo hose connection, if at all.
           I think I'll make the servo all black and try to polish the clutch reservoir too, as when I eventually buy a new master brake cylinder I don't want it to look too out of place.
What to do about the hole though ? and the pedal box ? They will go black also. The surrounding area is going to be a nightmare with all the wiring and bubbly paint. Where do I start this ?

I'm determined to get at least these jobs done and brake cyl fitted this /next month as I feel I'm still taking things apart when I should be putting things back on. Wish me luck folks.

Thursday, May 26, 2016

I'll never make a body man

Yet more sanding and wet/drying the front ST spoiler.
Had a good couple of hours with 240 grit emery and trusty half milk carton of warm soapy water. Got it smooth as silk everywhere............or so I thought.

With my trusty £1 rattle cans of pound-land grey primer, I gave it a nice even coating. On viewing it after and even during I could see the glaring areas I'd not smoothed and flatted enough.
However, after a couple of hours I circled all the areas needing more effort. Approx 15 of them varying in size from a thumbnail to a whole thumb. So I set to work flatting again and did about five of them till the next one would not feather out, it just came off in tiny wet fragments. Obviously not dry enough yet then !. Never mind, the finish is good and compared to how it looked last week a major improvement.

Peeped at the spark plugs. All show signs of last run last summer of it being too rich. I knew that anyway. Also removed the alternator to check all the pulleys and the cause of the alarming rattle/squeak last start up. Water pump pulley seems fine, water pump is newly fitted (3 years ago! ) this also was the source of a major noise, on investigation the bearing and impelor was well and truly shot, hence the replacement. Can't be this again surely?. Alternator bearings good and free with no wobble and crankshaft pulley seems ok ( hand turned when plugs were out )

So just have to wait till I run her again. Looking at the engine bay depressed me. A bit oily, a bit rusty, a bit red leady and a bit dirty. I'm determined to get it all running fine before I attempt to renovate this area first though.

After spending a small fortune having bathroom totally renovated its time to paint. I'm gonna have to do it as wifey tends to lallop it on a bit and is a liability anymore than 1/2" above solid ground.

Its going well though and enthusiasm is returning slowly.

A view of last years spoiler before I ruined it by applying primer by brush....looks good dunit !

Sunday, May 22, 2016

And yet another list of to-do's

Alzheimer's must be setting in. I just realised I've repeated most thing in the last two posts.
So here is the definitive list I made this morning on the status so far, in no particular order.

1/.   Replace both rear tyres.
               It would appear these have only lasted 15 years plus and can no longer hold air. What I did with the front cost me a tenner ( £10 =$ 14.5) having a local company fit 2 good but bald-ish scrappers. Albeit they are low profile, but sealed up to the hilt and with new valves. Next day off will see me visit said establishment for a repeat ( but not low profile though)

Sadly I see no point in buying real tyres yet.

2/.    Buy and fit new brake servo. Had the money for it last year but frittered it away on god knows what. Commonsense say to replace rubber hoses to front too, and free of the cylinders. I replaced the caliper pistons, seals and discs ( rotors ) a few years back so I must add more effort to make them work and appear new again.

3/.   Weld/repair lower valance. I converted from RB to CB and the new holes for the side lights/indicators looks a bit dogs dinnerish with little support below.  I have to find the Jigsaw first, no mean feat as I've not yet done this years clean up of the shed and outhouse.

4/.   Yet more expense. The small heater radiator is leaking. I'm not letting this bother me yet as I'll bypass it with some jiggery pokery of hoses and it won't affect the running of the car. ( Thats if it will run after this years lay up)

5/. Buy and fit Indicator stalk mechanism. Nuf said, broken through sheer stupidity and Lostsock logic.

7/.   Re-set tappetts. Sounded very noisy when last run, or was it timing chain rattle ?

See what you think

8/. Check oil/water levels......... !!

9/.   Check dash bulbs and replace.......fit dash.........re-paint in crinkle finish ?   naah, its good to go and has only a little patina of  " old car"

10/.   Re-cover dash top panel. Not as easy as it sounds. Need hardboard, foam and jigsaw !!!

11/.   buy front bumper fitting chrome screws. A little vainglorious but hopefully it will at least look like being finished............from the front....low down, anyway.

12/.Clean engine bay..........big job and difficult with engine and all ancillaries there   !

13/.   find/acquire starter motor bolt.........for some reason the top bolt is different from the bottom and I can't find it..............or remember weather its the top or bottom I need.

14/. Sand spoiler. Well documented in previous posts. Did 3/4 of it today. Sanded off most of the ...nay all of the real primer that reacted. Even managed a quick tickle with rattle can of primer. Wish I had not. Shows up all the flaws in "too course sanding". Mostly wet an drying this today but getting there.

More next week folks.

Tuesday, May 17, 2016

Wot a faff

So, the saga still continues.

Sorry I've not posted of late. The trouble is good ole Google. I have over the years got several google accounts + the kids accounts set up on this laptop. And that's where the trouble starts, trying to log on now its all controlled by Google.

Anyways, I've written down the log on Name and password and linked it to my iphone, so, hopefully some posts on my progress with images directly from my phone. I did say hopefully, as I always have trouble with the youngster specific apps like itunes and Google+.

To fill you in regarding the MG. Nothing has happened since the last post last year.  I've still not purchased the master brake cylinder yet, but since it was birth month I may have enough cash to buy and fit.

The nice weather this week has seen me cut and strim lawn, replace 6' x 8' trellis panel after hammering in 2 fence posts, blow away leaves from autumn, paint said trellis and archway + shed front. I had only one day for MG stuff and that was spent removing all the tools and stuff, cleaning, oiling and re-organising as they suffered a major ingress of water this year due to a leaking outer cover.

Next job up is to get 2 tyres ( scrap ones) from local friendly tyre fitting company so I can at least roll the MG fore and aft to sweep the drive. Then fit master cylinder and maybe just may be run her up/down our little cul-de-sac. Todays fact..........the word Cul-de-sac is not recognised as a word or entity in French.


p.s The spoiler looks nothing like this now. In my wisdom I coated it in "proper" primer. Its reacted and needs sanding off again.....ho...hum !

More soon folks !


Monday, June 15, 2015

Now the difficult bit/s........Electrics !!

So faithful fans,  I'm still at it albeit slowly due to lethargy, work and lack of finances.
I last left the car with the new ST spoiler loosely fitted and the Bumper bracket attached. The Brake master cylinder has been removed during the last attempt at seal replacement as it broke on the end so a new one is needed. I've had the cash for the replacement for some time but not the inclination to fit it.

The enormity of whats left to do has been nagging away at me for some time and often thought of packing it all in, especially since my daily hack the Peugeot 207 has developed an annoying limp home issue.

So today with 3 days off and a nice sunny day I set to to looking at the dash re-fitting and vynyl top re-glueing + crash pad. Bad move !!

The good news is I have finally removed the steering wheel after 2 years of trying. Damaged the nut and thread on column though, fortunately not much.

The bad news is that I've buggered the RH indicator mechanism, lost some small but vital parts and snapper one important part ( also tiny and un-fixable). That's another £30 part needed !!!
When will I ever learn the old motto.... " If it aint broke don't fix it !!"
I had a loose purple wire bullet connector (Male) adrift from somewhere on the underside of the stalk mechanism and needed the wheel off and said mechanism. As  I've said I've now done both but  could not resist taking the RH unit apart to see where/how/ why the female bullet connector was to affect a repair.
Hey Ho....another one for the experience bank.

I shall be extremely careful whit the electrics from now on.
I know from all those years back that at least 3 rocker switches disintegrated on removal, the heater pipes were impossible to undo and the dash a complete enigma to free one dark and snowy winter.

So maybe tomorrow I will investigate the dash bulbs and source some wrinkle finish paint to aid the enthusiasm drought. Wish me luck.


Tuesday, March 10, 2015

Not long Now ?

Just a quick post to let you know I'm not dead and still at the MG stuff.

Its taken me all of 2 hours to get onto the blog to put this post on, gawd I must be getting old.

I'm about to clear out the shed at the bottom of the garden soon and this means only one thing, its summertime....almost !

Since starting as a Radiographer proper a couple of years ago and on the "Rota" it leaves very little time to dedicate to my loved one, let alone having the cash.

However to get up to speed I'll tell you the following since the last post.

1/. Not much

2/. Ma in Laws 80th birthday soon, that means its been 10 years since I bought it and thought I better get it finished !

3/. The weather has been rubbish during winter so the first jobs will be cleaning off any rust and puddles accrued.

The engine runs, albeit a bit "tappetty", allthough I set the clearances I think its the timing chain/tensioner making the noise. Find the vid and have a listen, let me know your views.

The spoiler is fitted 80%, needs a full set of the correct screws and nuts and attention to the sidelight holes. During removal of the original valance half of the screws sheared , some came out OK some needed the nut behind grinding off.

So, I'm considering an engine bay tidy up, bodge fix on the heater radiator core and buying a new Master brake cylinder. The old one's been on and off so often to mess with the seals that I damaged the cast iron body whacking it against a wooden batten then in frustration a housebrick !

After they are sorted I'll fit the dash ( I'm sure there will be several posts regarding this subject) fit the window and seal mechanisms and maybe front and rear screens. Thats enogh to chew on for now. I'll post more when I actually do something, If good old blogger/google plus lets me back on !


Sunday, May 11, 2014

Typical.............!

As last posted re "Perfect Storm", this weekend has seen everything in place except the weather.
      Work has been tough ( and continues to be so for the foreseeable future...good ole NHS) with many off hours shifts and weekends.
However I'm about to start a 6 week period with all weekends off except for one Sunday...whoopee.

So my old friend the weather plays its fickle part yet again. Dull and rainy on and off, windy and changeable.
At least its also halted the DIY too.

 I've just replaced the 90 foot x 6 foot Ivy encrusted fence panels down the side of my property and had a hell of a job too. Most of the panels have been " de-Ivied...?" and a neighbour has had about half of them for his steam engine. I have the last 3 thickly ivy encrusted to dispose of and several panels reduced in size ( i.e smashed to smithereens or fell apart when ivy removed).

The lawn needs a good mechanised rake and I'm sadly behind on the seasonal Easter shed clean-out.
The clean-out is one job I enjoy. It involves emptying the outhouse in conservatory to get out outside the six patio chairs. Then a thorough clean and throw out of (mostly Wifeys) stuff.

Then same to shed. This is where most of my MG stuff is located, most of the internal parts and chrome stuff. Since I'm at that point of putting things back on I'm even more frustrated that its not yet happened due to several factors. Mostly Wifey going full tilt for her finals at Art Uni ( She's responsible for 99% of the "Stuff" in and around the house...her excuse being  its needed for my degree...!)

That's about it in a nutshell. Except I've finally got round to looking at the Blogger settings as to why no comments or listing rating has dropped me like a stone this last 2 years.

So come on....drop me a line, I need cheering up !

Sunday, May 04, 2014

Its been too long !!! but I'm still at it


Yes it has been a long time since the last post. I've not lost interest in fact things have been progressing very well.
A quick recap has seen me finish just about all of the bodywork and panels and solve the issue of oil/water mixing in engine oil after the head skim and pressure test.
I must admit this had me worried over the winter of inactivity, however come this spring it appears to have vanished. How ?
I don't really know.
 I emptied the engine of oil of about half and refilled with fresh oil (NOT the cheap Wilko stuff) and set to work trying to get the engine running smoothly.
First was to re-torque the head bolts.
Then adjust tappet clearances.
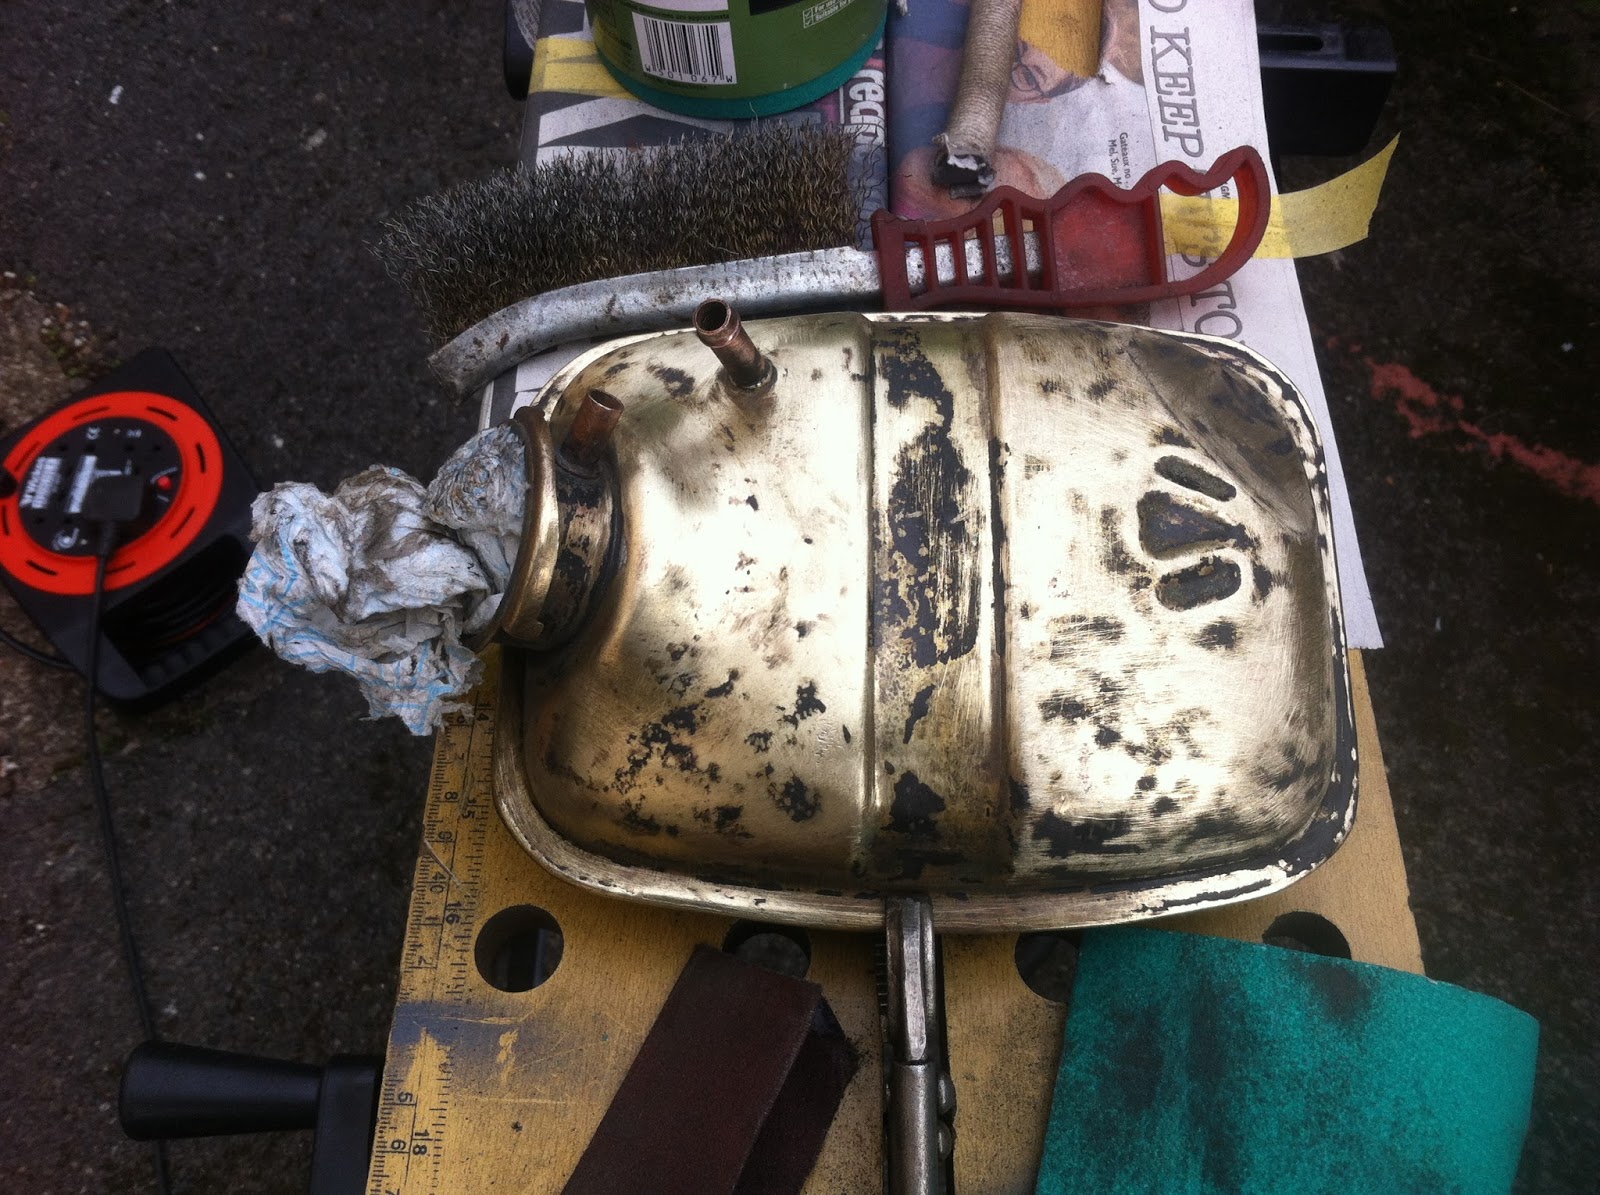
Then fit stainless steel exhaust and brackets, bought second hand off E-bay for £35 quid. Excellent condition + bought brackets from MGOC £18.
Next removing old rusted on Brackets.
This was not a simple task. The bolts at the rear holding the complex rear exhaust mount are inside a tiny box section and were a swine. I reverted to the angle grinder to get most of the bracket off without slicing a finger or skull part off. The nuts however were inaccessible and well rounding off, same for the centre bracket.
So I soaked them in Duck Oil and left it for another day.
Another day.....
The bolt heads are 11mm....doh. Just when I was well and truly stumped on how to get them off I thought I'd try the more accessible middle bracket first and lo...it (they ) came undone easily with an 11mm spanner.
So same tactic for rear bracket, more fiddly but done with some patience, swearing and filthy head.
Then buy new jump leads ( where oh where have my originals gone?. Suspect a family member but no one owns up)
Read up thoroughly on carb tuning thanks to John Twists excellent you-tube vids.
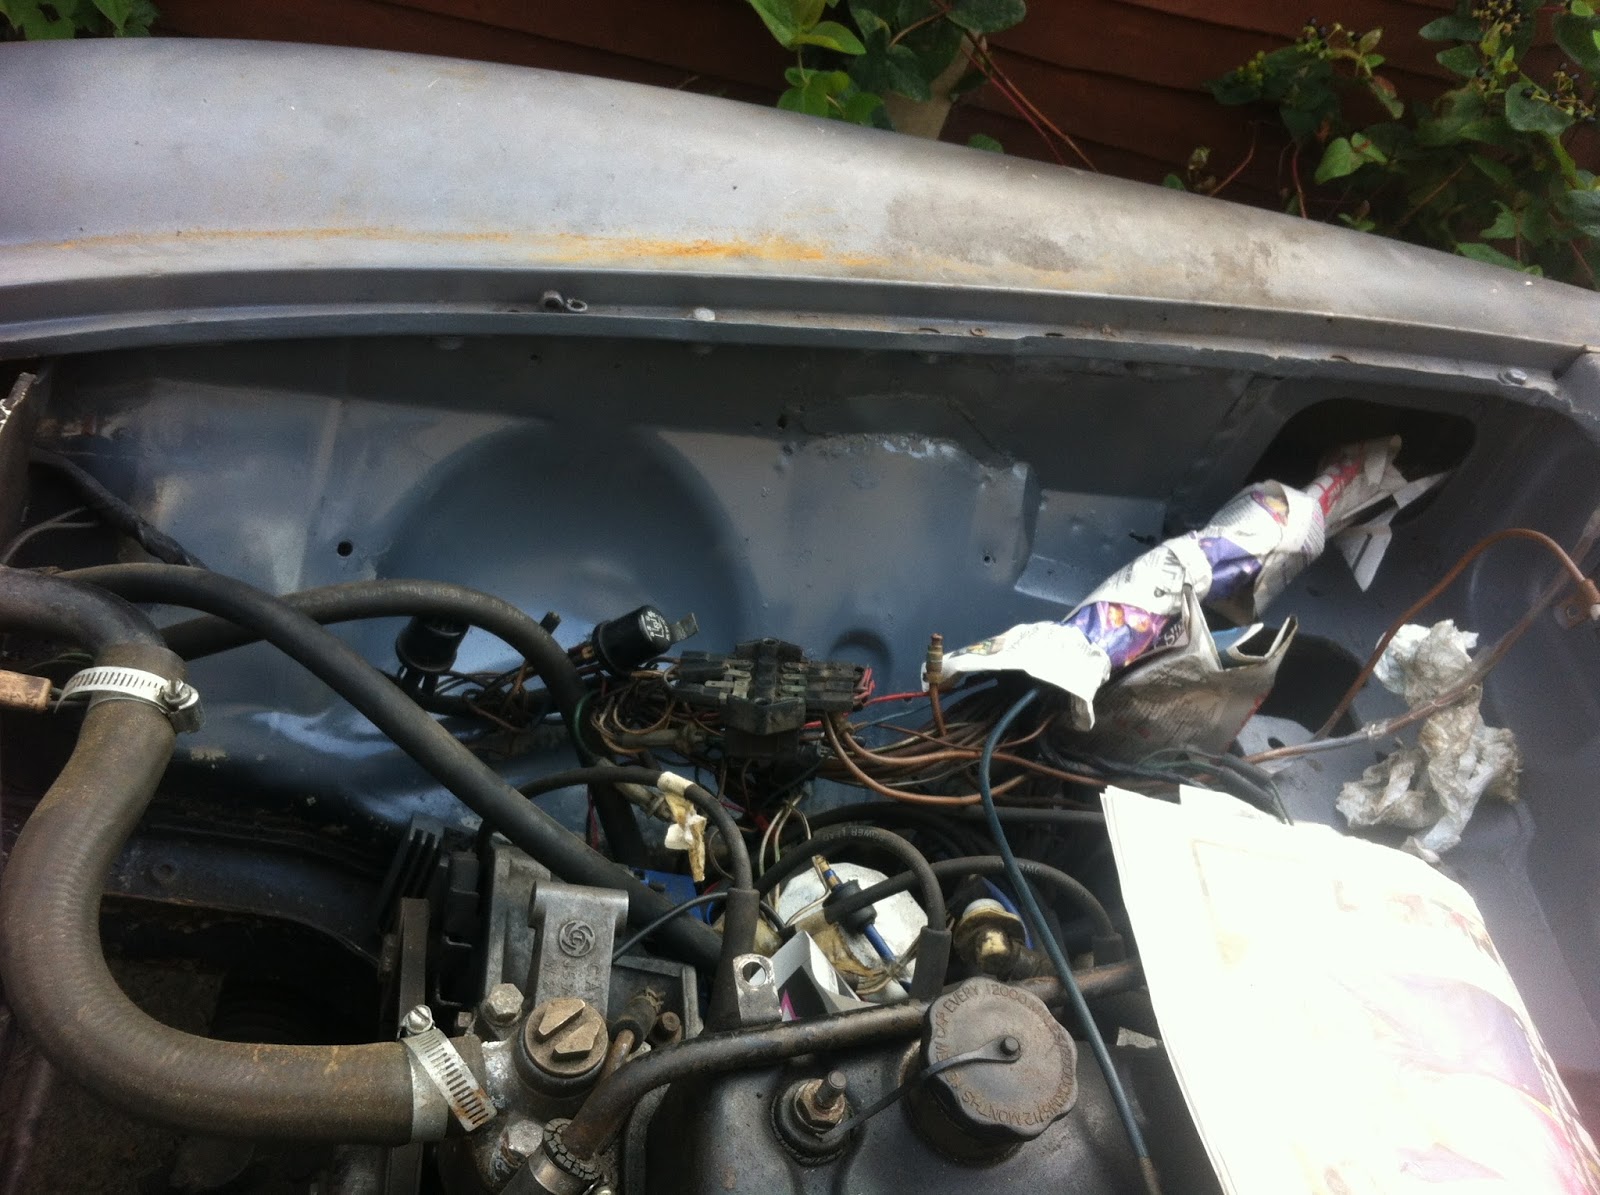
Re-fit dashboard sort of, actually only connected gauges plug. This looks like its going to be a major fiddly job eventually as it wouldn't even sit where it should under the dash rail, let alone clean and fit all the loose wires everywhere as well as troubleshoot any probs. Hey  ho, another job for later.


Fitted exhaust easily but the manifold nuts were fiddly and needed some clever socket extensions and lateral thinking.
It was while I was supine under the sump spannering the manifold nuts ( Liberally coated with copper grease...my new best friend) I noticed a long standing oil leak (as in years) and where it was coming from.
What looked like a simple tighten up of one sump bolt also needed lateral thinking and a bit of bravery.
It transpires that trying to tighten it was just rounding off the nut........or so I thought. The nut in question was at the very rear of the sump 4" up in a tight spot next to the gearbox. The problem was that the sump mating face has a downward facing lip on its outer edge, I presume to give it some form of strength. This was next to the nut and a socket didn't fit on it very well, hence it was not tightened fully.
              Being a dolt at times I imagined sump off and new gasket, not an easy, good or clean job to do upside down on the floor, also being a tightwad and possessive of my tools I didn't want to grind down a socket.
So I took a lump hammer and blunt pointing chisel and gently bashed the rim outwards some/ enough to get the socket on firmly and apply some/more force. I think its worked...so far.

Whilst starting, nay cranking over I noticed more leaks. Two actually, one oil and one water.
The oil cooler hose where it meets the oil cooler needed a little nip up and job done. More tightening of the leaking exhaust manifold saw me source the water leak, from the footwell/copper pipes underneath to the bulkhead to the plenum chamber (of sorts) to the heater to the matrix. Some years ago I'd refurbed the heater box so it was easy to remove. As we speak the matrix is standing outside full of water with one end bunged up in an effort to pinpoint the leak even further, However this will not detract from the march onwards.
Trouble is, as we restorers know, it does.

Should I get the engine bay looking good or just better, it looks crap now, or carry on with fitting up as a whole ?
Since wifey said I could have £100 quid to spend on pure MGB stuff, I bought the exhaust, bracket and a new ST front spoiler... £35+ delivery.


Its gonna be a bit fiddly to fit since some of the holes in the body valance have their welded on nuts missing from when I removed the original valance a few years ago. Also I can't remember where I put them or what size they are.To make matters worse its not an exact fit to the contours of the front of the car. The spoiler has a squared off flat  middle section !! is this normal ?.

Never mind though as this area is covered up by the (eventual fitting of ) chrome bumper. The re-positioned indicator holes have also left the area below a little weak as some of the "L" shaped body has no vertical lip underneath. Should I weld on ? ( tricky as the piece has two curves,... Fibreglass mat it ? don't improve strength but looks better or Ignore altogether as again its not seen behind the chrome bumper ?


Since the engine runs quite nicely (see vid above) should I :

Continue fitting the dash and electrics ?
Continue adding chrome and glass parts ?
Refurb engine bay ?
Bleed brakes ...or buy new master cylinder ?
Faff around doing bits of all of the above ( most likely outcome)

Another startling discovery made recently after a review of as to why I can't bleed the brakes ( from last summer) was I'd fitted a master cylinder seal the wrong way and trapped one with the retaining pin.
One major problem is wifey has to help me bleed the brakes ( unwilling and bored easily!!) and I don't want to really fork out for a master cylinder if I don't have to.
Some extra money due to a birthday has given me something else to think about buying ( NOT master cylinder amounts) so I'm thinking splash guards.....or maybe some thing else !

I promise to post more often. At least I have six, yes SIX weekends off soon.

Just to remind you, my restoration is like the perfect storm : several elements have to come together all at the same time, viz

1/. Money
2/. time off work
3/. good weather
4/.No DIY or gardening chores to do
5/.Inclination to get up early and know exactly what I'm going to do and how to do it
6/.Not feel tired from work

That's my excuse anyway !!!

Tuesday, October 01, 2013

The front continues apace

So after a stint of nights irradiating the fair people of  middle England I got a few rain free days to continue on the anticlockwise (starting rear left corner) direction of the cars bodywork. I'm up to the front of the front wings and valance.
This is how I left it last time after welding in the fillet pieces for indicator holes.


Horror of horrors.........the RH hole is 3/4" inch too far from the centre. At first I tried to make a template modification by adding on some small sections but broke both jigsaw blades extending the pointy end of the hole. So, rarely for me, I removed the patch completely and made another one. This time I popped to my local hardware shop for supplies of jigsaw blades and other stuff. I made the template properly. That is by drilling a 3/8" holes at strategic points to allow the blade to turn 90 degrees. Guess what, Never broke another blade..whoopee ! My welding skills had deteriorated though and ground most of the weld away.

Below is the rather complex template I was going to make before I decided to renew the whole insert.


As you can see I've used the old door skin to make the patch. The skin has come in very handy as I've used it endlessly for the rear inner wheel arch, Rear side window bottom, Inside rear strengthening (where P.O had cut through it to mount a speaker) window winder base bracket and many other things. So, it shows I'm keen on recycling ( not really, just a tightwad).

As a diversion I got from the shed the front chrome bumper, bought years ago from down south when I was travelling as a sales-specialist. I also bought yonks ago some mounting irons (stored in conservatory) and set to to give it a good clean with the sponge pad in the drill.


Armed with an array of cleaning products I thought I'd get it looking like new, well almost.
Look at the stuff I used on it. Note that the bumper had an over-rider on but I've decided to go with a sleeker 60's look without so the chrome does have a distinct line where it was covered up. That's the area I started on first to see which product worked best. 

See below


Well, which one did work best ?

Answer.................................................None of them. I had visions of the chrome looking brand new.
Epic fail. To be fair the T-cut, Vinegar and Peek chrome cleaner were all about the same. It'll have to go off for re-chroming at some point in the future, but that's for much later on when finances are in better shape.


Since the welder was out I fashioned two gigantic captive nuts to hold the bumper iron onto the chassis rail. These were made from the old rubber bumper brackets and were being saved by wifey in the conservatory for her arty farty projects. I just reclaimed them, chopped them about and hey presto.


With two rectangular infills added to the front lip the front end was complete. I've discovered high build primer !. Painted that on the welded area, sanded ,filled, sprayed primer ( the cheapo £1 tin stuff) and job done !
Before

After


Next up is rebuilding a wall around the base of (as was) giant fir tree, again. Did it 20 years ago so can't grumble, but wifey can !