Another cryptic title which gives no clue as to what I've been up to lately. Well as I type this not much really as the weather has been cold and very damp.
I'm actually about four weeks behind with my blog so I have to do them from memory ( rather than do the sensible thing and read the last blog !!)
So as a recap as much for me than you the last thing I did was start the engine after having it on charge for about 14 hours. Mainly due to the fact the car has to be moved when they come to make the garage.
Yes it runs, still a bit rough, noisey ( tappetty....?, water pump?...Alternator....? Exhaust mounting ? ) And so on, I'm done figuring out so it's going to a specialist soon to figure out why.
I did note that whilst it ran and after several attempts at stop start to try and adjust the carbs the cranking got slower and slower till after about 6 or so attempts the battery died. It had a good 14 V at starting but eventually dwindled to 12 V ...ish. Methinks the alternator is the culprit. It's always been this way since I've had the car. A new battery a few years ago did help but I'm afraid it's back to square one now.
The prob is .......should I just bite the bullet and a/. buy a new one, ( Alternator that is ) b/. ask the local MG specialist to test the alternator or c/. do some proper tests with the multimeter.
The local specialist can be a bit dismissive and terse....pffft.
I'm a real tightwad and don't like forking out for repro items made in China and I'm rubbish at electrical probs especially with my third, yes third multimeter which is still a bit iffy.
So a proper dilemma.
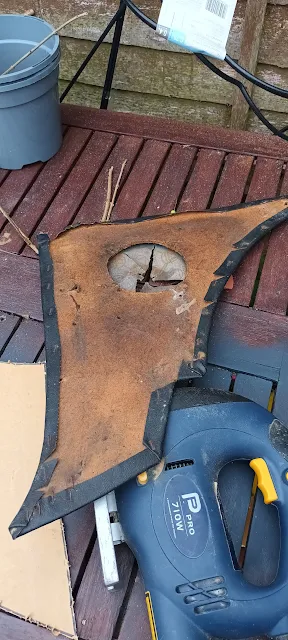
What is done though are the sunvisors. A bit home made-ish but I'm happy with them if only I find the missing screw to hold the passenger one in securely.
One job done, mostly, is the heater core. A second hand one from Andy Jennings ( £15...bargain)
Managed to get the heater cover prised out and fitted core plus some new if somewhat over stuffed sponge surrounds in place.
The heater core in place and ready for final assembly.
Looking at the photos there seems to be a lot of rust around. Trust me when I say that it's the remnants of when the cooling system overheated due to a loose fan wire, which made the overflow tank spray a goodly amount of rusty liquid towards the fire wall. Be reight, only needs a wipe with an oily rag.
But on a lighter note, the heater works will with no leaks from said heater core, it sends heat to where directed by the rusty creaky heater flap and it's warm. Much warmer than most MG enthusiast would have you believe.
Now comes the tricky part. Fixing the two convoluted hoses onto the back of the heater box spigots/ flanges, lips ( guffaw) well below the scuttle and in deep above the transmission tunnel, and keeping them there. Did a a few years ago ( before I knew the matrix was leaking) with black silicone and electrical tape. However since I'm about to re attach It again I see how crap it was fixed before. The lip is only about 5mm/ 1/4" so not easy and hands and fingers do not get anywhere near it as it's behind two trans tunnel re-enforcing struts, albeit with cut outs......ha.
The designers of this obviously had relatives from Barnsley with six multifaceted digits of unequal proportions and spent much time on their back with a neck twisted at an unusual. angle.
So I came up with a master plan of epic proportions, A trip to B&Q saw me buy two 90 deg elbows of 35mm pipe fittings which fitted the scrap section of pipe I had already scrounged from Graham next door.
I must be honest and say I've not fitted it yet but it fits easily over the lips and hoses and with some more silicone and cable ties ensuring the tricky bits are well out of the deep fitment area should be ok. Here's hoping.
Sorry but I forgot to photograph said plumbing....promise I will when fitting.
Next job is to fit the heater controls on the binnacle above the gear shift/ below dash panel. It's all in the same area as the heater hoses but with the aforementioned mods it should make it much easier.
I bought a gear shift Bowden cable from Halfords for the heater control as it had frayed and come loose at the engine block end, again not yet fitted but I forsee no problems...............steady on Fufferfour, that twice you've said that before the event....and we all know what that means !
A lot of time has been taken up with the garden under wifeys instructions and my own quest to improve the lawn but in a couple of days time the garage will be built..........with a home for my beloved...yay.
The struggle does not end there though. Should I insulate it. I need an electrician to run the lights wires and sockets in, what floor covering should I have ?
I know the answer to the last one already, none. Since I tinterweb browsed, I've been inindated with locking tiles, rubber sheet, epoxy paint, vinyl tiles et al.
F*** me, how expensive are they !!!!!!!!. It's a place to work not a 5 star reception area. I might stretch to acquiring a large roll of cheap nylon carpet from the dump it site if possible. After all the MG is a little like me...incontinent and unpredictable. At least it keeps wifey out of the way.
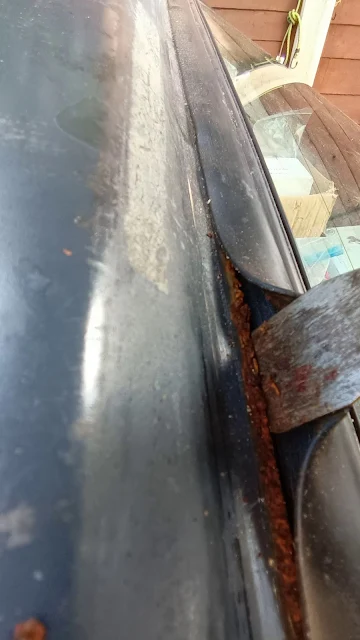
The only down side of late has been the rear window rust. I'd noticed the odd rust bubble under the rubber surround. I've had both windscreen out and thought I'd Kurusted and primed them quite well but on inspection, well apparently not.
It got worse the more I looked.
Probably due to being outside and under cover for many a year and season so it's the first job when the car is in its home. I have already Kurusted and sanded it but methinks it will need more.
Enough for now more in a while.


