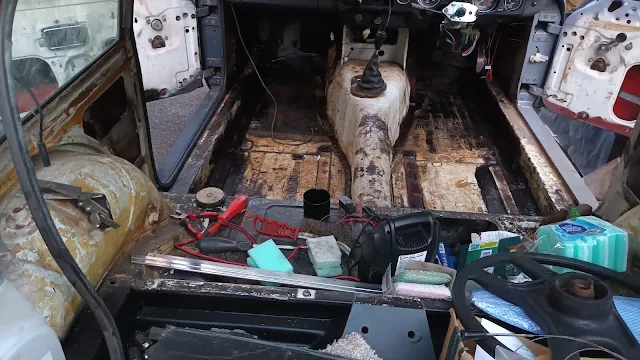
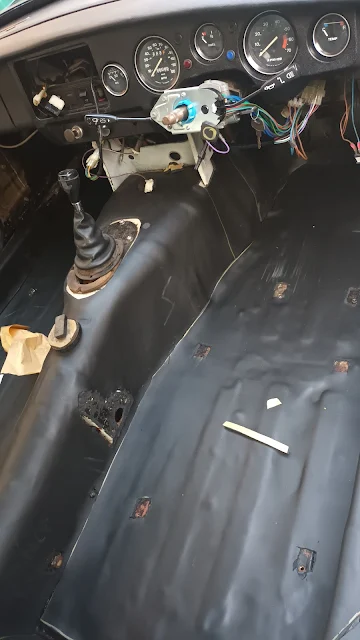
So spent a day determined to make some positive progress after the last disappointing session. A bag of bits arrived from Moss containing misc screws, nuts , bolts, grommets, relay and a pair of window handle winders. Much joy.
Bravely, I tackled the errant relay. I had also bought a spare from Halfords so if I destroyed one so what. It would have to wait for wizard Tony's visit.
I'm thinking now that I had some duff info from one of the MG forums regarding the relay PIN numbers.
They are numbered 30, 85,86 and 87. Strangely all the wiring diagrams show W1, W2, C1 and C2 and this is where, I think I went wrong.
A big thanks to Paul Hunts website " Hammer & spanner". I should have gone straight there as I've been reading all things MG on there for years and it has everything you need to know, well written and loads of links.
Anyway back to the job in hand. Fitted new relay carefully ( after looking at Advance Autowires wiring diagram) about 30 times and Mr Hunts W1/ 85 pin locations.
Bingo........... Wifey even filmed it for me happening.
So, the annoying settings of Blogger, AppleMac and Samsung Android won't allow the lovely video, however I'll keep trying.
Back to the story.
Engine runs albeit very rough, fuel pump pumps, wheels and tyres lovely and shiny, brakes work ( handbrake very weak though) So I took it for a spin up and down the little cul-de-sac where I live. Engine was stuttering lots, steering was heavy and clutch/ gearstick a bit iffy. Reverse works but moving forward I never got above 2nd gear.
Ah well at least it's moved. Twas then I spied a long thin trail of fluid showing where I'd been, and a bigger puddle where I'd stopped to turn round, bugger !
I'm going to try again though but this time with a fuel filter fitted and a catch container on the carb overflows. I hope it's not a fuel line issue and now wish I had checked the fuel line tank connections more thoroughly.
Hopefully it's the carbs that need a proper setting up after their thorough cleaning and dismantling a few months ago. Before that though I have to do the due diligence thing and check for the spark/ plug fouling issue/s and timing. But at least now I know I can move it and have a good battery and wheels.
A day or so later I set too making the door cards. It was fun trying to fit a 2.5 x 1.2 met sheet of hardboard into a Toyota Yaris. ( I cheated and broke it in half knowing each half would be big enough for the roof of 43 inches x 43 inches, just. The other Half more than enough for the door cards.
The above shows how skanky the old door cards were with the bottom 3" missing along most of its length.
The vinyl was ripped too and just as skanky. They were seperated easily and old card scribed round on the nice new stuff. Since the old cards were very warped I had no confidence that things would line up when cut out.
I devised a cunning plan. I made a brown paper sheet and taped it to the door and by utilising wifeys charcoal art sticks and used the "dirty finger" method of finding the mounting holes.
Once the pencil centre lines were scribed onto the paper I cut out a square around the holes and offered it back up to the door. I then used a red pencil to mark the template where any slight changes were needed.
It is important to note how far off the original holes were taken from the crappy old door card, in fact not one lined up.
What to do about the "missing" holes along the bottom though. What missing holes ?
I forgot to add that the door had been repaired by me years ago by welding in a section at the bottom about 9 inches long, where some of the mounting clips go.
Then another brainwave. I assumed the doors would be symmetrical so used the paper template turned over to get the new holes that were missing on the other door. And it was a success. Transferred it to the door card and used this as a template to drill the 2 new 8mm holes for the missing clip holes.
Fortunately I saved the old door clips and managed to locate them amongst the many boxes scattered around the property ( in shed, of course ) bad news was I only had 13, but that's just enough for one door. A trial fit just using four clips, a bit of fettling of the board and Bingo , fitted.
It was easier than I thought it would be even though It took most of the day On and off, It went on with a nice little click and also comes off with gentle persuasion from a proper trim tool.
Next job is to trim the outsides, stick on foam and then vinyl.
The handles cleaned up great using hob cleaner, however the mounting hole and screw need some jiggers pokery to make them secure and nice.
Engine wise, I have to check the fuel lines, fit tank outer grommet and inner tube clips, fit fuel filter ( I know as soon as the newly ordered one is fitted I will find the original one that was never used). Check timing ( Tony's first job when he arrives), and so it goes, endlessly.
Or I may just try making the roof lining board, or the other door card.
Fun fun fun.


