Typical.............!
As last posted re "Perfect Storm", this weekend has seen everything in place except the weather.
Work has been tough ( and continues to be so for the foreseeable future...good ole NHS) with many off hours shifts and weekends.
However I'm about to start a 6 week period with all weekends off except for one Sunday...whoopee.
So my old friend the weather plays its fickle part yet again. Dull and rainy on and off, windy and changeable.
At least its also halted the DIY too.
I've just replaced the 90 foot x 6 foot Ivy encrusted fence panels down the side of my property and had a hell of a job too. Most of the panels have been " de-Ivied...?" and a neighbour has had about half of them for his steam engine. I have the last 3 thickly ivy encrusted to dispose of and several panels reduced in size ( i.e smashed to smithereens or fell apart when ivy removed).
The lawn needs a good mechanised rake and I'm sadly behind on the seasonal Easter shed clean-out.
The clean-out is one job I enjoy. It involves emptying the outhouse in conservatory to get out outside the six patio chairs. Then a thorough clean and throw out of (mostly Wifeys) stuff.
Then same to shed. This is where most of my MG stuff is located, most of the internal parts and chrome stuff. Since I'm at that point of putting things back on I'm even more frustrated that its not yet happened due to several factors. Mostly Wifey going full tilt for her finals at Art Uni ( She's responsible for 99% of the "Stuff" in and around the house...her excuse being its needed for my degree...!)
That's about it in a nutshell. Except I've finally got round to looking at the Blogger settings as to why no comments or listing rating has dropped me like a stone this last 2 years.
So come on....drop me a line, I need cheering up !
Sunday, May 11, 2014
Sunday, May 04, 2014
Its been too long !!! but I'm still at it
Yes it has been a long time since the last post. I've not lost interest in fact things have been progressing very well.
A quick recap has seen me finish just about all of the bodywork and panels and solve the issue of oil/water mixing in engine oil after the head skim and pressure test.
I must admit this had me worried over the winter of inactivity, however come this spring it appears to have vanished. How ?
I don't really know.
I emptied the engine of oil of about half and refilled with fresh oil (NOT the cheap Wilko stuff) and set to work trying to get the engine running smoothly.
First was to re-torque the head bolts.
Then adjust tappet clearances.
Then fit stainless steel exhaust and brackets, bought second hand off E-bay for £35 quid. Excellent condition + bought brackets from MGOC £18.
Next removing old rusted on Brackets.
This was not a simple task. The bolts at the rear holding the complex rear exhaust mount are inside a tiny box section and were a swine. I reverted to the angle grinder to get most of the bracket off without slicing a finger or skull part off. The nuts however were inaccessible and well rounding off, same for the centre bracket.
So I soaked them in Duck Oil and left it for another day.
Another day.....
The bolt heads are 11mm....doh. Just when I was well and truly stumped on how to get them off I thought I'd try the more accessible middle bracket first and lo...it (they ) came undone easily with an 11mm spanner.
So same tactic for rear bracket, more fiddly but done with some patience, swearing and filthy head.
Then buy new jump leads ( where oh where have my originals gone?. Suspect a family member but no one owns up)
Read up thoroughly on carb tuning thanks to John Twists excellent you-tube vids.
Re-fit dashboard sort of, actually only connected gauges plug. This looks like its going to be a major fiddly job eventually as it wouldn't even sit where it should under the dash rail, let alone clean and fit all the loose wires everywhere as well as troubleshoot any probs. Hey ho, another job for later.

Fitted exhaust easily but the manifold nuts were fiddly and needed some clever socket extensions and lateral thinking.
It was while I was supine under the sump spannering the manifold nuts ( Liberally coated with copper grease...my new best friend) I noticed a long standing oil leak (as in years) and where it was coming from.
What looked like a simple tighten up of one sump bolt also needed lateral thinking and a bit of bravery.
It transpires that trying to tighten it was just rounding off the nut........or so I thought. The nut in question was at the very rear of the sump 4" up in a tight spot next to the gearbox. The problem was that the sump mating face has a downward facing lip on its outer edge, I presume to give it some form of strength. This was next to the nut and a socket didn't fit on it very well, hence it was not tightened fully.
Being a dolt at times I imagined sump off and new gasket, not an easy, good or clean job to do upside down on the floor, also being a tightwad and possessive of my tools I didn't want to grind down a socket.
So I took a lump hammer and blunt pointing chisel and gently bashed the rim outwards some/ enough to get the socket on firmly and apply some/more force. I think its worked...so far.
Whilst starting, nay cranking over I noticed more leaks. Two actually, one oil and one water.
The oil cooler hose where it meets the oil cooler needed a little nip up and job done. More tightening of the leaking exhaust manifold saw me source the water leak, from the footwell/copper pipes underneath to the bulkhead to the plenum chamber (of sorts) to the heater to the matrix. Some years ago I'd refurbed the heater box so it was easy to remove. As we speak the matrix is standing outside full of water with one end bunged up in an effort to pinpoint the leak even further, However this will not detract from the march onwards.
Trouble is, as we restorers know, it does.
Should I get the engine bay looking good or just better, it looks crap now, or carry on with fitting up as a whole ?
Since wifey said I could have £100 quid to spend on pure MGB stuff, I bought the exhaust, bracket and a new ST front spoiler... £35+ delivery.

Its gonna be a bit fiddly to fit since some of the holes in the body valance have their welded on nuts missing from when I removed the original valance a few years ago. Also I can't remember where I put them or what size they are.To make matters worse its not an exact fit to the contours of the front of the car. The spoiler has a squared off flat middle section !! is this normal ?.
Never mind though as this area is covered up by the (eventual fitting of ) chrome bumper. The re-positioned indicator holes have also left the area below a little weak as some of the "L" shaped body has no vertical lip underneath. Should I weld on ? ( tricky as the piece has two curves,... Fibreglass mat it ? don't improve strength but looks better or Ignore altogether as again its not seen behind the chrome bumper ?

Since the engine runs quite nicely (see vid above) should I :
Continue fitting the dash and electrics ?
Continue adding chrome and glass parts ?
Refurb engine bay ?
Bleed brakes ...or buy new master cylinder ?
Faff around doing bits of all of the above ( most likely outcome)
Another startling discovery made recently after a review of as to why I can't bleed the brakes ( from last summer) was I'd fitted a master cylinder seal the wrong way and trapped one with the retaining pin.
One major problem is wifey has to help me bleed the brakes ( unwilling and bored easily!!) and I don't want to really fork out for a master cylinder if I don't have to.
Some extra money due to a birthday has given me something else to think about buying ( NOT master cylinder amounts) so I'm thinking splash guards.....or maybe some thing else !
I promise to post more often. At least I have six, yes SIX weekends off soon.
Just to remind you, my restoration is like the perfect storm : several elements have to come together all at the same time, viz
1/. Money
2/. time off work
3/. good weather
4/.No DIY or gardening chores to do
5/.Inclination to get up early and know exactly what I'm going to do and how to do it
6/.Not feel tired from work
That's my excuse anyway !!!
Tuesday, October 01, 2013
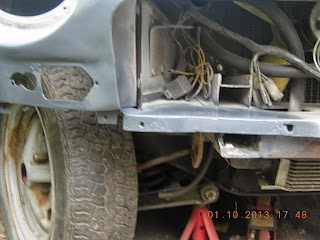
The front continues apace
So after a stint of nights irradiating the fair people of middle England I got a few rain free days to continue on the anticlockwise (starting rear left corner) direction of the cars bodywork. I'm up to the front of the front wings and valance.
This is how I left it last time after welding in the fillet pieces for indicator holes.

Horror of horrors.........the RH hole is 3/4" inch too far from the centre. At first I tried to make a template modification by adding on some small sections but broke both jigsaw blades extending the pointy end of the hole. So, rarely for me, I removed the patch completely and made another one. This time I popped to my local hardware shop for supplies of jigsaw blades and other stuff. I made the template properly. That is by drilling a 3/8" holes at strategic points to allow the blade to turn 90 degrees. Guess what, Never broke another blade..whoopee ! My welding skills had deteriorated though and ground most of the weld away.
Below is the rather complex template I was going to make before I decided to renew the whole insert.

As you can see I've used the old door skin to make the patch. The skin has come in very handy as I've used it endlessly for the rear inner wheel arch, Rear side window bottom, Inside rear strengthening (where P.O had cut through it to mount a speaker) window winder base bracket and many other things. So, it shows I'm keen on recycling ( not really, just a tightwad).
As a diversion I got from the shed the front chrome bumper, bought years ago from down south when I was travelling as a sales-specialist. I also bought yonks ago some mounting irons (stored in conservatory) and set to to give it a good clean with the sponge pad in the drill.


Well, which one did work best ?
Answer.................................................None of them. I had visions of the chrome looking brand new.
Epic fail. To be fair the T-cut, Vinegar and Peek chrome cleaner were all about the same. It'll have to go off for re-chroming at some point in the future, but that's for much later on when finances are in better shape.

Since the welder was out I fashioned two gigantic captive nuts to hold the bumper iron onto the chassis rail. These were made from the old rubber bumper brackets and were being saved by wifey in the conservatory for her arty farty projects. I just reclaimed them, chopped them about and hey presto.

With two rectangular infills added to the front lip the front end was complete. I've discovered high build primer !. Painted that on the welded area, sanded ,filled, sprayed primer ( the cheapo £1 tin stuff) and job done !
Before

This is how I left it last time after welding in the fillet pieces for indicator holes.

Horror of horrors.........the RH hole is 3/4" inch too far from the centre. At first I tried to make a template modification by adding on some small sections but broke both jigsaw blades extending the pointy end of the hole. So, rarely for me, I removed the patch completely and made another one. This time I popped to my local hardware shop for supplies of jigsaw blades and other stuff. I made the template properly. That is by drilling a 3/8" holes at strategic points to allow the blade to turn 90 degrees. Guess what, Never broke another blade..whoopee ! My welding skills had deteriorated though and ground most of the weld away.
Below is the rather complex template I was going to make before I decided to renew the whole insert.

As you can see I've used the old door skin to make the patch. The skin has come in very handy as I've used it endlessly for the rear inner wheel arch, Rear side window bottom, Inside rear strengthening (where P.O had cut through it to mount a speaker) window winder base bracket and many other things. So, it shows I'm keen on recycling ( not really, just a tightwad).
As a diversion I got from the shed the front chrome bumper, bought years ago from down south when I was travelling as a sales-specialist. I also bought yonks ago some mounting irons (stored in conservatory) and set to to give it a good clean with the sponge pad in the drill.

Armed with an array of cleaning products I thought I'd get it looking like new, well almost.
Look at the stuff I used on it. Note that the bumper had an over-rider on but I've decided to go with a sleeker 60's look without so the chrome does have a distinct line where it was covered up. That's the area I started on first to see which product worked best.
See below

Answer.................................................None of them. I had visions of the chrome looking brand new.
Epic fail. To be fair the T-cut, Vinegar and Peek chrome cleaner were all about the same. It'll have to go off for re-chroming at some point in the future, but that's for much later on when finances are in better shape.

Since the welder was out I fashioned two gigantic captive nuts to hold the bumper iron onto the chassis rail. These were made from the old rubber bumper brackets and were being saved by wifey in the conservatory for her arty farty projects. I just reclaimed them, chopped them about and hey presto.

With two rectangular infills added to the front lip the front end was complete. I've discovered high build primer !. Painted that on the welded area, sanded ,filled, sprayed primer ( the cheapo £1 tin stuff) and job done !
Before

After

Next up is rebuilding a wall around the base of (as was) giant fir tree, again. Did it 20 years ago so can't grumble, but wifey can !
Monday, September 16, 2013
A little bit more progress
So whats been happening then !
I booked 3 days leave from work to ferry the kids back to Uni with a weekend sandwiched in between, so 5 whole days. It transpires as 3 actually as 2 days were for above, one day it p***ed it down, the other day it rained p.m as I was in town in the a.m. So that left One day ! on which to get more progress.
I did though.
Firstly found LH winder mechanism in shed. The LH door glass was next together with mounting screws and winder handle.
Found front LH Indicator lens and frame in shed.
Found front bumper in loft and brackets in conservatory under a pile of wifeys artyfarty stuff.
Found LH quarter light assy in shed.
One thing that did puzzle me was...........I bought a pair of doors ( from you know where) about 4 years ago. Turned out they were crap, rusty, full of filler and poor lock chrome. However the quaterlights were good so I saved them down by the shed wrapped in polythene.
When it came time to find the LH door/window stuff I'm sure I had 3 RH side windows, quarterlights and winders !!
It took forever to figure out what was what and for which side.
Coo....the winder mechanism drove me nuts as I had four of them and trying to decide which way round they went was baffling.
Anyways, I cleaned up said winder mechanism with thinners,wire wool,soapy water and lithium based grease and fitted. Trouble is though the door is now heavier and its a swine to re-align and tighten the 6 door screws sufficiently so it does not drop.
Anyone got any Ideas better than the 6 Phillips screws used ?
Not thwarted I attached the quarterlights roughly. The top edge of the quarterlight seems a long way from the windscreen A pillar...eek.
 N
N
Not quite shown in the picture due to the slight head on angle and I had a little jiggle around with the door.
I must admit that its good to be finally fitting stuff on rather than taking stuff off or even sanding.
I also have 4 window channel runners but think I've found out which way they fit..hopefully. Trouble is though I can't find the base bracket I fabricated a few years ago to hold it in position on the door bottom. I desperately need a selection of UNC/F nuts, bolts, screws/washers. MGB Hive do one for £18 ore so, so next payday will see me purchase one. I also need some to hold the front bumper to its brackets whilst I drill holes in the chassis rail.
That brings me to my next job.
Courtesy of the Canadian MGB register and Moss USA, I found the templates to weld up the indicator holes from the front ( Rubber) bumper position and new hole position to suit the chrome bumper light ( Yes I know its getting boring...another E-bay purchase, albeit 5 years ago).
So set to I did with 2 new in-fill pieces for LH & RH sides. Scrounged B & D jigsaw from Ma-in-law ( only wood blades available but hey ho it worked).
Picture to follow
Monday, September 02, 2013
Sanding and more sanding

After a mammoth wet/dry with 240 grit paper the A post is looking slightly better. All the old scratches from using 80 grit then 120 grit appear to have gone....or have they ?

The simple answer is NO !Shown is the remnants of the painted on "high build primer". Even after another sanding session and light guide coat of grey primer there are still many imperfections from the coarser grit paper used in isolated areas.
Time for more 240 "wet n drying" then. It then resembles much the same as the first picture except I'd spotted more areas along the top of the wing and near the front edge.
Fortunately after a days trolling round town Saturday morning with wifey I spotted more £1 cans of the grey primer. So on it went after a thorough clean and wipe. Look , it gleams !


Unfortunately there are STILL flaws in the paintwork !.
a /. it was quite windy.
b/. I'd not cleaned it as well as I though.
c/. Did not rub it down enough !!!! FFS how much rubbing do you have to do.
Its funny though a few years ago this was the first wing to get a full coat of primer and after we/drying it looked fantastic. Must be the attention to detail I have now, since slight scratches from the original 120 grit paper are faintly visible, nay hit me in the eye..and sting.
Since the storm clouds were gathering and the wind getting up I called it a day.
I've decided to let the paint harden for a week, however I'm applying the acrylic stopper tomorrow hopefully it will harden sufficiently for more localised polishing/wet/drying. I'm getting a bit pissed of with the endless filling, rubbing, more rubbing, cleaning guide coating, repeat ad nausiem.
So as a diversion I'm going to modify the front wings to accept the chrome bumper style indicators and positioning. I may even fit the chrome bumper bracket ( bought from you know where) after some inventive " modification" of the old rubber bumper mounting legs into captive nuts to fit inside the chassis rails. I have a rather explicit and diagrammatic instructions from the MG club of Toronto ( I think) which has lain sulking in the Lostsock secret repository for a few years ( As has the CB lights, bumper and irons). I'm loathed to fit the irons with M8 thread and nuts but it looks as if I may have too.
Or I may just fit the door locks and mechanism instead. Oh the joys of MG restoration.
Monday, August 26, 2013
Bodywork..it int arf borin. innit !

The picture shows the LH rear wing inboard of the seam top. Its been a swine to get right. Every time I filled it and sanded then primer ed it a distinct crack appeared. Several attempts have ensued. Each time deeper and deeper I plunged in with the scary grinder and wire brush thingy. Each time the "crack" appeared
looking like an old section of thick paint curling up from the filler. Anyways after umpteen re-do's its fine now, hopefully. If you look closely you,ll see the imperfection. Much worse looking than the photo shows.Here's the latest attempt below

I've been working diligently if not slowly from LH rear wing clockwise round car attending to all the poor filling/sanding done over the restoration at various times over the years by ME ! I've got as far as the front wing rear edge and top seam/scuttle join. The sill is done also. See below.

As is the A post. Had to bite the bullet with this one since there was a few large flakes of old paint around the hinges. So I set to with small wire cup in drill and had it done in no time. Same with the door frame sides and bottom. Lots of wet/dry sanding of door skin and that's looking dandy.


I have a funny feeling that I did all this a few years back too. But, and a big but is I have a super heavyweight cover made by yours truly. On a trip to the timber yard I asked if they had any polythene in their skips. And, boy did they have some. There had been a recent delivery of 30ft lengths of 2 x 4 ( about 24 pieces wide x 30 high ) all wrapped in heavy duty Poly. They were huge. I selected best/least shredded one and set to cutting and taping to MG shape one afternoon between heavy showers. Loads better than blue woven sheets which flap and leak.
The only bad news I have to report is the demise of the much heralded "electric" spray gun. It was purchased early in the restoration from a car boot in town ( Circa 2005) for £2. Its skulked somewhere in the loft ever since, but not forgotten. I recently purchased some high build primer from ( you know where by now !) since the bodywork was progressing. Up to now I've been using rattle cans from
Poundland/poundshop. Just when I was ready to spray the whole rear 1/4 + sills the bloody gun just made a lot of noise. loud and pounding. I'd even got paint in the bowl but not a drop would emanate. After an hour of stripping it down ( made in the 70's - but still as new/unused) I admitted defeat and threw the flipping thing away. Trouble was the supply of £1 primer cans was exhausted in both shops with no idea if they would return. N.B just spotted 5 cans this weekend. Bought em. Hence post now on a sunny Bank Holiday Monday.
Onwards and upwards.
Saturday, May 11, 2013
Slow, Slow, Stop,Go !
Another confusing title ?
Well what else would you expect from good ole Lostsock.
Very little progress has been made this year. Mostly due to the weather ( winter !!) However now the summers here its time to get a move on.
There are only two things to possibly prevent this :-
a/. The Weather
b/. Money
there is also another possibility, work. Our Rota's been changed to a 38 week cycle with supposedly more weekends off, fewer night shifts and less 7 day continuous shifts. Six weeks in and it feels a lot worse than it looks on paper. Maybe I just chose a crap place to start and I know the two people responsible for the rota worked very hard to make it fair/better or that we are still understaffed by 20%. Rant over, back to things MG.
I left the MG in a bad state engine wise tuther winter which saw last summers engine start up mix oil and water together (again) after head re-skim, pressure test, block head stud hole chamfer and new Payen gasket. So, I've had all winter to re-think after some considerable considering a new/refurbed/second hand "good"/complete engine out/rebuild thinking it may be that the block is cracked.
After some discussions with knowledgeable people I've come to the following conclusion.
Cast Iron blocks rarely crack hence the design of core plugs. Twas the discovery of two leaking ones that lead me to suspect a cracked block in the first place, the oil/water mix confirmed this after the head skim.
I was wrong.
It is more likely that the head studs have " bottomed out" or some dirt got between when fitting the head. So, come time off of more than one day that coincides with a dry wind free day and wife has not nagged about some doom laden urgent DIY task to be done, I'll start on the engine.
Firstly is a good tidy up of the driveway then to the cars inside where all my tools and stuff are stored.
What prompted the post is that I've just done a big spurt of DIY garden related stuff viz :- removed front fence to be painted by wifey ( done, waiting purchase of new fence posts and me/son1 to refit) chopped down three large conifers and took to dump-it site (70% wifey 30% me). In a fit and flurry of "got to do it now" from wifey, she's been a blur of activity and arranged a professional tree surgeon to remove the huge Douglas Fir tree in the back garden ( and take it away) and he needs good access along the driveway to his tree munching machine. So since the MG has developed flat tyres at the front and he said it needs to be "repositioned" out of the way of lumberjack type blokes with chainsaws, a local garage put wind in them for me. A very helpful chap he was too and a classic car enthusiast ( He has a 2.8 Capri). The local fillings stations wind machine that just emits continuous burps of 20/30 psi just wouldn't do the job. Helpful chappies machine give 150 psi max, and he did it for free.
To keep it interesting here's a shot of the "Mix" Opposite # 4 cylinder.

and the new Black Payen gasket before head fitting.

I hit a crappy section of the Rota now which means lots of 4-12pm shifts with midweek days off. So wish me luck that fate, the weather, Wifey becomesnagless kind/ charming and enthusiasm/wisdom returns. Sounds like the strapline for "The Perfect Storm".......Hahaha......int life great !
Well what else would you expect from good ole Lostsock.
Very little progress has been made this year. Mostly due to the weather ( winter !!) However now the summers here its time to get a move on.
There are only two things to possibly prevent this :-
a/. The Weather
b/. Money
there is also another possibility, work. Our Rota's been changed to a 38 week cycle with supposedly more weekends off, fewer night shifts and less 7 day continuous shifts. Six weeks in and it feels a lot worse than it looks on paper. Maybe I just chose a crap place to start and I know the two people responsible for the rota worked very hard to make it fair/better or that we are still understaffed by 20%. Rant over, back to things MG.
I left the MG in a bad state engine wise tuther winter which saw last summers engine start up mix oil and water together (again) after head re-skim, pressure test, block head stud hole chamfer and new Payen gasket. So, I've had all winter to re-think after some considerable considering a new/refurbed/second hand "good"/complete engine out/rebuild thinking it may be that the block is cracked.
After some discussions with knowledgeable people I've come to the following conclusion.
Cast Iron blocks rarely crack hence the design of core plugs. Twas the discovery of two leaking ones that lead me to suspect a cracked block in the first place, the oil/water mix confirmed this after the head skim.
I was wrong.
It is more likely that the head studs have " bottomed out" or some dirt got between when fitting the head. So, come time off of more than one day that coincides with a dry wind free day and wife has not nagged about some doom laden urgent DIY task to be done, I'll start on the engine.
Firstly is a good tidy up of the driveway then to the cars inside where all my tools and stuff are stored.
What prompted the post is that I've just done a big spurt of DIY garden related stuff viz :- removed front fence to be painted by wifey ( done, waiting purchase of new fence posts and me/son1 to refit) chopped down three large conifers and took to dump-it site (70% wifey 30% me). In a fit and flurry of "got to do it now" from wifey, she's been a blur of activity and arranged a professional tree surgeon to remove the huge Douglas Fir tree in the back garden ( and take it away) and he needs good access along the driveway to his tree munching machine. So since the MG has developed flat tyres at the front and he said it needs to be "repositioned" out of the way of lumberjack type blokes with chainsaws, a local garage put wind in them for me. A very helpful chap he was too and a classic car enthusiast ( He has a 2.8 Capri). The local fillings stations wind machine that just emits continuous burps of 20/30 psi just wouldn't do the job. Helpful chappies machine give 150 psi max, and he did it for free.
To keep it interesting here's a shot of the "Mix" Opposite # 4 cylinder.

and the new Black Payen gasket before head fitting.

I hit a crappy section of the Rota now which means lots of 4-12pm shifts with midweek days off. So wish me luck that fate, the weather, Wifey becomes
Monday, February 25, 2013
Its been how long.............!!
Looking at the date of the last post has made me guilty and a little embarrased that I've ignored all you followers and the MG.
So to keep you all up to date, The life of lostsock is as follows in no specific order of importance or date :-
Got permanent contract at work, following straight on from early Feb 2013 temp contract end.
Son twin 1 off to Stafford Uni Sept 2012
Daughter twin 2 considering other offers from many Uni's after year off.
Spent most of last 6 months with me and/or wifey trolling cities for twin 2's choices of Uni ( Glasgow, Newcastle, Manchester x 2, Sheffield, Bristol, York, Leicester and Nottingham - All Medical stuff)
Spent fortune on my (Wifeys Clio) as it was our (my ) only means of transport to/from work.
Bought new-ish Peugeot 207 for better mpg/commuting/running costs ( Wifey has her Clio back..yay)
Finances take a hit since kids are no longer kids anymore and despite me earning, overall income is lower !!
The weather since Sept 2012 has been crap, finances low and motivation for MG completion low.
Working shifts at a busy NHS trust makes me very tired and weeks without seeing daylight have become normal.
And last but not least..............motivation to finish the MG is back ( as soon as the weather improves, and I get the time off for more than 2 consecutive days)
So a recap MG wise. The engine is maybe no good. Its puzzled me the last 6 months as to why oil/water is mixing. The head has been off, skimmed and pressure tested and re-fitted with a Payen gasket and torqued down correctly.
Maybe I've not cleaned out all the Mayo from pre head off test run. Maybe there is a crack somewhere in the block........how do I find out though ?
I've decided not to worry about it now since the engine is full of oil and good quality antifreeze. I'll do what I typically always do...ignore it. The worse case scenario is a new engine ( £1200 full recon with warranty or risk buying second hand block to rebuild myself)
However with so much bodywork still to do and the brake/clutch masters not functioning 100% the immediate work will all be bodywork related. Typically fitting windows and winder mechanisms. Aligning doors and bonnet and wings. Repairs to rear window and rear wing underside.
And so it goes. More news as it gets completed............soon with photos hopefully.
Forgot to say also Ive managed to delete the mass ( 95, yes 95) spambot messages left as comments offering everything from financial advice to sex toys. Unfortunately I may have accidently deleted some of your comments too, so sorry. Please repost as I can't rescue them and I need the encouragement.
Sunday, October 07, 2012
Life at last !!!!!
Brakes iffy, partial clutch, battery takes no charge and no exhaust but it moves.
Sunday, September 23, 2012
How's this fit together ?
After a lovely holiday in Greece and some new found enthusiasm I set too bolting back the engine bay ancillaries.
First up was emptying the gearbox of oil. I did this a few weeks ago but left the 4 litre milk container in situ whilst I holidayed. I wondered long and hard about the amount to put back in. Several of the usual sources said 4.5 pints ( UK pints) some said 6 pints. WTF ? Well almost 4 pints came out as I've the plastic milk container to prove it. More searching revealed that the gearbox ( with Overdrive takes 6 pints) luckily found the answer in my Haynes manual, who says men don't read the instructions.
Filling up was a farce. First I undid the wrong topping up bolt. I knew from my meanderings it was tricky to fill up the gearbox as the filling hole is rather awkwardly positioned. I assumed it was just out of sight under the firewall/scuttle and just ( only just) accessible from the engine bay. It was a real struggle undo the nut with very limited access. How to fill/get a funnel/pipe in there though ?
As it happens whilst reading the Haynes manual I read the following chapter and it all came to light, viz-:
1/. Drain the Overdrive at the same time as the gearbox, they share the same oil.
2/. The filler plug is also a filler/leveller plug and is located on the LH side of the gearbox, access from underneath the car.
That cheered me up no end as I now had a definite plan to work to and as long as I remembered to replace the drain plugs we're off to a flying start.
That was the easy bit.
Removing the filler plug was easy enough, I had TWO sizes of funnel to re-fill with and a mighty Pneumatic hose length ( 400mm) to do the job.
It was too big in diameter to fit into the drain hole !!
More rooting around in the many plastic boxes and food bags inside the car gave me the ideal pneumatic hose size. This hose came directly off a PBE- P14, 5 Ton hot stamping machine that had been skulking around in my old "work" toolbox ( the hose, not the machine), along with a multitude of pneumatic fittings and metric nuts, bolts and washers. A quick soak of one end in wifeys favourite mug + boiling water saw the end slip over the funnel nicely.
I even had a calibrated measuring jug left over from the brake bleeding session. Or should that be "bleeding brakes" ? Max capacity 2 pints. No worries, 3 jug fulls should be perfect.
Well what a performance. It took ages for it to run down the pipe/ funnel and into the gearbox. At least 45 mins per jugfull (2 pints), maybe longer as I kept scroaming under the car to wiggle the pipe, lose some dribbles, mop up, pull the pipe, shake the car and ponder on the carb linkages I put together wrongly.
After 2 jugs (4pints) I called it a day. After all it was 5 pm on a Saturday and my team had lost at home.
The following day saw me up early and at it like a man possessed.
Between the 5 minute top ups of the small funnel I loosened the RH carb and turned round the throttle linkage, fitted the springs and throttle cable, oil cooler and pipe ends, fitted the Alternator and coil, and found the radiator, hoses and screws.
The alternator was a swine. When first fitted the pulley was not in line with the other two pulleys, at least half a pulley forwards. Loads of head scratching, spannering and jiggling saw me put it back as it was to start with, as brute force and ignorance was needed, not careful logic.
So the moment of truth will arrive in the next week or two.
What moment of truth I hear you ask !
Well I have my suspicions that the block is cracked.
a/. two core plugs have been tapped firmly home after weeping rusty water
b/. emulsified oil, hence the head gasket change
c/. I left it all winter full of water with no antifreeze in, hence above.
So next up is another purchase of B&Q's 20/50 cheapo oil, Winns engine flush and decent anti corrosion/anti freeze for the start up/
Before that though I have to put a large coach bolt through the driveway gate or I can't open the gate without fear of it falling on beloved MG. Then enlist help pushing car down drive, reversing it out and back down the drive so I can start it nose to nose with family Clio runabout as "jumper". Not that easy with Son No 1 now away at Uni and only 2 girly girls in the house.
Wish me luck.
Bye the bye.........Why no comments ? Listen guys i need em. Its a lonely life being skint and clueless. Go on help make my week.
Monday, August 27, 2012
A little progress at last
So the enthusiasm has returned, against all the odds at that. Why ? Well work has been tough of late. Lots to learn, lots to remember, lots of things not to do and many many patients.I feel I'm getting to grips with it all now but I'm still regarded as a "newbie" even though I'm one of the oldest there.
I've also been very tired each night and weekends. But, and a very big but wifey booked a holiday in Greece starting early Sept and gifted me £200 from her inheritance ( It also paid for the holiday) so I've had a spring in my step since and money to spend.
I've had the head skimmed ( and pressure tested, it passed) at a local shop and a fine job they did for £75. Got "Payen " gasket/set, cheapo 20/50 oil from B&Q ( Yes, good enough for me as I'll be replacing it soon after a good run and flush).
The head was collected on Sat morn and I devised a cunning device to replace the valves. It was a real struggle to remove them and managed to mangle up most of the trusty workmate lips.

I used one of the rubber bumper mounting brackets clamped in said workmate at just the right height ( this took a bit of trial and error) and used a Die wrench levered against underside and over spring cover. It worked a treat and did the job in no time.

I spent ages cleaning engine head and cylinder head before attaching the Payen gasket and making each other meet seamlessly and cleanly. I was going to paint the cylinder head but could not be arsed with all the degreasing, cleaning primering and painting as well as visiting the shops for a suitable engine paint. So on it went. I struggled to remember which studs went where but eventually worked it out and put the new torque wrench to good use by tightening to 30ft/lbs then to 48ft//lbs.
Next on with the exhaust manifold and inlet manifold, followed by the heat shield, new gaskets and very very fiddly carb nuts. The front lower LH nut was a swine and took about 40 mins of hard awkward spannering to complete. I'm sure I used the wrong nut, maybe. But its on and tight.
Still puzzling over the throttle lever mechanism and single spring. WTF does it attach to. Anyways, I left that for now and got on with other things. Fitted Heater valve and new gasket. What a struggle. Again the lower nut was hard to reach and little or no spannering room. In these situations I just sit and have a fag then get back to it, sometimes with a little swearing. Fitted carb/crankcase breather pipes and replaced the long oil cooler pipe ( see earlier post for meeting of alternator & pipe).
I also drained the engine oil into several plastic containers. I say oil, more like yellow/creamy stuff. I should add this was the first job of the latest round of enthusiasm. I managed to spill some under the car when the bottles overflowed. I consoled myself with the fact we'll be having the drive tarmacked anyway. Look !

Not included is the gearbox oil which is draining into a 4pt plastic milk bottle as we speak. It looks very old and more importantly BLACK. On day two I puzzled some more regarding the hoses and carb linkage and gave up again. Well, I did solve the pipe problem by viewing some old photos, then connected the servo vacuum pipe. Next up was the front end modification to chrome bumper. I have the bumper, mounting bracket but not the chrome attachment screws. Anyways I'm fitting a MG spoiler rather than the original lower valance which would need more welding and cutting. I had decided earlier on in the head gasket issue that I would remove the front chassis rails whilst the radiator and oil cooler was out. It was easier than I expected. A few slices with the cutting disc in scary grinder and some boring grinding of the chassis base spot welds and job done.
Then I got fed up of the intermittent but light drizzle and called it a day so I could do nothing for the rest of the bank holiday.


Next up is welding plates onto the end of the rails above, fitting of the coil, Alternator, Radiator and oil cooler/pipes. New valve for front tyre, buy some engine flush and coolant/inhibitor + diff oil and top up, fill with cheapo oil and water then ready for start up and test drive up/down cul-de sac ( after testing brakes and engine temp) I think I might temporarily fit the dash for this, dunno yet.
First up though is a holiday in Greece ( all inclusive = yahhhaaay) with wifey and NO KIDS.
Monday, July 30, 2012
Update on ponderings
After the mish mash of one afternoons potterings taking off the cylinder head I've left the MG dormant for a while.
No particular reason. The weekends have been good weather but work has taken its toll. I must say being an itinerant industrial printing machinery salesman ( or Student for that matter) did leave me with much more energy for weekend frolics. I've not done such a physical job for over 35 years and when your in your mid fifties a lazy day or several is a must.
The ponderings are this :-
Does the "mayo" come from a cracked Head or Block ?
Is it because I didn't tighten the Head nuts according to the correct torque ?
Has my stupidity of not adding antifreeze during winter had terrible results ( Cracked block ) ?
My answer/s are still unclear.
a/. Cracked or warped Head ? Warped should see a £30 ish head skim correct this. Cracked , well time to save for a new unleaded head..........big probs ( No/not enough cash )
b/. Cracked block.....even bigger probs and a big long job. Not something I could do without a garage or have confidence to know what parts need replacing/ regrinding.
c/. Just buy another Head gasket " Payen type" and torque wrench, fit, flush and forget about .
d/. Bob-on with the s**t-load of other bodywork sanding and flatting, fit doors and winders to align doors, wings plus tackle front end chrome bumper mods ( alter indicator holes, grind off front chassis rails, weld captive nuts for bumper irons, modify lower valence for aforementioned.
As a precursor to any of this I've bought a torque wrench.....yahoo. This new toy ( arrives this week) will allow me to go over the front and rear suspension and leave me feeling a little happier knowing its all tickety boo.
I still wonder if I've fitted the correct front springs. I bought them on E-bay from a guy in the same town as me ( actually 1/4 mile away) and he said they were from a chrome bumper car. Trouble is the front end looks very high. Methinks even though they were shorter they may have been from a V8 thus much stiffer resistance for my car.
Just another worry of restoring a classic car on a shoestring and feckless heart.
I'm sure the enthusiasm and energy will come back....hopefully soon. I'm hoping the torque wrench does the trick.
All things considered I've achieved a lot this last few years and accomplished the seemingly impossible with time, patience, Internet trawling ( look up John Twist- University motors, on YouTube & BBS subjects on MG forums) and determination. So' I'm not going to fall at the last and supposedly most pleasurable hurdle of fitting up and interior re-trim ( The most costly though )
Wish me luck, send me money, post encouragement or just stop by to say a few words I need 'em all.
Sunday, July 15, 2012
Dotty, Seals, and emulsion
Where to begin. First of all an apology for not posting sooner. Where does time go ?
My only excuse is that starting the new job has seen me exhausted each night with the mass influx of information, regulations, new faces, protocols and doing the job. It is said by wise old sages that the first six months of a Radiography job is a steep learning curve, well they're wrong. There's no curve at all, its linear and vertical. The good news is that my six month contract has been extended to a further six months, now taking me to mid Feb, prior to anxiety kicking in re permanent employment. I also have an interview later in the week for a permanent job in one of the other hospitals I rotate to every six weeks, so wish me luck.
On to things MG wise.
Last post saw me wrestling with the conundrum of brake and clutch bleeding, after replacing all the seals possible on master and slave cylinders.
The Clutch master is a swine to remove. Its lower bolt is located under the main body, and only accessible via the dash end ( fortunately removed in my case) and some expert bodging of tools I'd acquired. I bought a 250cm ( 10") extension and ground a 1/2" square on the end and connected it to my (wifeys) knuckle extension. Even allowing for only one flats turn at a time and ages to get the socket onto the nut each time it was a real pain. A pain mostly because the seal kit was crap. On and off the master came at least for times, between each set me pleading for someone to help press the pedal whilst I was underneath opening and closing the bleed screw. Each time the clutch pedal was either too soft or said master piston stayed "in" after depression.
Depression is an emotive word, its how I felt after the umpteenth time of M/C removal and dis-assembly. Its a good job I bought 5 litres of DOT 4 Fluid. I've used half of it already, mostly dappled on the driveway floor....................Hence " DOTTY"
Depression crept in thinking I'd need a new Clutch M/C.......to expensive for me to justify to Wifey after the £ 200 of suspension and brake parts I was dying to road test. Hence my frustration at cheap but crap seal parts thwarting me. The brake M/C problem was similar, only there was no pressure emitting from the rear 3 way union at all. In the end I purchased a new brake warning switch and seals ( 2 types). But, and a big but, business end of the small cylinder to operate the switch would not budge from its long thin hole. The fantastic Mr Twist says just give it a firm tap " in gloved hand" on something solid. No chance. After several weekends of penetrating fluid soaking and poking it would not budge. Eventually I resolved it by using a punch to drive the rod in 2/3mm, then using a small electrical screwdriver to prise forward the rod. It mangled the rod somewhat but heyho. The brake warning switch the rod acts on was pants( £16.00). It disintegrated the first time I screwed it in. I spent ages trying to repair it but gave up. I ordered ( for £ 4.85) a 5/16" UNF bolt to blank off the port and left the useless rod/spring/tiny "o" ring out of the equation. Quess what ? It worked !. A fit of benevolence from wifey saw her sat in car ( reading Sunday supplement) whilst I bled all for corners. Its not perfect, with some sponginess but............F*** it, after so long another job done.
What had preyed on my mind though was the emulsion in the rocker cover and thermostat housing.
I took the bull by the horns today and fetteled it. LOOK !

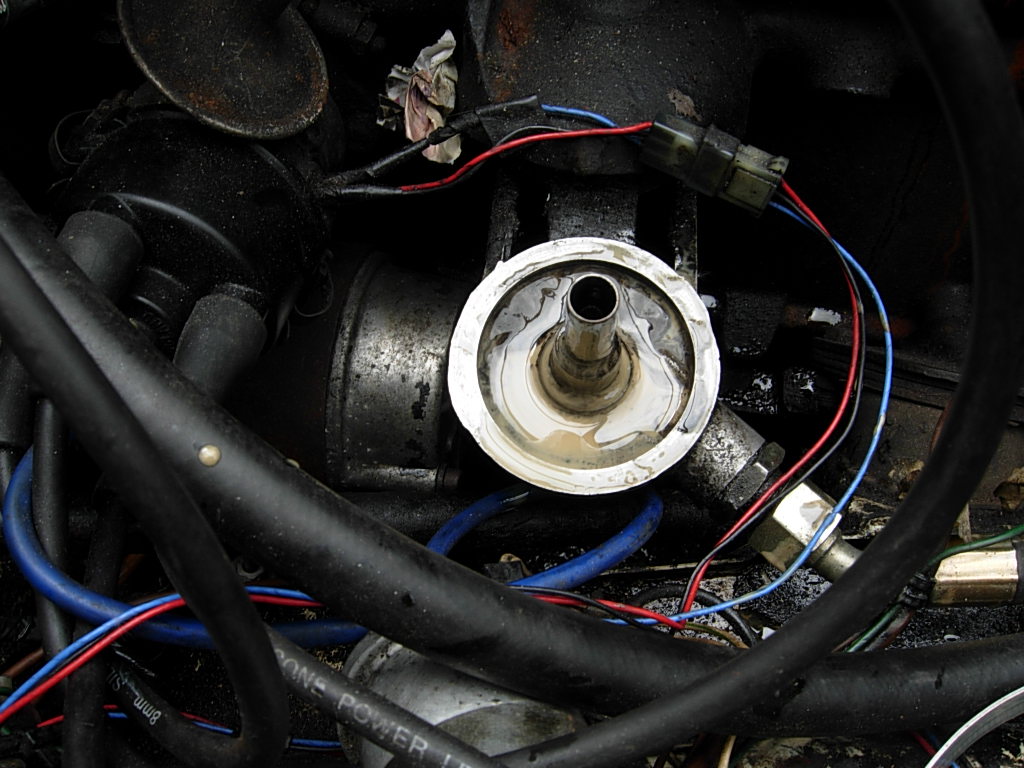
Top shows the cylinder head removed opposite no 4 cylinder. Bottom the oil filter when removed.
Since I'd removed the jubilee clips to the top rad hose ( to fasten round oil filter to remove it) some weeks earlier I decided to remove the rad, flush it out both ways and then some more. It was easy, which made a nice change from the last several weeks.
Some struggles with the twin carbs and manifold nuts but done rapidly if not a little fiddly then on to the head nuts. Surprisingly they came out easily after a few grunts. Could this be the problem ? did I torque them down sufficiently when I replaced the gasket the first time? I didn't have a torque wrench ( still don't- despite asking for one the last three Christmases) Did I use too much gasket sealant ? Should I have used sealant at all ? Was the gasket another cheap aftermarket crappy thing ?
Who knows. Here's after cleaning up half of the block top.


There was loads of rust at the water holes which makes me suspect I should have added antifreeze before now. A decision I regret. Good ole Lostsock. Never the wise when it comes to a peaceful life. It may also explain why 2 core plugs sort of tried to escape.
As it stands, its payday on Friday so I'll treat myself to a new original spec "Coopers Payen" head gasket, engine flush stuff ( which one though?) and coolant antifreeze/rad flush.
Next up will be the engine start and engine temperature monitoring, more bodywork (sanding, sanding and RH wing attachment).
P.S by way of a slight understatement we've had quite a bit of rain this summer and not just weekends.
Subscribe to:
Posts (Atom)