
My name is Paul. Recentlv retired Radiographer in the NHS, former toolmaker, draughtsman & Sales engineer. This is a blog of my pastime . I have now have a brand new garage In which to build my dreams, no lights or electrics yet. So follows is my journal of the restoration of a 33 year old MGB-GT .
Tuesday, November 19, 2024
Sunday, November 03, 2024
Head scratching is not good for the nerves
The horn button is proving somewhat problematic, an understatement if ever there was one.
The horns worked, I knew this. Last year it took ages to get the right connections via a relay. Eventually managed it. The Haynes and Advance diagrams are wrong !
The horn push lever acts a an earth to activate the circuit. I wondered why there was constant power on the purple circuit but no horn sound.
Back to the present, no horn.
A wire did come loose, or maybe two on the relay. Regardless of which way round it is wired no joy.
I had found online two diagrams, both different, but one did show the switch via earth. These did not work !
I did find the two wires that when connected and the horn lever depressed continuity sounded, yay.
However, each wire had two wires in the spade connector ????.
Then the bottom fuse in the fuse block keep blowing.why?
Then a continuity check on the bottom fuse holder spades gave nothing, why??
It was getting dark by then and the new trusty Rolson torch had given up the ghost anyway.
So with a headache and a night sure to be restless, Morpheus beckons.
Not helped by the fact we are dog sitting for son #1 for two weeks. She has a bladder the size of a walnut but still wakes us ( me usually) at least twice in the early hours for a roam down the garden to pee and bark randomly at leaves rustling, bless her.

How I hate electrics.
Must get the electrician in to wire in some lights for the garage, it may add to my frustrations though.
Not even touched the starter motor or the radiator or the flashers right hand side.
Any advice would be appreciated
Saturday, November 02, 2024
A home at last
Yes, that's right folks the MG has its own home. Dry and spacious, warm and inviting. Smooth floored and draught, damp and rain free..,,,,,!!!
It's only taken 30 years. A garage was there when we bought the house back then, but on moving in day it had somehow disappeared.
''Twas only a rusty, rickety corrugated small thing anyway and we had a lot more on our plate than to worry about the outside of the house. Like that all the lightbulbs had also been removed.
Anyway....digression over and back to the MG.
Lo and behold


What a thing of beauty. Thats where the good news ends though. Still had trouble starting the engine so I bit the bullet and ran an extension from the kitchen into the garage to give the battery a damn good charge for two and a half days.
Great. Cranks every time now. It eventually started but still ran a bit rough, well a lot rough.
Moreover the radiator overflow tank overflowed......again.
Even moreover, the right hand hazard warning light did not flash, neither did the same indicator, pfffft.
It gets worse. The hazard warning switch ( which is only about 3 months old ) disintegrated completely after I had to wrap tape around the outside to stop it/ make it work correctly straight after installation. This really pisses me off, why pay good money for something that is sub standard, poorly designed and never going to last very long anyway. To add insult to injury, I ordered some time ago a new fan switch only to find I already had not one but two ! Ffs.
And that's not the end of the woes.
The horn does not work at all. Not a peep. All the electrics worked a few weeks ago, but since I fitted the steering wheel binnacle/ housing and tidied up all the under dash wiring bundles nuffin.
I've saved the worse till last.
Since the battery is fully operational now most startups the starter motor spins like crazy or grates gearing or does nothing at all. So I guess that's got to come out to be inspected.
A small bit of good news is that the engine runs much much better. I don't really know how. I did re- position the carb linkage links, tighten up the choke cable and generally fiddled with the mixture/s.
Of all the stuff that needs sorting I'm worried about the radiator overflowing as this could be a head gasket failure, maybe something as simple as a thermostat swap or a blockage somewhere in the pipes.
It's nice to know that now I can leave all my tools spread around the garage and just lock up and walk off. Normally I'd have half an eye on the weather then spend ages putting stuff away in the storage box and covering the car and fixing all the springy straps.
More after tomorrows episode of head scratching.
Sunday, October 13, 2024
Inside outside lips and flaps.....guffaw
Another cryptic title which gives no clue as to what I've been up to lately. Well as I type this not much really as the weather has been cold and very damp.
I'm actually about four weeks behind with my blog so I have to do them from memory ( rather than do the sensible thing and read the last blog !!)
So as a recap as much for me than you the last thing I did was start the engine after having it on charge for about 14 hours. Mainly due to the fact the car has to be moved when they come to make the garage.
Yes it runs, still a bit rough, noisey ( tappetty....?, water pump?...Alternator....? Exhaust mounting ? ) And so on, I'm done figuring out so it's going to a specialist soon to figure out why.
I did note that whilst it ran and after several attempts at stop start to try and adjust the carbs the cranking got slower and slower till after about 6 or so attempts the battery died. It had a good 14 V at starting but eventually dwindled to 12 V ...ish. Methinks the alternator is the culprit. It's always been this way since I've had the car. A new battery a few years ago did help but I'm afraid it's back to square one now.
The prob is .......should I just bite the bullet and a/. buy a new one, ( Alternator that is ) b/. ask the local MG specialist to test the alternator or c/. do some proper tests with the multimeter.
The local specialist can be a bit dismissive and terse....pffft.
I'm a real tightwad and don't like forking out for repro items made in China and I'm rubbish at electrical probs especially with my third, yes third multimeter which is still a bit iffy.
So a proper dilemma.
What is done though are the sunvisors. A bit home made-ish but I'm happy with them if only I find the missing screw to hold the passenger one in securely.
One job done, mostly, is the heater core. A second hand one from Andy Jennings ( £15...bargain)
Managed to get the heater cover prised out and fitted core plus some new if somewhat over stuffed sponge surrounds in place.

This shows the heater box half way out, which is what was only really needed.

The heater core in place and ready for final assembly.
Looking at the photos there seems to be a lot of rust around. Trust me when I say that it's the remnants of when the cooling system overheated due to a loose fan wire, which made the overflow tank spray a goodly amount of rusty liquid towards the fire wall. Be reight, only needs a wipe with an oily rag.
But on a lighter note, the heater works will with no leaks from said heater core, it sends heat to where directed by the rusty creaky heater flap and it's warm. Much warmer than most MG enthusiast would have you believe.
Now comes the tricky part. Fixing the two convoluted hoses onto the back of the heater box spigots/ flanges, lips ( guffaw) well below the scuttle and in deep above the transmission tunnel, and keeping them there. Did a a few years ago ( before I knew the matrix was leaking) with black silicone and electrical tape. However since I'm about to re attach It again I see how crap it was fixed before. The lip is only about 5mm/ 1/4" so not easy and hands and fingers do not get anywhere near it as it's behind two trans tunnel re-enforcing struts, albeit with cut outs......ha.
The designers of this obviously had relatives from Barnsley with six multifaceted digits of unequal proportions and spent much time on their back with a neck twisted at an unusual. angle.
So I came up with a master plan of epic proportions, A trip to B&Q saw me buy two 90 deg elbows of 35mm pipe fittings which fitted the scrap section of pipe I had already scrounged from Graham next door.
I must be honest and say I've not fitted it yet but it fits easily over the lips and hoses and with some more silicone and cable ties ensuring the tricky bits are well out of the deep fitment area should be ok. Here's hoping.
Sorry but I forgot to photograph said plumbing....promise I will when fitting.
Next job is to fit the heater controls on the binnacle above the gear shift/ below dash panel. It's all in the same area as the heater hoses but with the aforementioned mods it should make it much easier.
I bought a gear shift Bowden cable from Halfords for the heater control as it had frayed and come loose at the engine block end, again not yet fitted but I forsee no problems...............steady on Fufferfour, that twice you've said that before the event....and we all know what that means !
A lot of time has been taken up with the garden under wifeys instructions and my own quest to improve the lawn but in a couple of days time the garage will be built..........with a home for my beloved...yay.
The struggle does not end there though. Should I insulate it. I need an electrician to run the lights wires and sockets in, what floor covering should I have ?
I know the answer to the last one already, none. Since I tinterweb browsed, I've been inindated with locking tiles, rubber sheet, epoxy paint, vinyl tiles et al.
F*** me, how expensive are they !!!!!!!!. It's a place to work not a 5 star reception area. I might stretch to acquiring a large roll of cheap nylon carpet from the dump it site if possible. After all the MG is a little like me...incontinent and unpredictable. At least it keeps wifey out of the way.
The only down side of late has been the rear window rust. I'd noticed the odd rust bubble under the rubber surround. I've had both windscreen out and thought I'd Kurusted and primed them quite well but on inspection, well apparently not.
It got worse the more I looked.


Probably due to being outside and under cover for many a year and season so it's the first job when the car is in its home. I have already Kurusted and sanded it but methinks it will need more.
Enough for now more in a while.
Thursday, October 03, 2024
Inside strides and staccato steps
The Interior is almost complete. Mostly home made by me using mostly hardboard, contact adhesive, vinyl and 50p foam squares from the craft shop. Where no templates of the rotten old stuff were existing I made them from the masking tape and dirty thumb method.


The trouble is since it's all Black ( headlining, carpet, seats and trim ) it's very difficult to photograph clearly. The rear bench seat took some fiddling to get level as I'd lost the/ some hinge screws and had to resort the the dreaded Teemu screws, which incidentally have been great.
Not so the drills I purchased. I think they make them from OXO cubes.

They are not even the size stamped on them. I resorted to the good ole B&Q Bosch drills.
Next up was the sun visors. Major undertaking. Not what I expected and took several attempts, weeks and much thinking. I thought I may just get away with a nice coat of satin black.When I dug them out from the shed and tested their " flexibility" I could hear the foam crunching like granny's knees.
So I bit the bullet and sliced one open.
I wish I hadn't.
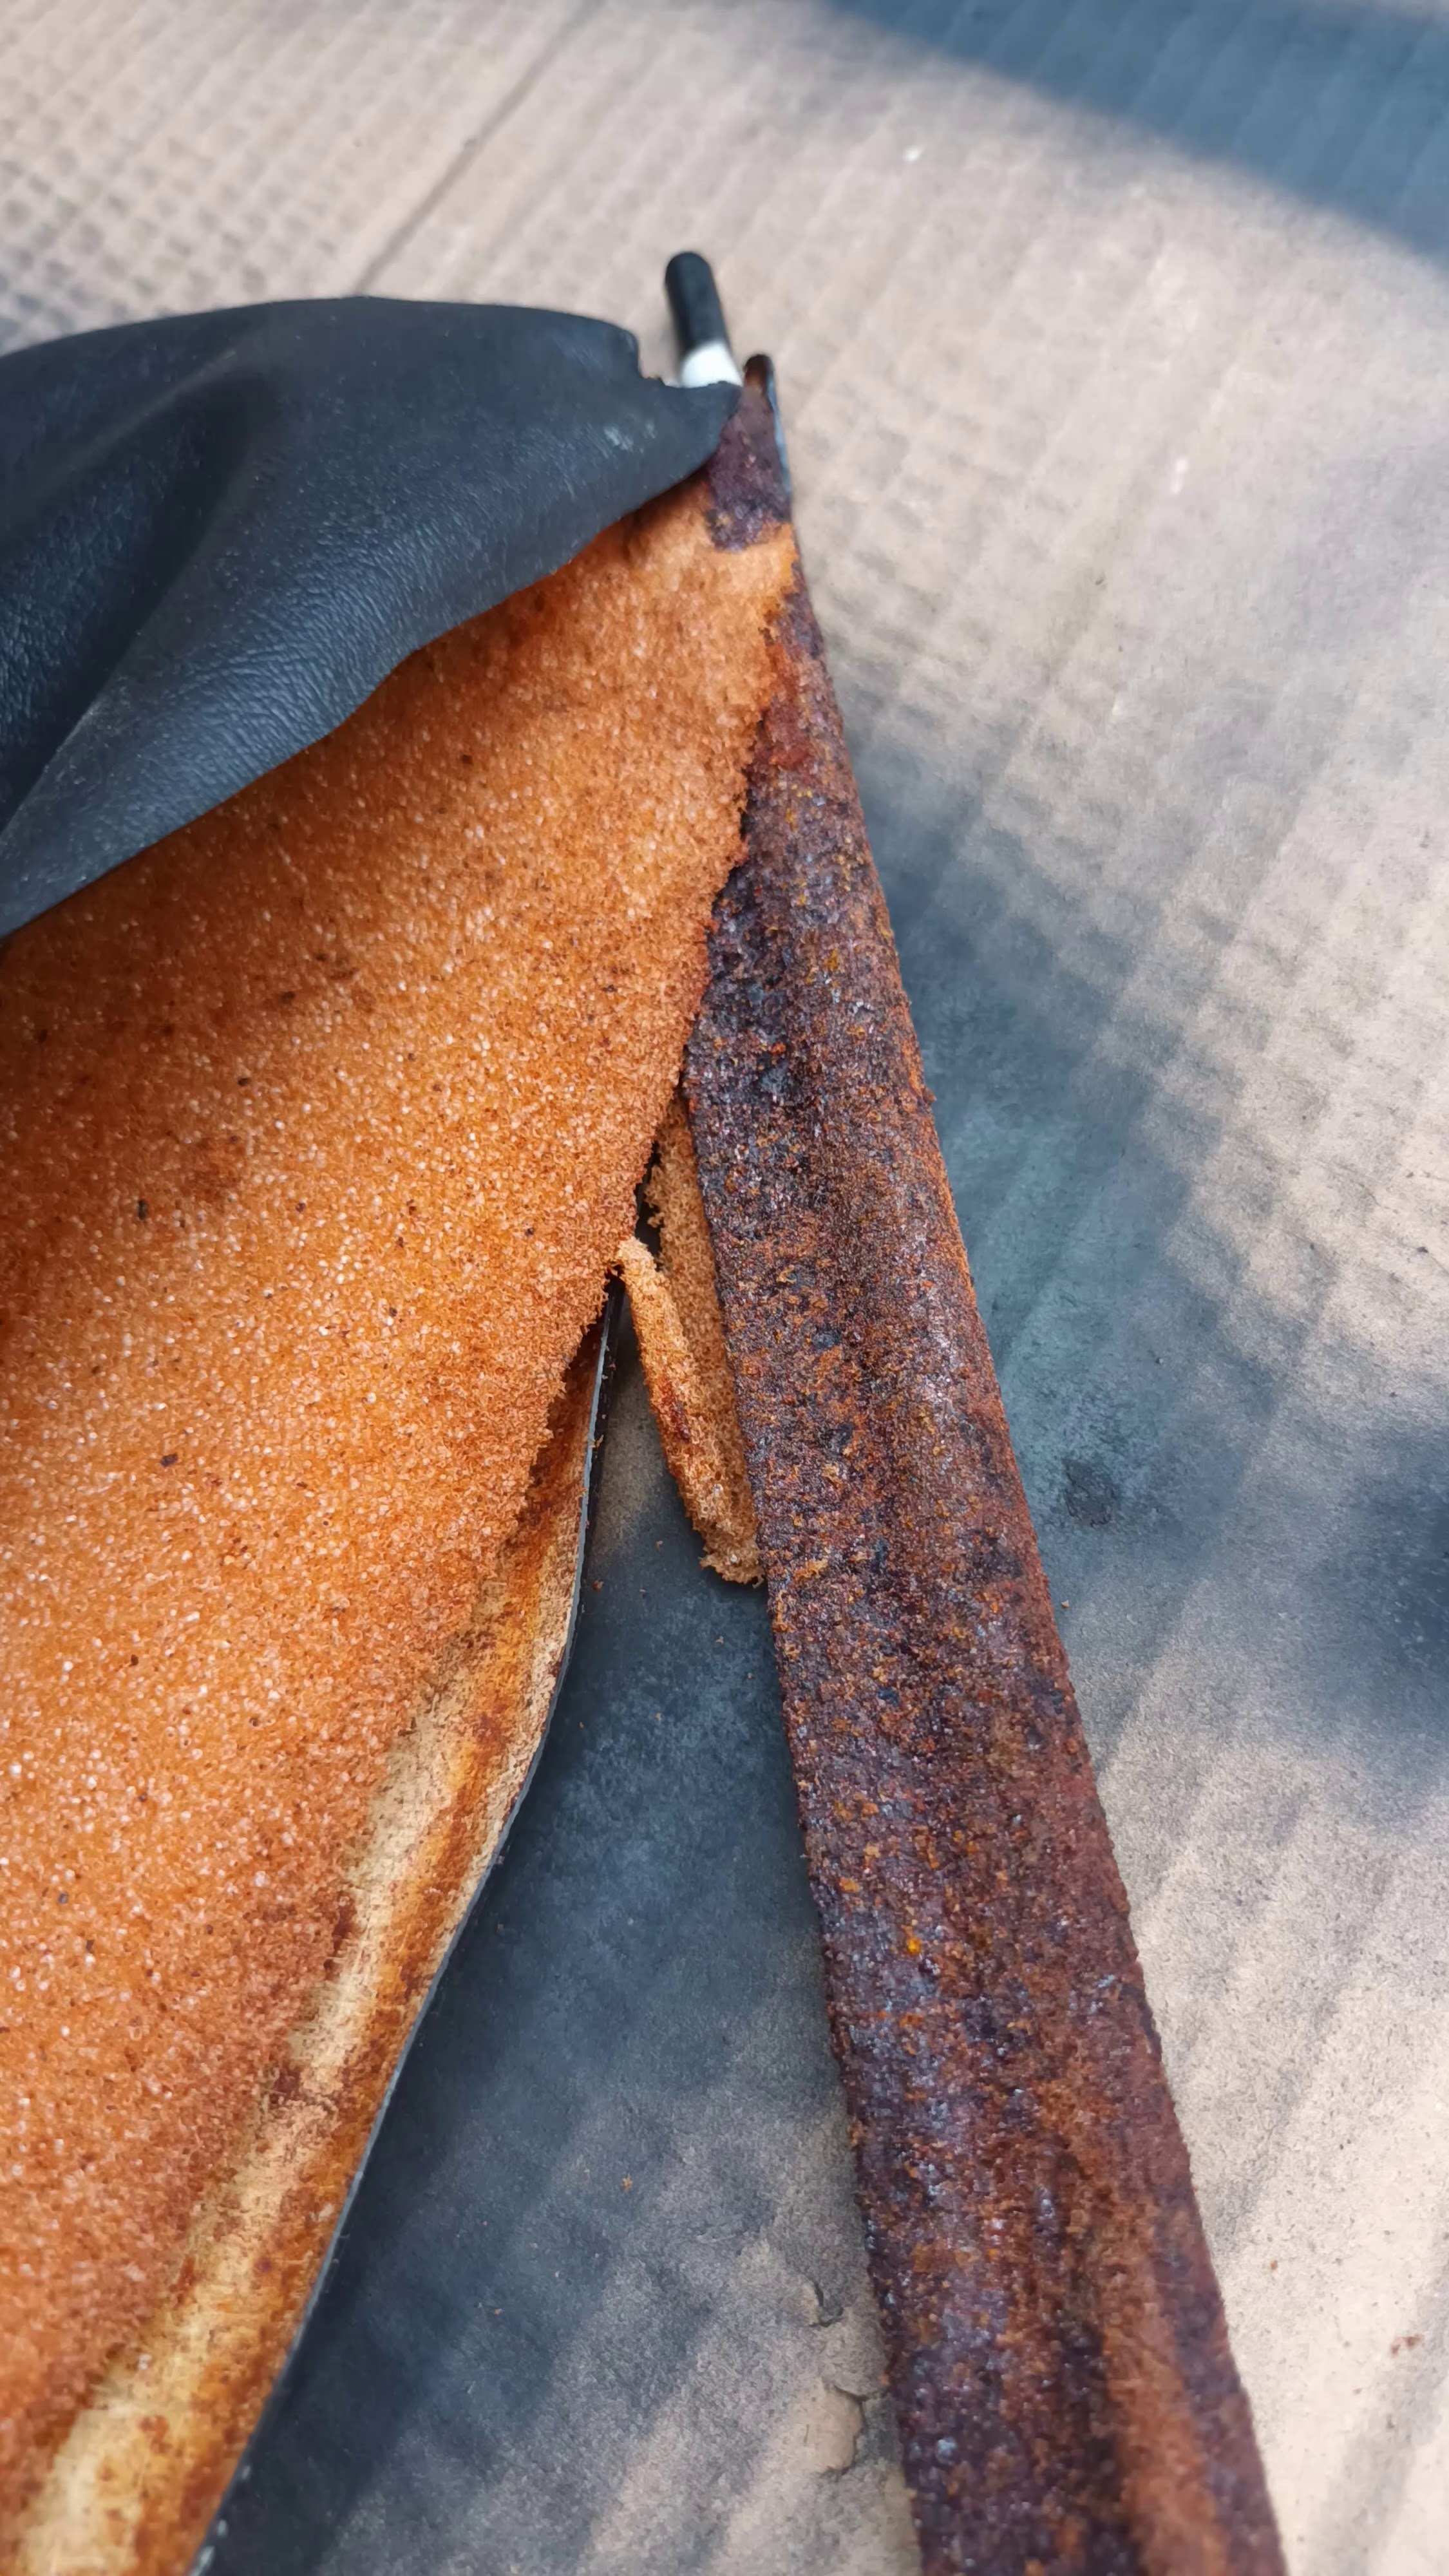

Rusty, crusty and a disgusting mess inside. Even the wire frame had come apart and the foam was just a massive pile of sand.
Here is my attempt to make the body of the flap.


The story gets quite long regarding the outer vinyl cover after two failed attempts, plus I forgot the photo the finished ones.
There is still lots to tell and since I've not posted much I'll leave it for next time which will be soon.
And the Garage will be erected too by then.....yippee.
More soon....promise
Monday, July 08, 2024
Weathered the storm but still tilting to port
A strange title I hear you say.
Let me explain. The ground crew arrived early Monday morning after a frantic week of me and wifey preparing and moving "stuff", mainly the large Keeter storage box and other boxes, plus lumps of wood and pebbles and fences and plants and lots of plant pots full of wifeys pride and joy elsewhere to other patios.
A kind neighbour let me park the MG on his drive together with wifeys trusty Fiat panda. He has just restored his fifth ( yes fifth) MGA. It looks wonderful. Concours restoration far above what I could do. I must admit it inspired me to crack on......but wait there will be a big delay whilst the driveway and garage base is complete.
The MG did start on the second attempt, ran a little, well a lot lumpy. Move it did though and there it stayed for nearly two weeks. The old base looking like it has done for the last 20 odd years.

The new base, flat smooth, large, clean and welcoming.

Sadly to say after standing for 10 days the MG would not move. It did start on the second attempt, ran lumpy for 5 minutes but stalled when I put it in reverse and by that time the battery was too low to initiate ignition. Big strapping son #1 to the rescue. 10 yard push off the drive slightly uphill, 20 yard easy push slightly down hill and onto new garage base. Result.Here it is in its new home.

And being actually worked on one fine day.

One Job I was keen to do was fit the newly acquired seat belts. But first I had to fit the rear wheel inner carpets. I deliberated over about say three lengthy sessions on the toilet and a few nights pondering before sleep as to fit the carpets, glued directly to the inner arch. Or fit the sound deadening that's been in the shed for about 2 years.
Unwisely I decided on the latter. It's quite stiff and not very sticky compared the the rest of the earlier deadening, which was a dream to fit, soft, sticky and extremely pliable. But sadly it was all gone so I used the stiffer silver backed stuff. I had to use some wide masking tape to hold it in place and even then it's not exactly stuck down. I may revert to using the old evo stick contact adhesive as I'm sure I 'll have to use it on the carpet anyway.
I test fitted the sort of moulded arch carpets anyway, did a little trimming and am a little unsure so I did what I normally do, go do something totally unrelated and ran the engine after having the battery on charge for a few hours.
Again it started at the second attempt, ran quite better with the choke on at about 1000 rpm.
'
'Twas then I noticed a slight trace of steam/mist/smoke emanating from side/ front bonnet gap.
A very quick Ignition off move followed by popping the bonnet led to dismay.
Brown boiling water was spraying from the overflow vent straight back towards the scuttle and everything in between.
Moreover, there was a long stream of brownish water flowing out from underneath towards the front of the car.

All over my new garage base. If wifey saw it she would go apeshit full tilt again. Good job she was not at home. A quick sweep up and hose away and all evidence gone......it never happened, did it ?
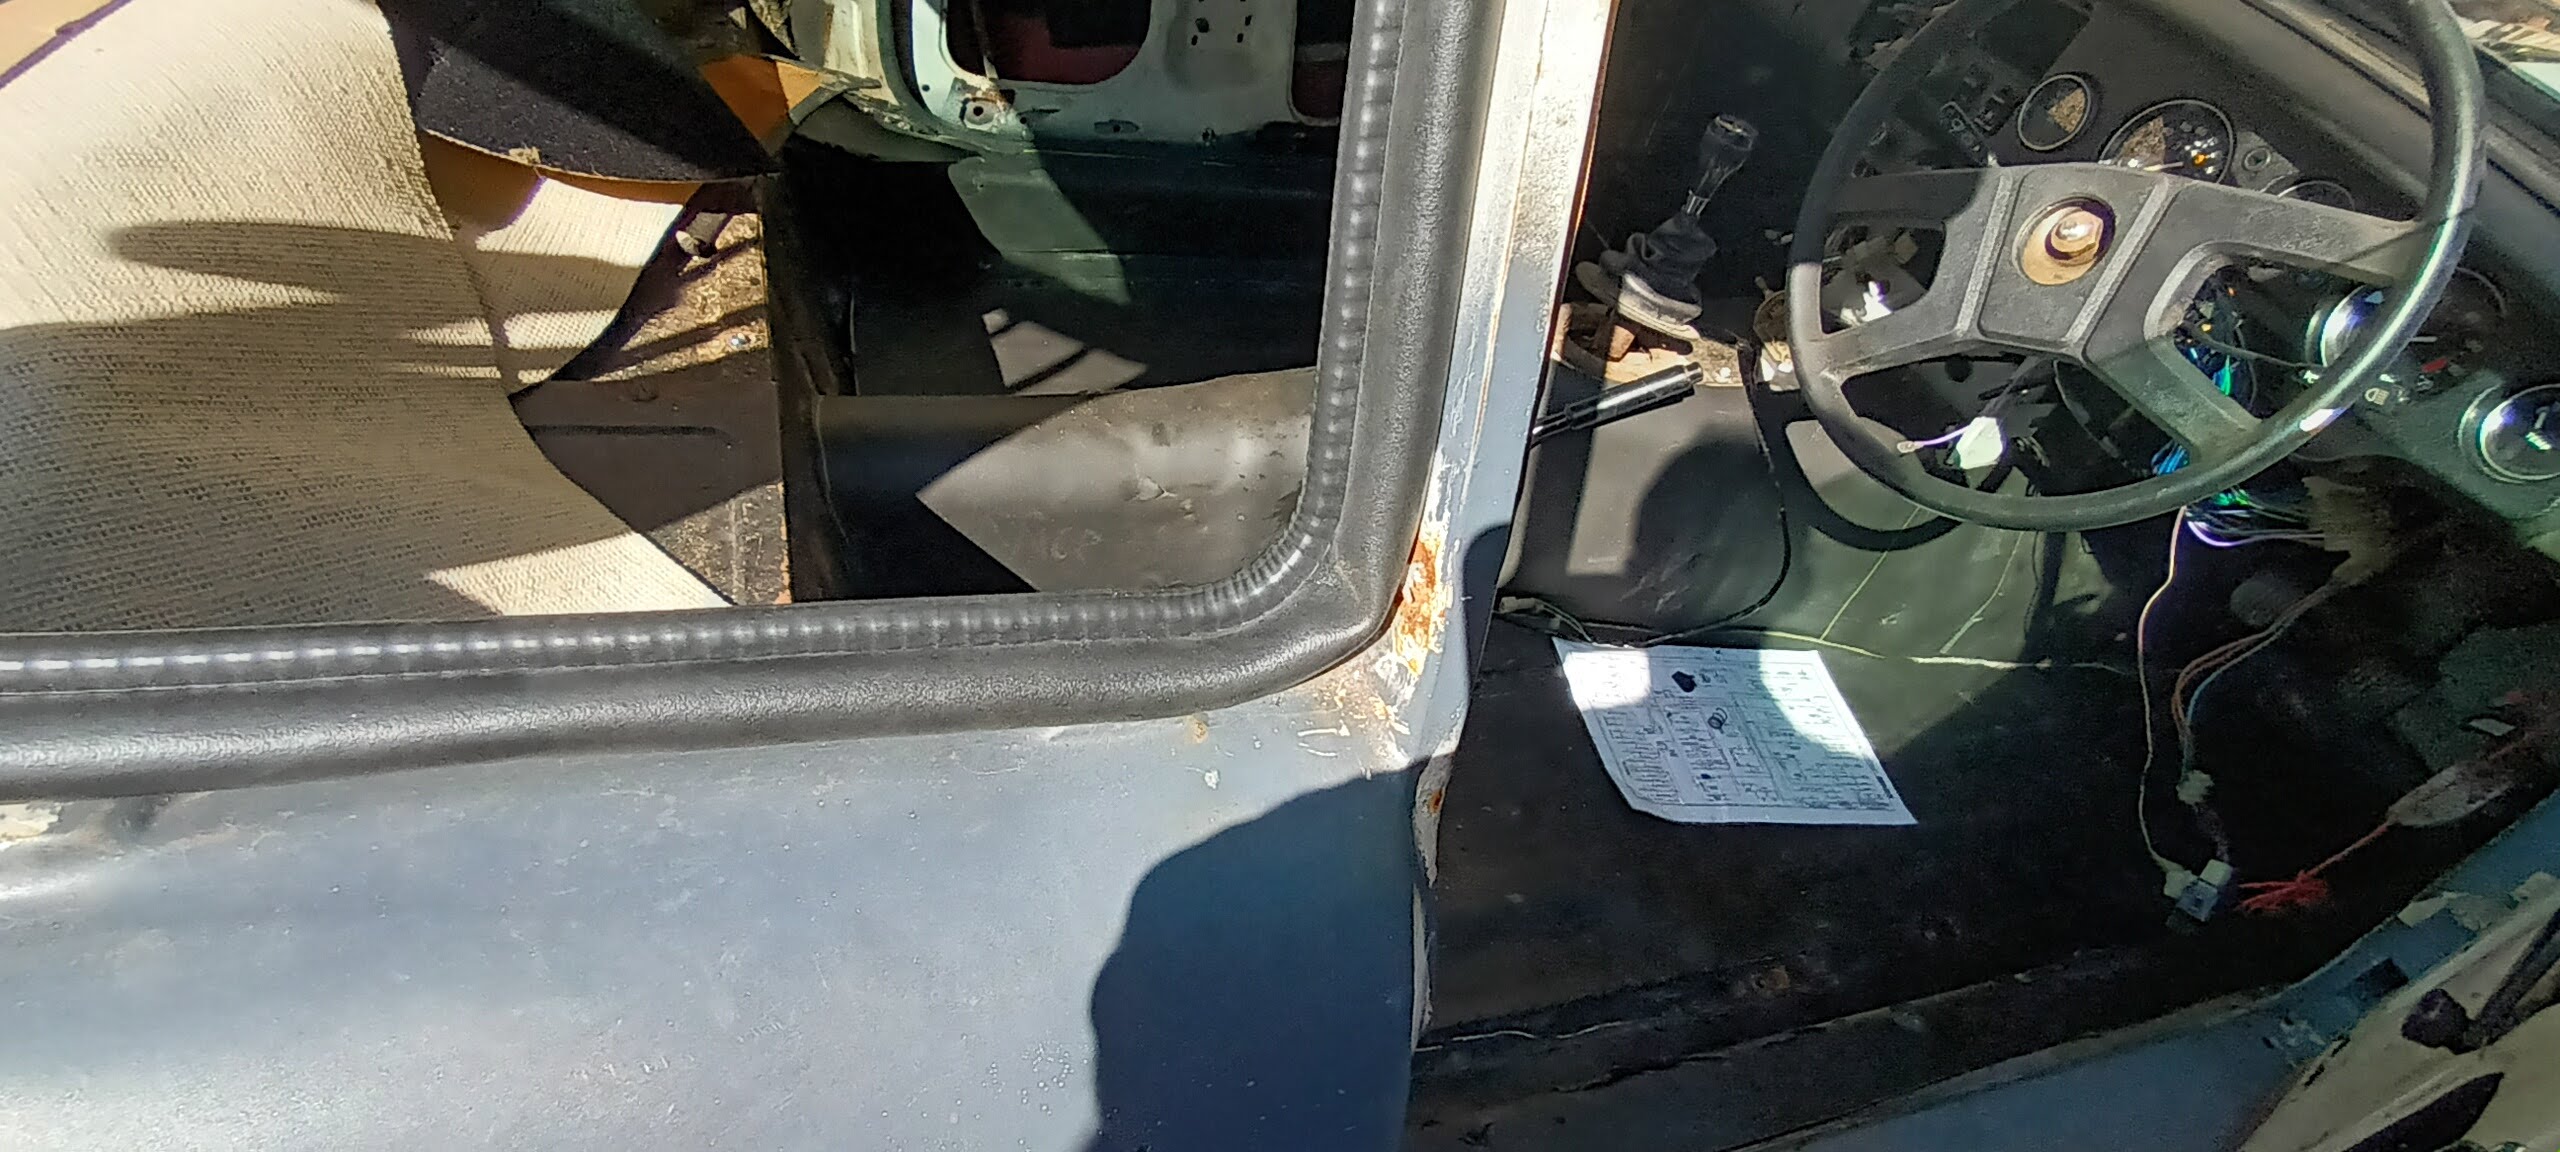
Investigating as to why it happened was more straightforward.

Top left-ish of picture shows broken thermostat temp sensor spade clip adrift from wire. For some reason I'd had it zip tied to the rather hefty engine earth strap which must have been tugging it loose. Prior to this the fan had always worked when the engine got hot. Not this time though.
One other slight annoyance was the wiper arms running slowly and even stopping. This may be to a weak battery, hopefully. If not it looks like a dash out jobby, oh no, just as I was starting to get it all together. I think I'll ignore that for now.......or run away.
Anyway I can still fit the carpets and another job halfway through are the interior rear trim panels.
I made a replacement Left side one using the old masking tape template trick.


I have the closed cell foam sheets and plenty of Interior vinyl to complete this final stage of the interior, barring aforementioned wiper issue. I forgot to mention that I fitted the rear Cant rail. After trying for 2 hours to get the fiddly clips aligned, bending them and getting thoroughly pissed off I used three black self tapping screws. I don't care, it looks good and can easily be removed. I forgot to photograph it though !
Next up I"ll address the engine running issue by fitting the air intakes, filters and other related gubbins.
That's enough for now folks. Rain on the way so I may have a few enforced easy days. Front of house driveway looks good though.
From this

To this in only 10 days


More soon folks. Post a comment too, please.
Tuesday, June 18, 2024
The pressures on full tilt
So a side project has always been to have the front and side driveway re-tarmac'd as well as making the front of the drive wider and a large flat garage base to the rear of the house. Since day one the MG has sat halfway down the drive behind the large driveway gates.
Well after 30 odd years the time has come, and boy has it. The lovely contractor paid us a visit to finalise details then came the bombshell, I can start it next week !!! it'll take just short of a week.......nearest other start date is late August.
I bit the bullet and said " next week please". This sent wifey into a flat spin of panic mode full Tilt.
Plants to uproot, stumps to level, boxes to move, storage Keeter to empty and move, find new temporary places for some plants, order new fencing and paint, repair current fencing on driveway.
''Twas only hard labour for me but for wifey It meant making decisions, something she avoids at all costs.
Whilst I got on with the labour part of moving stuff off the drive and front, about 8 pots and 4 storage boxes ( full of all my tools and misc MG stuff ) she stood in the front garden wondering and prevaricating.
I did dig out 2 large plants then left her to her wondering.
The big thing for me was I had to get the MG looking like it was somewhat finished and would start, stop and be mostly legal and be moved each day off the driveway and onto the road.
Here is a view of my containers that's been my life for years and years.


Below is the very old garage base area that was going to be done " soon", 30 odd years ago.

Taking things in order I first had to mount front and rear number plates. I started the front last month before we decided on a contractor, but I left them loosely attached and poorly aligned. I left them like that. I needed to make a bracket to attach behind the bumper but in front of the " L" mounting brackets.
I decided to make one from the rear bumper too. The trial one I made a few weeks ago from a Fiat Panda sill section was too weak and flimsy.
I did find a large sheet of powder coated Aluminium 3mm thick left over from the new TV purchase so I utilised it, waste not want not, up cycling and all that.

Here it is marked out.
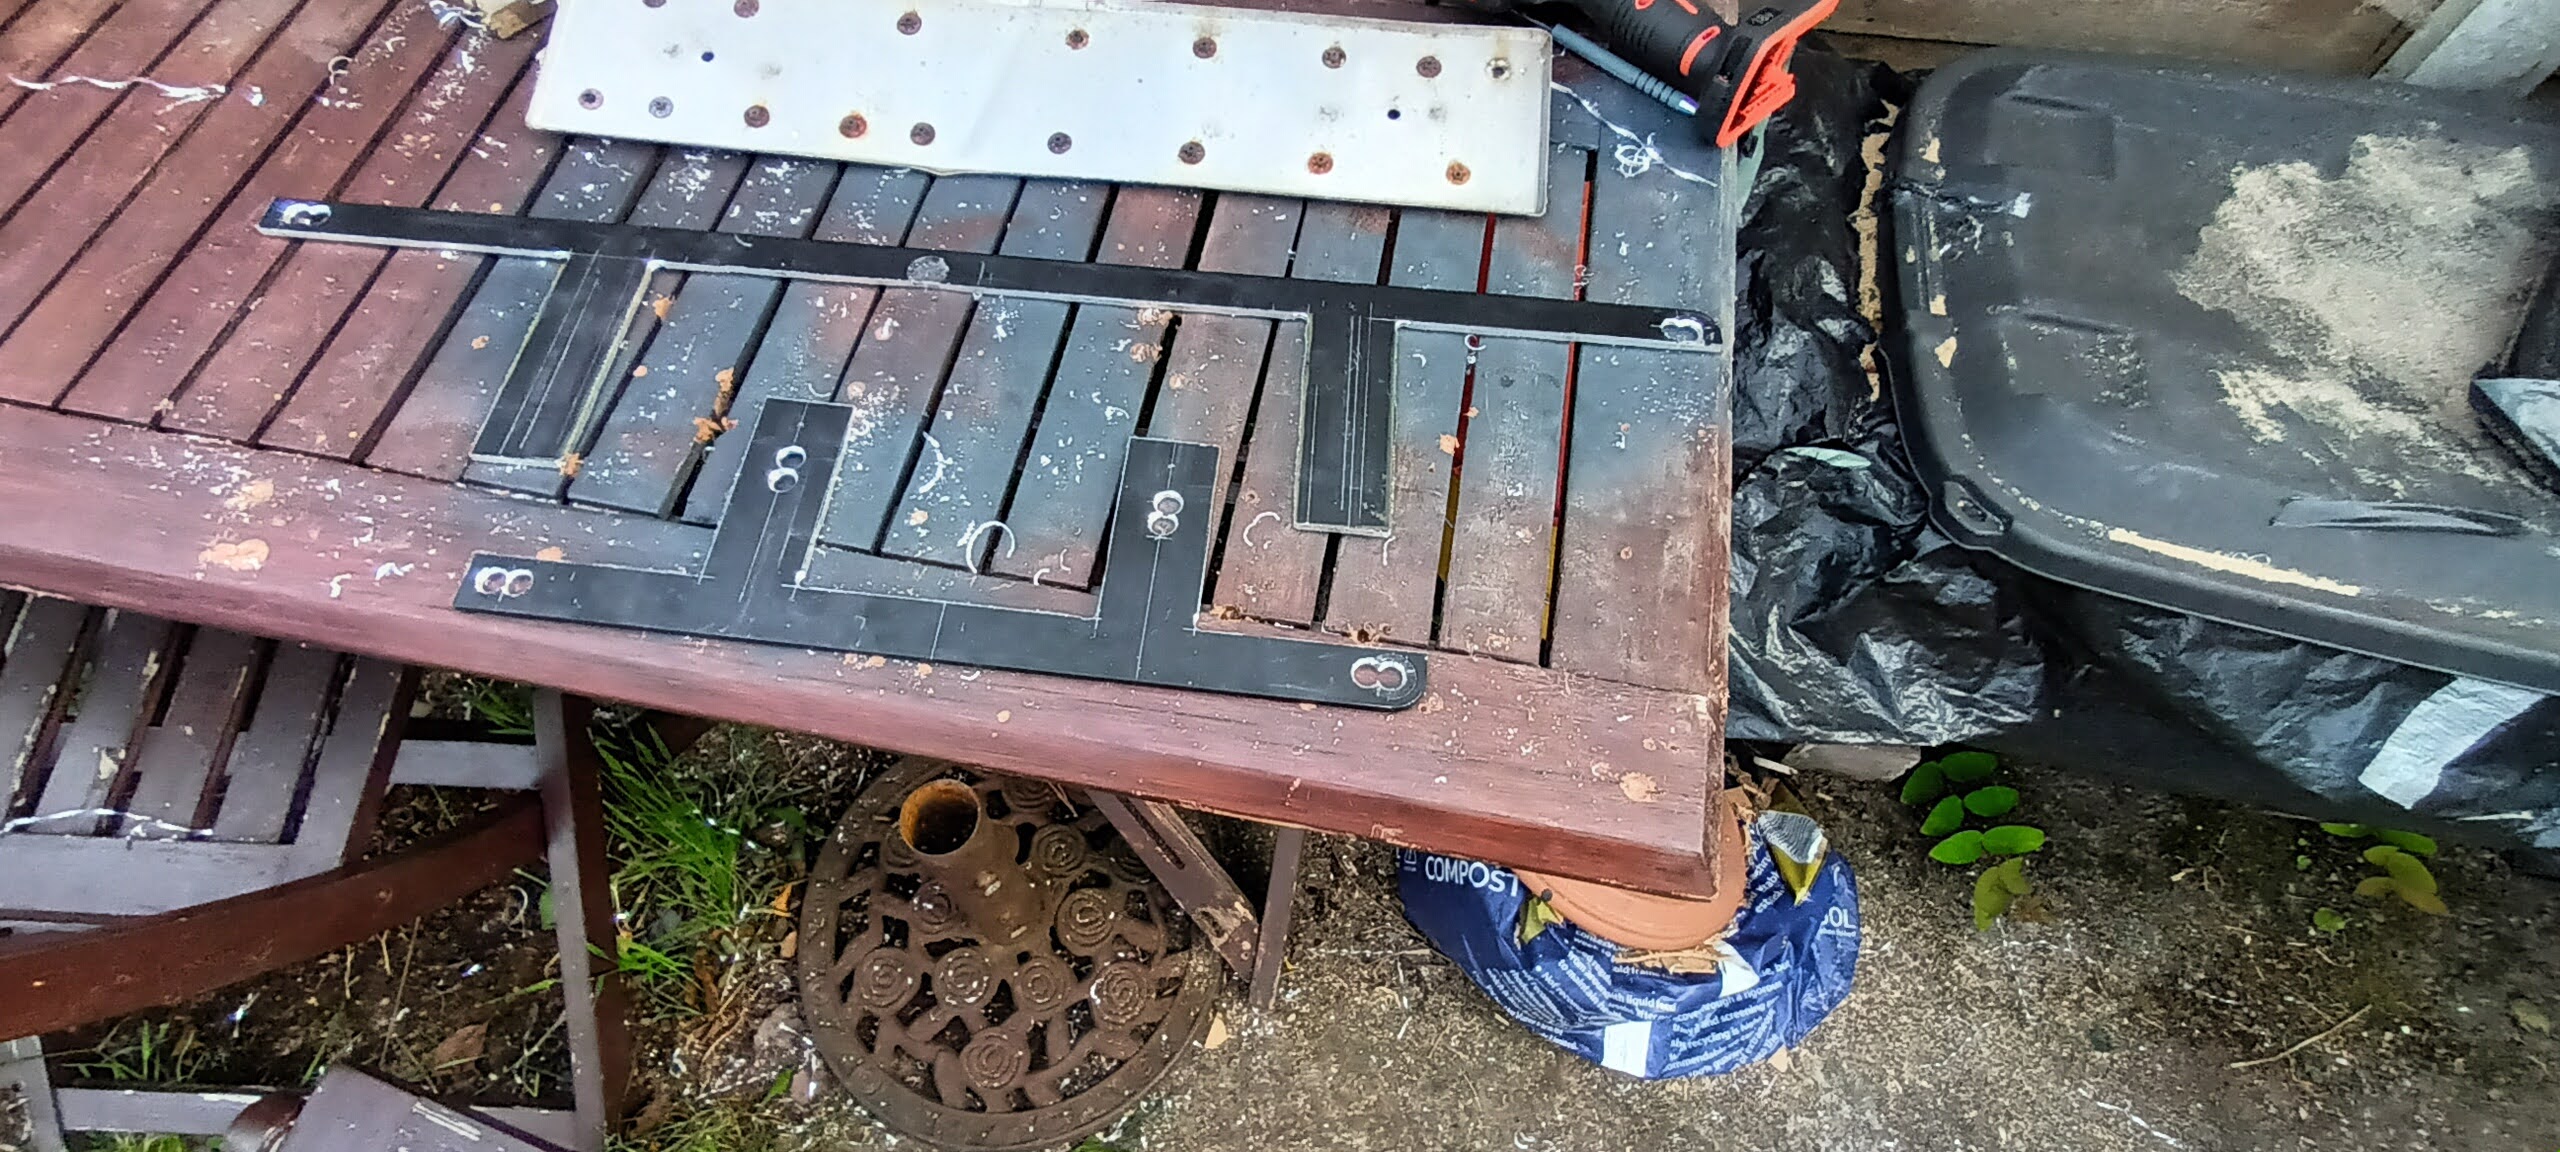
And finally cut out with trusty jigsaw using only one blade. I took ages though.
And here are the mounted plates. Again not perfect, loosely held in position with bolts and nuts, and some ahhhem ( double sided carpet tape ) but workable.

Still got lots to tell as this was only a few days ago and only the first day of full tilt up to teatime.
So, more tomorrow...if I have the energy ,
Sunday, June 02, 2024
Too much to do.....so little time to do it.
So I finally ordered the handbrake cable, along with another £ 80 of misc parts . Boy do the small items add up to a lot. Rear side window seals, chrome bumper bolts, door handle screw anchors etc.
The window seals were a bit of a puzzle. If you recall the shape of the outline is roughly triangular at the rear end and rectangular at the front. But the seal had only one area where the seal is/has a 90 degree mitred corner. This meant that the seal ( luckily about 9" longer than needed) needed to be cut and joined right in the middle of the lower edge !!

Why not make the left part longer and the right side shorter so the bottom can have a nice 90 degree mitre, instead of a fiddly mid section join. Ppppffftt.
Rant over. Also fitted vinyl to inside of window rims.

Squint hard and you can see.
Also fitted brand new wipers. Lovely. They work. The washer works. Getting there slowly.

So finally bit the bullet and fitted the handbrake cable. I must admit I struggled somewhat. I could not get the car very high up to get comfortably under the very centre. Struggle I did, that's after removing the battery clamps, battery and insulating boards as well as the P clip Phillips head screw therein hiding making mental note to fit P clip onto new cable. Twas too tricky to photo but I did my best.

Why I was dreading this is it meant having to repair the very small bracket below the handbrake lever mechanism that holds a 6mm diameter limit switch that switches off the "Handbrake on" warning light. It snapped right through the middle of the hole ages ago. Fortunately I had kept and located said part amongst this lot.

The welding of it meant a little tidy up In the shed in order to extract the mig welder. It took all afternoon. No, I don't mean the welding, just the tidying up of the shed. I did manage to find a few long lost parts that had been sought for for many years, so I stored them carefully to be lost all over again especially when they are wanted, rinse repeat for most of the " little jobs".
I did feel much better after the tidy up and the following day set to welding. I ended up making a new bracket since when using the scary grinder to clean up the tiny edges of the tiny "saved" part, it flew off at great speed into the undergrowth. Hey ho.
Cable and lever fitted, battery back in place, adjustment made and it works.
Another step forward.
Amongst my many birthday treats was a a tool from Teemu, a rechargeable 3/8" drive ratchet. I'm quite sceptical with Teemu stuff, screws, plastics and low value stuff is very good, but manufactured tools not so. Same with the ratchet. It worked great for about 30 minutes, then sporadically for another hour.
That really pissed me off, as it's not possible to have them sent back for repair, just a refund after returning. So I dismantled it and found a wire from the batteries had come unsoldered. Re soldered it and back in business. No no no.
Same happened again. Worked sporadically, tapped it a few times and worked, sort of.
Repeated above repair but this time with much more solder. Hopefully now cured. You should not have to faff with something that cost upwards of £32 FFS !


Not resolved the front bumper alignment, so I moved onto the rear end whilst it was slightly elevated.
I've decided to locate the number plate under the chrome bumper. This means using the chrome bumper conversion brackets with a home made brackets and another home made bracket too.
The four holes in the rear needed filling but wisely decided not to weld in fresh steel. I filled them instead with aluminium mesh and glass fibre filler on the inside and good old filler on the outside.
Inside

Outside

Sanded

The whole rear valance looked a bit tawdry and a few shady rust patches were beginning to show so I set too sanding down the lower quarter, treating iffy areas with Ku-rust and giving it a good covering with some proper primer, not the crappy £1 a tin Poundland special, look


I forgot to photo the finished article but it made it look a whole lot better. Then on to the chrome bumper and brackets.

Brackets to mount to the brackets. Home made found design on BBS MG website forum.


First fitting of the bumpers. Need to reposition a hole in the bracket bracket about 10mm up but fits much better than the front one and easier to reposition.
I'm dreading drilling an extra hole in them as they appear to be some chromed metal and are a swine to drill through.
more soon peeps
Subscribe to:
Comments (Atom)