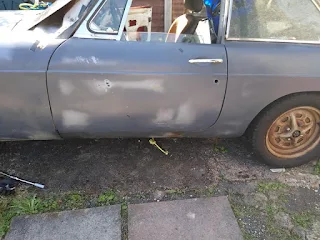
Sunday, August 09, 2020

It aint half hot mum


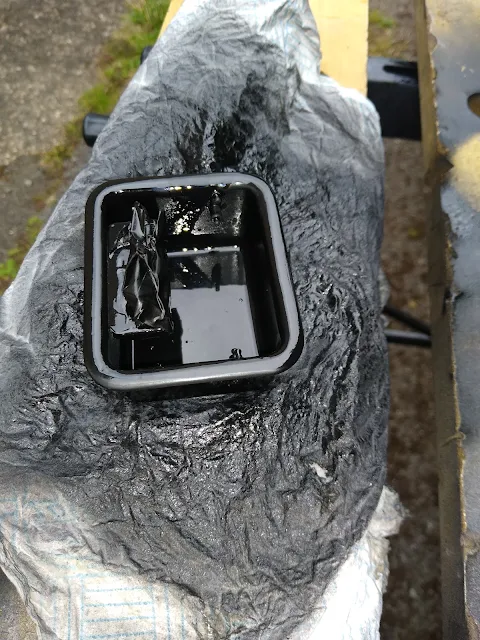
First off, ashtray. Its taken three attempts to get a good finish on the top edges. First time the paper covering protecting the workmate wafted up up rested on it, the second time I rested  it too close to the green scouring pad. So, wet and dried yet again. I'm waiting to do the final coat till I can find the missing dash top vent.
I should explain that I'm currently shed-less waiting delivery sometime in August, so stuff is spread everywhere and some things have become invisible. However, I have seen things I've not seen in years.

The missing vent top is annoying since I saw one in the conservatory before the grand emptying of the shed and I,m sure its not the one I have "found". Time will tell when the shed arrives and its time to put all the stuff back in.
I have also sprayed the air intakes a lovely gloss black and the ashtray lid. 
The glovebox armrest has had a clean and polish as has the vynyl dash top......again. Nothing seems to get it matt black and clean looking despite trying all manner household products, acetone/cellulose thinners, Armorall "really works" restorer and good ole WD40.

I did have misgivings about the dash top I removed years ago. The hardboard backing was broken in 2 places and the vynyl was coming unstuck at the vent holes. So I pondered long and hard , bit the bullet and decided to remove the vynyl from the tatty hardboard, buy some new hardboard and re-glue.
           Judicious use of the heat gun, masking tape and clamps ( wifeys clothes pegs) and job done !
Here is the vynyl halfway glued on to the new hardboard. The old board was used as an accurate template. I did watch on you-tube some geezer doing same to his TR 6, which was helpful.  Contact adhesive is very unforgiving so I did it with some trepidation. The secret is to get it aligned well and start from the middle, even though I started from the RH vent holes it all went well and even the snurpy edges of the vent hole slots in the vynyl stuck down well. I did it in 5 sections.


Not perfect, but much better and its flat and rigid. Luckily I had the wisdom to test fit the hardboard onto the dash before glueing.

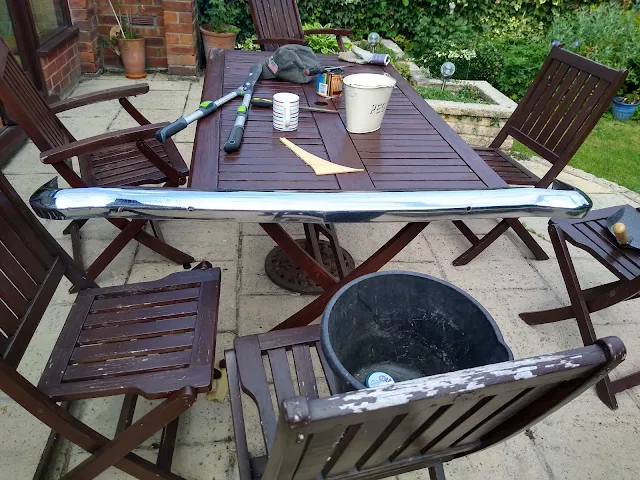
Whilst waiting for the glue to be tacky I set about cleaning the rear bumper, bought on E-bay about 11 years ago from some bloke down Wolverhampton way. Again these are not perfect, slight pitting all over but they will do till the car is finished. Much scrubbing with wire wool, Brasso and Peek autosol chrome cleaner did their bit but alas not enough to make it look new again.


The next big thing is the  WINDSCREEN GLASS !!!!   eeeeekkkkk!!!  next month will see me buy the rubber surround, retainer and some headlamp rubbers.
All with the aim of fitting the dash, console and electrics. But that must wait for the shed to be up and functioning.

Not yet completed is the drivers side hinge/door alignment, glass fitting and locks. Also the brakes need bleeding as well as the inner wing splash plate to fit and underseal. 
The brake hoses still remain an enigma with no word from MGOC other that the standard template of Covid times blah blah blah.  I will not use them in future, especially since I found during the tidy up/ re arranging  the perfect Automotive porn, a Moss full catalogue giving BL part numbers. A must for toilet reading.
Just to prove.................I do have a brain...............usually !   More soon folks.

P.S   some good YouTube sites to see for restoration -:

https://www.youtube.com/c/ChurchHouseClassicsLimited         Very Funny with Range Rovers


https://www.youtube.com/channel/UC8MBWMaGHLbGwDrrzbddevA   Love this man even though its all Triumphs

https://www.youtube.com/watch?v=bRs-4AXb9_U         My Favourite. Lotus, R Rover and Jag. Classy production. Great Chap.

https://www.youtube.com/user/urchfab     Welder and Mech par excelance


Sunday, July 05, 2020

Recycling old stuff and adding more parts

So, since I did things in reverse order MG wise on my week off due to the weather. What follows is the last bit of stuff I completed after the trauma of disposing of the shed. That warrants a mention since up until last week it housed most of the MG bits. After son No1 helped me dismantle it last Sunday
I had all week to chop up and take to the dumpit site. First trip on appointed "odd number day" and after waiting about half an hour to get to the front of a long queue, Geezer doing parking allocation say "wot yer gorrin there mate". Me replying it was a 7x5 shed chopped up into manageable  long lengths. " Sorry we can't accept sheds, its against the rules innit". Then a knowing wink from him he says " Looks like a fence to me, wot izzit again " A Sh................ fence my good man  I replies, " In ya go, park last on left, wood into bay 8. That's the spirit . Especially since I estimated another four trips.
Left the lovely Renault in a bit of a mess though and me knackered and tense from worrying how long it would be before it started pissing it down.

Just the minor matter of building a retaining wall below the neighbours fence where the shed will but up to it. Bags of Cement, Breeze blocks, sand and gravel bought and transported to old garden bottom shed base.
Loads of brownie points earned so onto next phase of MG doings, front splash panel fitting.
I've had both panels a few weeks with fitting kit, but alas no rubber seal for outer inner edges.
So I had a bright Idea, use the old door seal. I'd just fitted a new one to the passenger door frame a few weeks ago finishing off the door mechanism and hinges.

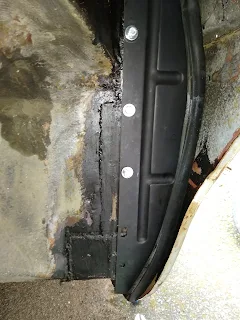
It worked a treat. I even undersealed the deep dark orifice before fitting the splash panels, look


The nuts were a real bugger to get in and squash the windscreen rubber enough as its fairly tough stuff. I had to  grind the first few threads off to get them located but after I did that bingo.
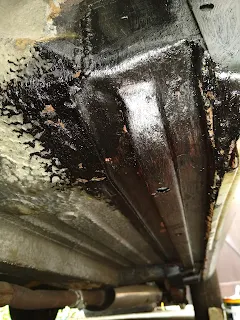
I even got carried away with the undersealing too................look at the castle rails. It must have been 10 years since I welded them on but only Red-leaded them at the time. 


Since most of the MG bits are now in the Conservatory outhouse they are much more accessible, so next job will be refurbing a few more plastic bits like crash pad, vynyl dash top and lower instrument binnacle.
The only problem now is that with so much stiff spread in and around the house, including the MG It makes doing anything a very long winded process. Ah well back to work Monday, however the pubs were open Saturday night so I treated myself. Well worth waiting for.


P.S  still not heard from MGOC regarding brake pipe lengths ( Bar standard format reply  bla bla bla)

Thursday, July 02, 2020

Another major part ready to be fitted.

Yes, after many a long year stood on its end in the airing cupboard, the complete dash is ready to fit   
( minus four switches).

Spent the day dis-assembling the dash, cleaning, checking bulbs, polishing and refitting.
Yo....look see.


 It took best part of three hours, with lots of photos so I could remember where all the wires went.  Many many moons ago ( 12 years to be exact) when I removed the dash I remember the four switches falling apart when being unplugged. I remember looking at the prices at the time......nay bother I thought  roughly £5/8 each. 
Now one is £22 FFS, another £18 and the others similar. 
Using my Lostsock cunning and a little common sense the coloured  Bentley wiring diagram says they are :  Hazard warning switch, Heated rear window switch, 2 pos Fan switch + one other I can't identify as it just says "courtesy light/ door light " ?

There is only one bulb not working on the whole dash believe it or not. I bought one locally for £1...bargain. 
I actually bought two hoping one would fit the "unknown" lampholder . However I've wasted a whole pound as it did not
So, my resolution is " Do not replace if it works, Only buy whats needed to pass the M.O.T test.

I only did the above after a blitz of removing the 5"x7" shed which housed most of the MG parts along with tons and tons of other stuff.


Shed Gone !

Most of the stuff is hived away in about 5 other locations till the new shed arrives ( Late August/Early Sept),  Still, a little bit of Concreting  and floor levelling to do first.

I've got/had all week off so plenty of time.
I should have been fitting the splash panels and undersealing the inner front wings, fitting splash panels and re-aligning driver door but its been raining most of the week, bloody typical !

The pubs are opening on Saturday though .........Whooopeeee !

More soon.


Sunday, June 14, 2020

Faffing before the onslaught.

Another day of faffing.......all's well that ends well.

No photos today sorry ! ( see later)

The plan was as I had a 3 day weekend to get the RH brake pads back in with the new rubber hose (even though I think the hose is too short)

Well problem 1/. was that the nut to undo the hose at the caliper end is 19/32" ???!!!. Whateever,  it spins rounding off the edges nicely. sawing through the  crimped end broke the junior hacksaw blade less than one third of the way through. Could I find the packet of hacksaw blades...........could I f***.
I definitely have some but where they are anyone knows. Hacked off using a pair of nippers.

In the end I removed the caliper as a whole and sliced most of the sticking out end with the scary thin wheel grinder thing..eek.,  even then the nut would not budge. After a lot of faffing with various sockets, chisels, screwdrivers and drills, yey-ho.........off it came TFFT !.

Problem No 2/.
How to get the pistons back in the caliper enough to allow the pads to fit.Sounds simple enough, " using a screwdriver prize them back with a little leverage". No, no, no. They were not moving. Fair enough it must have been five years since I fitted new pistons, seals and so on. And they've not moved one milimeter since, ( they've had no need to).
So I fitted the hose and pumped like mad, success, small movement, more pumpimg and more movement. Maybe too much.  The pistons had quite a bit of surface rust and some pitting. However now is not the time for another rebuild. How the F*** was I going to get the pistons back in to fit the pads ?  After a liberal clean with 3000 grit emery, WD40 and a good wipe to the piston outers a combination of a long thin chisel, wood scraps and  a big adjustable wrench...in they went ! Twas a big faff though. All the time from 10.30 am onwards it looked like it might rain so best thing is get head down and crack on with plan.

Needless to say halfway through 2/. problem, wifey came back from Morrisons to say " they have a nice container for your tools, its a patio container but big enough for some of your  crap stuff". After a quick think off I went. It was a welcome diversion from the problems of 2/.

Anyways after the haitus of thinking and scrambling round  container #1,  boot of MG and doorwell, eventually found 2 split pins and spring clamps.
Its funny how you mind retains some things and not others. I knew exactly where they were after maybe 2 or 3 years, but where are the  steering column bolts ( F*** knows, never come across them ever !!!).

I sent a friendly e-mail to the MGOC last week regarding the rubber hose being short. Not had a reply yet ( 7 days). Funny though they called me next day when I wanted to order something saying by e-mail I could'nt get through.

So whats next ?..................I dunno. Having Box .#2 has helped a lot. I've emptied the car inside ...almost. So all the useful tools are in box #2. box #1 contains all MG misc bits, lots and lots plus some aerosols and liquids and tubes n stuff.

Through sheer logic the drivers side door alignment must come next, but you know me.......lets mix it up a bit and get the interior ( dash and crash pad) fitted. Yeah baby !

Well lets see, lock-down and a 3 day weekend can do that to you, plus the exitement of a new bottom of the garden shed ( 10x6) a big improvement on the rotten 7x5. That's another story as that's currently where most of the expensive bits of the MG are.

Only emptying, demolition and disposal said shed  plus new concrete base to make...........not much then !

Oh the life of Fufferfour.  ...........................wow. the blog now connects with mi phone without asking, so go on just to keep it interesting.


More soon !


Sunday, June 07, 2020

Lockdown plays its part or Not ?

So, as mentioned in previous thread, I have bought a few parts to Fit to the MG.

Namely LH door rubber surround,  Under quarter-light sealing rubber ( cheap foam), a bag of shiny 1/4" nuts, screws and washers ( methinks for window winder mech inside door- never used as yet, made do with rusty oddments as found there), Both inner wing splash panels + nuts/washers ( no sealing rubber for over their edges as they are all out of stock) and and and new rubber front brake hoses. This is the saga I mentioned in the previous post.

When I ordered the hoses only one arrived, even though I was charged for two. No bother I thought a quick phone call and its sorted. NO !  about 23 calls to eventually speak to someone, then easily resolved, TFFT.                         NO !  come the day of fitting the bloody things they are too short. The hose is almost stretched at 90 deg when on full lock. Deffo  not right, the hose at the caliper end is really squashed. So after a bit of spilt brake fluid and fitting the wheel to check if the suspension was out of kilter      NO ! The hose was wrong !

Look see


So, after another attempted 23 calls to MGOC trying to speak to a person, I get the happy chappy (not) who informs me " its 14 inches long innit ?  ", "Nah...all MG are 14" long mate". Despite me  informing him the overall length is relatively unimportant, its the distance between the upper and lower nuts that determine the working parameters...........and its shorter than the one I have removed !!!!!

So what shall I do ?   I don't think the "new" replacement is safe. For now I've fitted it and sat quietly fuming. Maybe I should send said photos to them which I feel demonstrates the problem. I'm getting quite pissed off with the MGOC as nearly always,  either the wrong thing turns up or not enough  quantity as ordered or what turns up is sub-standard but shiny and new.  Maybe I should sue them when I crash in a ball of flames !...            ...              ...           Rant over.

So at the end of the last sunny day all I had to do was resolve above and fit splash panels. I did decide to underseal the inner part of the wing hidden behind the panel. This has sort of been under-sealed and red-leaded, and as we speak I can't find the underseal and I have a full tin I've not seen for a year or two. Since its been decided by the family accountant we are having a new shed ( 10x6 ) better than the rotted 7x5 that holds most of the MG and a whole plethora of misc stuff ( including mice that have nibbled the sponge pads on the bike rack into utter nothingness) I found said under-seal and other parts MG wise that's not seen the light of day for years.

I did have a great idea after the half- hearted attempt at emptying the shed, why not use the "old" door seal instead of the out of stock splash pane rubber seal.......to be tried yet though as every day since has seen it pissing down with rain and a little wind.

I'll let you know how I get on with both little conundrums.....promise.


Sunday, May 31, 2020

Back stronger !

First of all many apologies for not posting THIS YEAR  Time does fly !


The year started well till the second week of Jan when a bad Chest infection struck. Not that I'd be doing much on the MG anyway, but I did have spare cash to buy stuff.

My last effort was to get the passenger door aligned with A & B post equally each side. My last thought was to weld on a strip of £2.99 3mm round steel rod bought from Wickes, and yes they now have steel, aluminium  and brass stock in all shapes and sizes. I sat on this steel all through the winter months debating if I should weld it on or explore other Bodges  remedies.

So I did a very Fufferfour thing............nothing !
I faffed around with the winder mechanism, mounting brackets, quarterlight and lock mechanism. All seem to be working well-ish. What was not working was the key to the lock mechanism. I did have 2 spare doors ( scrap but that's another story, as I only have one now)
So in effect I have several keys. The Ignition key. Obvious which this one is. Then four others ? None of which appear to work FFS. A quick look at the MGOC website informs me a new one set (1 Pair ) is £60 ........ I guess I'll soldier on until I really need to lock the door then. However the lovely renovated door escutcheon ( sprayed metallic silver then clear lacquered, looks very pewter colour just like the factory finish) was missing a captive plate and screw. I seem to remember I had to drill it out moons ago. Anyways, some butchering of said spare door innards gave me a plate with the correct threaded hole and screw. The escutcheon has 2 captive plates, one large and one small.

So fitted it was and then promptly ignored due to above reasoning.
After perusing that Doyen of all things ..MG John Twist : Brilliant Brummie - Hammer and Spanner : and various BBS forums I had developed a plan for the doors.

https://www.youtube.com/watch?v=sU77OVfWuys     SOUP - my Fave youtube watch
https://mg-cars.org.uk/cgi-bin/or17?runprog=mgbbs     BBS forums......a must
http://www.mgb-stuff.org.uk/hammertext.htm              Hammer & Spanner , Its got it all-Invaluable
https://www.youtube.com/playlist?list=PLCFB510794339861C   The Daddy of them all


 This was  only 3 weeks ago.
I bought a new tool !!! and a set of new Door hanger screws. An impact driver ( Manual only, as I already had a big lump hammer). It was nigh on impossible to undo or re-tighten the door hanger Posidrives as they were mangled, mostly.

The plan was to place shims behind the A post door hinges to allow the door to be slid further back.

Viola ! Before and after.


Oh thing of great beauty. I love it when a plan works. It took some graft though. I made the spacers from the winder mech innard of the scrap door, 4 per hinge, galvanised and lined up perfectly. It transpires that I had put the rear wing on, many moons ago,  maybe 2 mm further back and bent the B post rearwards slightly as well as the new doorskin being slightly forward. HeyHo, done now. The door sits nicely, flat even with only an outward kink of 1/2mm at the bottom rear.  Twist the door I hear you say  !!....No, I tried this and suceded in unwelding the door top skin under the quarterlight. 

I have several parts to fit too. Namely Front wing splash plates with screws, Complete passenger door rubber and chrome clamping strip, Quarterlight sponge washer strip and new rubber brake hoses.
I did have to remove one brake pad months ago to allow me to push the MG fwd/back on the drive as it was binding and impossible to move so I have plenty more to finish off with this burst of post covid spring sunshine.

Also a neighbour donated a very nice and new car cover. This is a real help as previously I had to remove about four large and very tatty polythene covers rescued from the woodyards skip after a delivery of vaccuum packed soft wood in 30 foot lengths.

A rant is coming in the next post, after I've calmed down a bit and got the work on-calls out of the way. I also have just found the small captive plates for the door escutcheon whilst I was searching for an odd grubscrew to repair the spare bedroom door. Happy days.


Sunday, June 09, 2019

Gone but not forgotten


Another strange title. Let me explain. Imminently the men are coming to replace the soffits and fascias on the house, and need access to all three sides of the property. So the MG had to go. Go where I hear you ask. Alas not to a warm and dry Garage somewhere. She's moved 30 foot up the driveway onto the (sort of) garage base. I must admit its a good place as it gets lot more light. Plus it will/may motivate me to make a substantial concrete base/foundation for a real garage.This really shows up the grotty state of the original driveway and associated grime and oil from my beloved MG. A re-tarmac of the drive is a must..........eventually ( its only been 27 years of deliberating)

Anyways more of what I've been up to. I have a whole 10 days off work so, set too Sunday lunchtime to re-tackle the door alignment and window mechanism. What a fafffff. No matter what I tried the window sides always came adrift if their up/down runners. Not helped by the fact that when the window was out the channel below was well lubricated as was the pivot runners so it all moves like a well oiled whores knickers, in fact better . It slides back and forth lightly like a Fred and Ginger twostep. Not to over-egg  the story but I made two ( or maybe three) angulated brackets several year ago to replace the rusted and rotten ones at the base of the doors. I subsequently replaced the door skins but only now have started the door refit maybe 8 years later.  Anyways It turns out the bracket I had envisioned and made, was a figment of long lost obsirfucation, Imagination, superb memory, was all wrong. I had been thinking it was to be offered up and fastened one way ( even the Moss diagrams showed my clarity of thought) when in actual fact it was 90 degrees out.  I didn't realise this until I'd fitted the sidelight and screwed it tight, done some test up/downs and got an idea of the dimensions.


Yes I know its rusty as hell but I imagined fitting @ 90 degrees Clockwise. One thing I will add is  I tried using some of the miracle rust converter on it, only in GEL form. I've had it a few years. Now I know why. Its rubbish. several soaks and 2 hours later its no different. So back to the normal white  stuff that turns it bluey, a good coat of primer and paint in what ever I've got left over.

Speaking of which, since a birthday a few weeks ago I have about £100 to spend but for the life of me can't decide what to spend it on. Windscreen rubbers ? which means installing the vinyl dash top, dash + bulbs and heater pipes and controls + scary windscreen fitting !!!!

or Door rubbers and door locks. Fcku, me have you seen the cost of the door locks !!! My locks and keys are another story and complete mystery worthy of its own mini series.

I did spend near on £20 on nuts,bolts, and washers for the above brackets and it appears it was wasted as  I have all the parts, if a little rusty anyway. I now have a near on perfect derusting tool new to the stable courtesy of uncle Bri..............................Lo


Loud as Fcku and vibrates as well but damn good for making rusty nuts an stuff shiny. This as well as a liberal tin of Vaseline will help no end. Stop sniggering  there at the back !


Now for the tricky stuff !! 
No matter how I pull and push the passenger door the panel gaps are crap. Tight at the front and huge at the rear. I did fit a rear wing and door skin in the past. And yes I removed the door to fit the rear wing, and even the front wing so I guess its my own fault. But look, I did for several hours, wondering how to remedy it. The doors is adjusted as far back as it will go. The door glass is also right up to the rear edge.


The rear is about 3/4" gap, the front about 1/8" gap. The front wing can be sanded( to make the vertical seam wider) back along its vertical edge as their is a lot of filler there. But the back .........Pffffffftttt. I'm seriously thinking of adding a bent over strip of metal welded to the edge of the door and grinding near as and filling with filler.

Let me know what you think.............Please!.

Meanwhile here are some photos to show I am enjoying my playtime with the MG. Its a rarity.


No doubt more this week folks.


Friday, March 29, 2019

just a little one

Post that is !

My office for today .....with executive chair.


Since it was a lovely sunny day, I had the day (FFFFFFFFFriday !!) off and had some energy after a lie in I thought I'd uncover the MG. Normally at this time of year some water has managed to creep in and flood the boot ( trunk) area. So, I fully expected to spent most of the day drying tools mopping up wet/rusty areas and having a good tidy up and re-arrange of all the tools and car parts.

Not so. Very little water ingress. There is a lot, and I mean a lot of little /medium/ large boxes of stuff that keeps on growing. I have an internal memory bank of what these are, where they came from and what I'm going to do with them....................someday !

Its over ten years since I started the project and think that the memory banks are now showing signs of failure.
For example, today's job was to weld the wheel arch inner outer inner patch. But could I find the templates I'd made last summer. It took an hour of searching the shed, outhouse, conservatory, boxes in the car, boxes out of the car, dining room x 3. After a well deserved lunch I found them. They were in a box right opposite the kitchen door and I'd walked passed about fourteen times that morning after the initial tidy-up.

The during welding the sparks start playing up as the nozzle was getting hot/damaged. Could I find spare nozzles ..............no, not , nyet, never. I do have some but could not be found in all the usual places ( conservatory desk drawer). Neither could I find the small needle files to open up the 0.6mm nozzle hole. 

So the upshot was the welding was rubbish. Not at all how i saw it in my head or envisioned how easy it looked.

Lo......crap welding,but my welding and its done !  Its never gonna be seen as it will be under sound proofing and carpet. Beneath will be treated to a good coating of under seal too.


 I am worried about the parts still in boxes though. For example, one box contains a front RH side brake disc,pin and spring plate, another lock mechanisms with window sliders and brackets (no screws) another fuel overflow pipes and wing screws and it goes on and on. Must crack on and get bolting things on. One source of frustration is all the screws and nuts and washers. So many different sizes and types.

Anyway, I finished the rear LH light aperture and filed the hole to allow the light base to fit


And here it is fitted. Well balanced in position anyway. Next up door glass and sliders, but that's for another day soon

Sunday, March 24, 2019

Has it been that long ?

In a word yes..........9 months of not very much MG wise.

So let me fill you in a little on the last 12 months.
Both twins have left home properly, one to the environs of Birmingham to live with girlfriend but work in Coventry. The other to the northerly climes of Newcastle to live with her boyfriend and work Three, YES THREE jobs. Now her boyfriend has a Radiology post in the area they are looking at houses to buy.

I also have a new job. 20 yards down the corridor in Interventional Radiology. It has different hours . Four long days of 10 hours with a random midweek day off as well as weekends. And we  have to cover on-calls, roughly 2 days per month for 12 hours ( 24 hours at weekends). Not so bad.

Theirin lies the tale though. I've been so shattered midweek that I'm often in bed for 9pm, since my day starts at 6am. I love the job though and work with a great team, its complex but less stressful with less pain to the knees.  Even though I wear mi lead tabard most of the day, have a jcloth on mi head with green jimjams its fun. These hours were only changed weeks after I started so I'll have to see how it pans out for summer weekdays working on the car.

Some time before last Christmas uncle Bri visited and left me with more tools. A fantastic bench grinder with wire brush, Bosch grinder and a jigsaw with laser guide, wow. Just need a sander now.

For now, residing in the back of the car, together with all the other stuff that won't fit in the shed.


The future plans for the  Fufferfour household are new soffits and fascias, failed window glazing replaced, house re-wire, re-decoration and if any any dosh is left, a new shed.......whahoo.
 All due to the fact the mortgage is finished soon, as is my student loan and a salary increase come April.  

Wifey even admitted she would like me to have a big shed or garage. Methinks I will build my own garage after the aforementioned stuff is done. A new Larger shed will fit at the bottom of the garden where the existing 7x5, fit to bursting, resides. A nice 8 x 10 will do nicely. I might even re-locate the 7x5 near the house temporarily till it is no longer safe or weatherproof or in the way of a garage build.

This is the current state of the MG restoration. One last welding job to do ( never say never eh ?) on the rear LH inner wheel arch. I've cut the templates using CAD ( cardboard aided design) and was going to weld  up today but am just too tired after cutting the lawns and repotting a bush for wifey. Besides, it was too windy !


Normal view of my workshop


Additional storage box which has been very handy and only cost £30 from B&Q. Wish I got two.


So what next then ? This time of year ( traditionally spring Bank Hol in a few weeks time) sees me re-organise the conservatory outhouse mess, shed mess and car mess. Basically a 2 day job of re-arranging stuff and throwing away very little after swearing this year I'll be ruthless ( I could be if Wifey wasn't hovering by my shoulder all the time inspection everything).

I'm not that far off completion........really. Now I've decided that a vinyl wrap ( £600) may be the way to go instead of a full respray ( £2500) and a full interior is not required for the m.o.t.

So after the welding to the rear arch I'll fit the window mechanisms, winders and locks. I don't know why but I have 3 locks and 2  keys, neither work. F**k me, the locks are expensive , and here's me thinking I'd fit remote central locking easy peasy, and cheap second hand. I bet the mechanisms are going to be fiddly and the window channels even worse, let alone the door and seal alignments.

Next up will be the headlights, bulbs and rear lights, the the dash and windscreens/seals which is a part I'm dreading. So if I can get all that done this year I'll be a happy Fufferfour.

I must add the impetus for the resurgence is down to me watching a lot of YouTube videos. Namely The lovely George at "SOUP" whose restoring a Range Rover ( like me outside) and a fantastic Lotus Esprit. The quality of the production and editing is brilliant. Also a mention must go to Elin Yakovs "Rusty Beauties" who restored  a Triumph GT6 and TR6. Funny guy and a wizzard.

  TREASON ALERT..........I think I want a TR6 next !!!!!!!!      ooooooooooh Matron.

Now I can get photos from my phone onto this account and now know......and more importantly wrote down, the account name and password I should be able to do this more often....hopefully !

New beardyface Fufferfour enjoying Christmas with the kids


More soon


Wednesday, June 06, 2018

Bowls, locks and scrubbing


After finishing work early and eating a nice healthy tea ( fish again,,,,,,,,,,3 days running, I'll soon be swimming) I set too with some little jobs.

Finished spraying the bowls outers and inner lip with trusty £1 tin black gloss from Poundland/Buywise/Costco etc. I must have spent £30 in grey primer and black gloss over the years. But for me it makes perfect sense as its cheap, always available and does the job. I also sprayed the window slider brackets I fabricated a few years ago. They have been skulking in a box I recently found, fortunately with a nice coating of Red lead on them. Next to them is the rusty sad original one with rusted on nut and bolt. I've no Idea where the other bolts are. Probably in one of the several bags of bits marked "Misc nuts and bolts" I seem to have hived away in some strange places.


The photo above shows the tools of the hobby that most would be restorers on a budget know. Wilko White spirit. I use gallons of the stuff. WD40 miracle fluid, 1000's of uses especially cleaning and light lubrication. Celebrations plastic container with sealable lid. Used today as a wash and rinse bath. I also filled it with White spirit and put the locks in, sealed the lid and gave it a good shake to loosen all the old crud, grease and other stuff (Cat hairs ?......how did they get there !) Small poking screwdriver (obviously) Green scouring pad ( sorry....Ed China calls them Scotchbrites) and wifeys kitchen towels . Not shown is the wire wool.........I couldn't find it ( found it when I was tidying away everything...normal for me !) and lastly Swarfega with nailbrush ( 60p from toolshop)

So the Idea is to get the door locks mounted and the actuating rods. Striker plate and door handle, all in a working order. Also to fit the door glass, winding mechanism and quarter light    ON BOTH SIDES. Not necessarily in that order though

The keen eyed among you might notice that I am cleaning two Identical locks ( i.e both LH side ) That's because I can't find that either. I've seen it during the weekends.........somewhere..........with another bag of Misc parts but I didn't have time to seek it out tonight. I'll clean these two up, see which looks/works best and use that one.
A good few years ago I bought  LH & RH complete doors from West Yorkshire on good ole E-Bay for £15 total. I collected them one Saturday morning. The trusting vendor was not in, told me to put money in letterbox and the door were in his garage ( left open for me) It contained a very nice MGA.

On Inspection of said doors many weeks later I found the bottom half of both to be rotten and full of filler, about a ton and a half. No wonder he said he would be out at the appointed time. Caveat Emptor !!!!Still all the parts were salvaged off them and that's why I have two of most door parts. The trouble is they are all rusty to some extent but I suppose at least I have some choice. Apart from the window glass felt runner and latch plate ( don't know why I removed it as I had to drill out one bolt thus rendering it useless......doh) all I need now is that precious commodity.......Time, second only to Money.

Joy of joys, MGB restoration.