As usual it started with a diversion. Well the there is so so much to do It would wouldn't it.
Some time ago, and I mean years, I downloaded a very useful drawing of the rear bumper mounting brackett to hold the sub- brackett directly behind the chrome bumper.
It came from a forum named MG Experience, I think. Its American and very informative and friendly. After I "aquired" some steel plates, albeit only 1/8" thick, I decided to make four of them and weld two together by puddle welding from the rear plate.
So spent about 2 days on and off cutting, drilling, bending and grinding. Not tried them yet but they are exactly as the drawing, the holes line up so into the "ready to use, to be fitted when ready" box ( Its getting bigger at least)
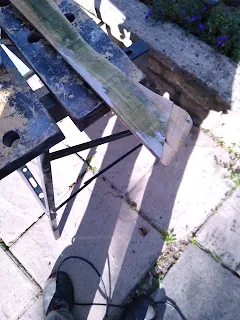
Back to the rear cappings. Even though the shape looked good some work was required to the ends. The rearmost areas have an angled rebate I presume the allow it to cover the angled C post covers. The front has two 1/8" thick blocks to allow the whole to sit flat against the inner wall and level with door cappings. The old ones were ok so I simply prized them off and re-stuck to the new ones with PVA and held overnight with a tough spring clamp. I'd taken the liberty the day before of giving both bare wooden shapes a coating of watered down PVA glue to act as a barrier against rot and adhesion promoter for what was to come.
Below shows the pathetic attempt to use the fibre glass fibres and resin to " fill" some rotten areas, large nail holes and damaged straight edges due to rot in the original pallett. It was easy enough to remove. So then I filled with normal body filler, waited 10 mins (:the weather was warm and sunny, for a change), sanded smooth and was overall very happy. Now ready to stick on the vinyl.
Not having an Industrial stapler or nail gun I bought some small blue head tacks to hold everything together (Wilko's, £2,35) including the piping strip, which was good enough to re-use after a quick clean up with WD 40 and removal of the very rusty small staples.
I used the old tattered cover as a template and got to work with the Evo-stick aerosol. It went great. The vinyl was pliable and easy to cut with a slight stretch if required. Bobbed in a few tacks to be sure then tacked on the piping. This was not easy to align as the underside is well rounded and I was determined the piping would come out true and straight, otherwise I would have been better using the tatty ones than an half arsed attempt. I wanted better than it looked. The piping was ok but could be better. Someone must have heard me muttering and cursing.
Twaz then that Wifey piped up from the kitchen window " I've got an Industrial stapler, somewhere among my art stuff"
WTF. I didn't know if this was a good or bad thing ! Her "art stuff" is spread over the whole house, shed, attic, bedroom wardrobes and outhouse.
Result!!!!! First place I looked, outhouse ( it was also the nearest).
It worked a treat, was easy the align the piping straight and true and staple accurately.
The only scary moment came was when a big black cloud hovered over and started to drizzle just as I was putting in the last of the staples, the WD 40 was almost exhausted and so was the Evo-stick. As you may be aware, I have no garage, so all the tools and stuff are stored either in the car or in two large plastic storage boxes. So any downpour is disasterous. But the cloud passed and all is well.
Very happy with all that. A quick clean up with WD 40 and they looked brand new. Hence back in the RTU,TBFWR box.
I gave the spare wheel another coat of primer and stored inside the passenger footwell. Just so you know, car primer is porous ! I'd wire wheeled three wheels a few years ago and coated with primer, as well as red leading the insides but alas the elements have not been kind to them, they have rusted badly so will need redoing.
Look at the difference between a previously primered one and an untouched original wheel.
More soon folks as I'm buying 2 new tyres so at least 2 wheels need completing, not to mention getting the auto electrician in...hopefully.


No comments:
Post a Comment