Well, finally got the wheels coated in Nimbus grey ( 3 coats) and a couple of coats of clear lacquer before masking up for the black quadrants before I buggered off to Greece for a well deserved retirement present of 2 weeks at a 5 star. It was great, now its over and back to the grind. Well not really, since I don't have to go to work anymore.....yay.
First job was to take the wheels now well and truly cured after sitting the conservatory for 2 weeks for their new rubber. Before that though the black quadrants needed attending to.
Normal masking tape proved too wide to go around the tight corners, inside or out so a trip to the local craft store saw me buy a box of 3mm wide luminous craft tape. £3. Bargain.
Each wheel took around 50 minutes to mask, phew. x5 . 250 minutes just masking. By the end of it I was getting quite good. I did have to use the normal tape to and newspaper. A lot of masking. What I did was a sort of logical production line, masking one, masking the next one, back to first one for light first coat, same for second one, mask third, coat first wheel fully, mask fourth.....ditto....ditto.
Twas a long job, 3 or 4 coats of Satin Black. I lost count near the end as I think some had four coats and some two, maybe. Anyways they looked great.
Except...........some corners had bled under the craft tape, pfffft. And one wheel had been missed altogether with its top insert horizontal craft tape......doh !!
Soon fixed a couple of days later with 400 grit sandpaper, more masking and delicate touch ups .
You might just see some of the bleed at around 1 o clock position, it happend on 4 of the 5 wheels, more or less similar. This shot was taken before the touch up, so Five rims are all looking perfect.
New boots fitted. Fat, hard, shiny and ROUND , for the first time in about 10 years.
Look.
You will note that the front end is a little high.This I knew would be the case since I fitted some new secondhand springs bought on e bay several years ago from a nice chap who lived about 5 mins away.
The springs were definitely shorter, but alas when fitted compressed a lot lot less, as in not at all,
so I left them for a few years so I could get on with other things.
Since I didn't want the brake calipers to disgrace the new wheels and tyres I decided to give the front corners a clean and paint. Removed the calipers to paint in nice Hammerite direct to rust Black.
It was then I noticed something quite startling and a little embarrassing
Amongst the various cast in markings on the caliper was a distinct "arrow". Was this a direction indicator ?or just some random manufacturers mark. Then a thought dawned on me. When trying to bleed the brakes all four corners were difficult and I never quite managed it.
I thought it was my " helpers" lack of perseverance, viz, wife and son got bored after 5 mins and buggered off. Also, and a very big also is that how the calipers were fitted meant the flexible hose was attached to the caliper at the bottom. When I purchased new flexible hoses from the MGOC and fitted them the hoze was bent at 90 degrees and definitely too short on full lock of the wheel.
So I spoke to MGOC and the bloke was adamant all MG's had the same hose length.
They must be wrong !. Since the bloke was rather condescending at the time and my daughter confessed to buying me a gift voucher from them and at great difficulty as the " salesperson" on the phone was rather rude to her, I sent a snotty email to the chairman expressing my displeasure.
Never got a reply.
Now it dawned loud and clear. A confirmation from tinternet piccys of calipers showed the flexible hose is at the top of the caliper. Many years ago when I re-furbed both sets of pistons and seals I fitted them wrong way round on opposite sides. Ooooooops. What a dick.
It gets worse. The pistons were a swine to push back into the calipers.
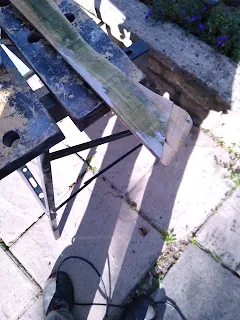
Made worse by the fact my "4" G clamps were cheap pressed steel crap that always went sidways when being used. It was at this point, wrestling with many configurations of heath robinson attempts with the piston/ caliper that I broke one half of the workmate jaws. New workmate jaws !!!!
The old ones only lasted 15 years, these lasted less than 6 months.
I managed to repair them with PVA glue and a section of 2" thick worktop screwed to the underside.
Back to the pistons. Since the crap clamps would not fit inside the caliper pad orifice I decided to slice the top off the G clamp so it would, inserted a socket into the inside of the piston, clamp and push in. Done !
This time I fitted the calipers without the pads then fitted the pads. Three of the four pads went in easy peasy. The inner drivers side would not go in. The piston was about a millimeter too proud. I had the same problem when I originally re-furbed the caliper so after some debating I removed the caliper and pushed the piston in more. But not enough though, it still was impossible to get the pad in.
Then a brainwave, loosen the caliper to gain a little more room between it and the disk. Job done.
Scary grinder with knotted wire wheel employed on disc ( new but lots of surface rust) outer hub and upper/arms and a coating of Hammerite.
The fitting of the new springs was an ordeal, at times it seemed impossible then bingo, in it went. Same for the other side.
I spent a long long time filling the grease gun. How can such a simple tool be so confusing and very very messy. To cap it all no grease was going into the nipples on the suspension at all. Hey ho, new nipples needed then.
On a final note I the fitted the wheels............excitement !
The measurement before the new springs were fitted was floor to wheel arch inner was 26 ". Too high as can be seen from the picture above. After all that faffing of calipers traumas, spring fitting, upside down calipers and broken workmate the new height was
24 7/8" FFS.
But, and a big but. It now looks level and flatter so all is good. I'm sure it will settle more after a drive or to, to be slightly lower.
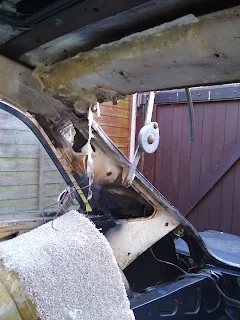
Much more to tell regarding the seats and engine bay and dash.
Here's a hint.


