Monday, August 22, 2022

Watching paint dry

 So, Tony the auto electrician came. A day early as it happens, I was just cutting the grass and he happened to be near bye so he thought its worth a visit. Stayed about an hour and got loads sorted. Firstly the ignition relay was no good, he fitted a spare he had and bingo a spark, of sorts. He thought it was weak so found the HT lead was not connected correctly at each end ( my doing, years ago). Advised me to get a new one. 

He didn't like the fuse box spade connectors, ditto. Or the fuse box.

Since he had just called in to recconoitre the job he had make remarkable progress in just 45 minutes or so.

As he was leaving I commented that the sidelights we on permantently. Another 45 mins and lots of head scratching he found the green wire was feeding the fusebox and somehow making the bottom two fuse holders connected.  Yes, deffo need a new fusebox.

I can't say at this point that this was my fault. The car has always had a parasitic drain, never started from the battery, only jump leads. But now its cured. This took another 40 mins at least. 

He even called back the following day to present me with a new HT lead and fitted it. Also to give advise on next steps, to call him when all new bits are fitted before starting the engine, what a guy !

So now it has ignition, dash lights, working indicators, hazards, and high/ low beams and good spark.

That soiree a day early made the wheel refurb a day late and time is getting very tight. I need the wheels with the correct colour on before I depart for my holibobs so it can cure a while.

Firstly though was the small matter of my retirement and wifeys birthday. It all went well so this week I set to sanding the wheels with 400 grit to get the silver/white/ protective coating smooth.

I also wire brushed the edges and inner part of the wheels as I had the tyres removed some days earlier.

Cor blimey, what a faff. They were in a right state. One was very rusty indeed.

I'm obsessed with getting the edges near the tyre and very outer rim looking good and smooth.

I used a good smooth file and the scary steel wire wheel in scary bosch grinder.

Two coats of primer and job done for today. I was lucky the weather held out with no rain, as the forcast was for rain all day. That would have set me back and scuppered everything.

Just managed to get all five wheels in primer and wet sanded one with 1500 grit before the staedy rain set in.

Just about done. Needs another quick smooth over tomorrow x4, then on to the final silver .


More after holibobs hopefully with a set of new boots and looking good.


Monday, August 15, 2022

Much binding in the marsh

 I reviewed the seat webbing after I completed the 2nd seat frame. 

Not happy that it would be up to the job.

I took the old seat bases and backs to my upholsterer. Nice chap and was willing to replace the orange deckchair Nylon with black vynyl and 2" pleats in the centre.

I did first enquire at a local automotive upholsterer with good reviews online. However, the female on the other end of the line did not seem keen or helpful, topping off with " well the earliest I can start them is after christmas". WTF.

Anyways, another 2 mts of vynly sent directly to the upholsterer and job done, really friendly guy and gave me some wadding should the foams be a little reduced. 

He also gave me 6 mtrs of polyester webbing used on sofa backs. Game on, a new set of straps sewn up easily on the ancient Singer.

No. Not at all. They were flimsy, taut as a drum and that was their downfall. I didn't think they would be up to the job, especially the shock loading. The last thing I wanted was to have to remove the seat frames again after the car is done.

So I ordered some 2" wide nylon webbing ala seatbelt type stuff but not as wide.

What a performance that turned out to be. Getting the correct tension was a nightmare.

What I should have done is fix the inner frame and clips all round with one end sewn up, stretched it ( very little stretch on these) clamped up then unassemble and sew the loose end.

I only discovered this technique on the last two cross straps. Before that was a series of stitching, fitting, not being tight enough or too loose, cutting four rows of stitching , retightening and restitching.


Bugger,bugger and more bugger. Iv'e just got a new phone and somehow not able to show the correct images.
I did intend to show the staps on both seat frames looking good and taut.

So here are some images of the frames underway. The drivers back frame was by far the worse but was soon fettled
with the brass wire wheel in trusty Bosch drill, primered and sprayed gloss black, twice.

Lots happening though. 
The seats will be complete by mid/ late Aug.
The Auto Electrician visits this Friday ( says one hours work should be more than enough)
Wheels away having tyres removed then paint nimbus grey before hols, tyres booked for fitting 10 Sept after hols.
Found boot lock AND KEY ! Cleaned and ready to fit.
Need to paint front and rear brake drums and mask tyres for black infills.

So no posts for at least 3 weeks but hopefully then more exciting news. 

Oh............ and I retire in a couple of days. Yay. TFFT.


Seat struggles and material wealth .....or not !

 Well, after last post I was undecided as to what to do.

The wiring still needs resolving. The wheels need coats of Nimbus grey + lacquer the new Avon tyres.

Guess what, I did neither of what I mentioned. I set too tackling the passenger seat. 

Here's the before shot/s.


Loverley......Deckchair Orange mixed with grinding spark holes,  12 year old spider webs and gawd knows what else.

Easy enough to dis-assemble though. Trim clips prized off and cover gingerly removed. 

The foam was not in bad nick. One tear down one edge and thats it. A bit on the thin/ soft side, so I put them to one side whilst I tackled the seat base frame.

The diaphragm frame came out with pliers, the webbing looking a little saggy and worn in parts. Again that was put to one side whilst I wire brushed the base frame. 


The brass wheel in trusty old Bosch drill did the trick in about 10 minutes. A quick coat in Kurust then nice grey primer. It looked good so I let it dry and tackled the webbing frame.

The "webs" were frayed at some ends, a little stretched but otherwise good. I selected the ones the a frayed end and undid the stitching. The intention was to stretch them by - how much ?  1", 2", 3". In the end I decided on 30 mm.......................guffaw.

I decided to do it the old fashioned way, as I didn't think the ma in laws ancient Singer sewing machine would cope.

Tough going pushing the sailmakers needle through two layers of rubber twice. But finished at last and much more taut.


Here it is inserted in the newly gloss black frame. 


Sunday, July 03, 2022

Trim triumph and wheel wins

 Just a short one today. I needed a leisurely day after another long week at work.

Started Sunday leisurely with a nice gentle 5 mile yomp from Hassop station to Monsal viaduct and back.

Home for a nap then up and pondering what to do.

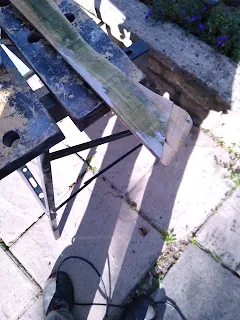
Before I forget here is a picture of Workmate disaster which I forgot to include on the last post.


The replacements should arrive tomorrow, hope they fit.

Since I'd already marked out the new hardboard for the dash top I got to work with the jigsaw and sandpaper. That done I cut the vinyl and applied the aerosol glue. It was a new type, i.e not the usual Evostick so I was a little aprehesive. 

It worked a treat. It wasn't stringy and applied easily. The instructions said wait 10 mins for instant "grab" 20 mins for "adjustable "semi-permanent to permanent bond. 

It worked well. It was German, must know Mr Bosch. The dash top looked great. I'm not fitting it though until the electrics are sorted. So in the shed it went into to the RFFL  ( ready for fitting later) pile.

Whilst all that was going on I extricated the 5th wheel from the passenger compartment and set too with some 800 grit wet and dry to smooth over the debris around the rim/inner disc primer stuff. It sanded well with plenty of water and left a finish as smooth as a babys botton. The only area that needs attention is around the tyre valve, which will be adressed " en masse" when the tyres are removed.


Just a couple of shots of the new vinyl glued on.
No more bloody wheel shots as its been a long haul and they dont show much detail of the hard work anyway. 
Maybe/ deffo upload shots of the completed wheels prior to and post black quadrant attempt.

Another long week at work for me but a long weekend to follow so I have to arrange stuff.

Maybe do a bit of minor welding, maybe review the door gaps or Hammerite underside and wheel hubs.

I have some dosh to spend so front springs should be first and as another diversion I may fit front spoiler, or then again I may review rear cant rail.

Such is MG ownership and I love it.


Trim trials and workmate wobbles

 The wheels all have the first of 2 phases done. That is all the insides done in black gloss, all the outsides done in very bright silver. The silver was rather annoying in so much as the nozzle became blocked on both cans halfway down the volume and proceeded to drop big blobs in random places. 

But since they are having a final coat or two of Ford nimbus grey all that remains is to have the tyres removed, some liberal wet and dry to get the finish right, spray and have the tyres fitted.

I have purchased the Nimbus grey already ( only one can as that was all Halfords had in stock ) and couldn't resist a little test spray. It looks perfect. Just the right shade . No pictures though as I'm fed up of photographing them. I'm not sure the camera phone would to be good enough to capture the true quality as the grey primer looked exactly like the very bright silver.

After the tribulations of the power tool issues I thought all the annoying little troubles were over.

No, not at all. During the wheel refurb I had two disasters. 

1/.  With the constant flipping over of the wheels complete with tyres one of the workmate wooden jaws snapped. What caused it mostly was my annoyance of all the tiny crud wedged into the small gap between the wheel rim itself and the inner section. Despite blowing out the debris with the leaf blower ( amazing power ) still crusty bits remained. I even tried to load the gap with aerosol grey primer and silver paint but to no avail. 

I then had a great brainwave. Fill the gap with decorators caulk ( same as seam sealer) and smooth over with a tiny flat bladed electrical screwdriver. It worked a treat..........sort of.

Then excess stuff just lingered around the edges and trying to clean it off just dropped more stuff into the smooth recess. Attemts to re-smooth it just made it worse. 

So I had to remove it all, scrape away, re-sand and re-clean and think again.


Pictured is said crevice with dried gunk from seal sealer/caulk prior to cleaning. Plus a few spots of drippy silver from errant aerosol.

What I did next was again a little off kilter but glad to say it worked. 

Skulking in the shed I found a tin of  primer/mould killer/ sealer that I used for the bathroom ceiling. It was very thick and dries quickly and permanently. Using a small thin art brush stolen from wifeys stash it was applied to all five wheels and it left a smooth finish with minimal sanding of the excess on each edge.

Yet to be sanded but at least all is done. Five wheels done and not to be touched till the tyres are removed.


2/.

Next up was the workmate replacement wooden jaws. Easily found on the internet, £ 12 for a pair including delivery. The fact that a brand new workmate from Aldi is only £16 means I've saved £4. Win win.

The vinyl I purchased was another matter altogether. I'd used some for the rear armrests which worked great. After reviewing the state of the current dash top I decided to replace that too with new vinyl, together with a new hardboard backing as the earlier new one didn't come away cleanly.


Well it looked awful. I'm sure glad I decided to replace it with lovely new vinyl. £18 for a large peice and I only used a small amount for the rear armrests. Also I was going to use it for the door cards. The cards themselves are rubbish with lots missing/ disintegrated areas but enough to fashion new hardboard backs .

The big question was though did I have enough vinyl to recover the dash top and two door cards ?

Well in short....... did I f ***. Not by much but still not enough. I must have been trying at least an hour to try in fit the three pieces on the remaining vinyl but every way I was about 2" short  in one small area.

Typical. Here's a shot of my best attempt.


So a big decision had to be made. I decided that the bottom 5" or so of the door card vinyl would be made up of black carpet. That way using less vinyl I would be easily able to cover all the new hardboard pieces. BTW the door card hardboard has not been purchased yet but I did have enough hardboard to make the new dash top. Well at least draw out the shape. The weather looked a bit iffy so I resisted in cutting the board with the jigsaw and did a lot of staring at the parts and rooting around in the shed. Thats maybe for tomorrow.

Here's a view of the boards with the  (theoretical reduced size ) of vinyl layed out. 

Loads o room.

Next big thing is the ordering of the tyres. What size though ? I'm thinking 176  x 65, although 165 x 65 would work. I have the advantage of having several sizes of tyres fitted to the wheels and the 175's look the best. Avon tyres look competatively priced and were originally fitted to many Birtish cars of the era.

In still yet to have to set a date with the mobile auto electrician, need to remove the tyres so I can do the final wheel colours and glue and fit the dash top and fit the dash complete. 

I'm hoping to get these done in the next few weeks, along with then dreaded cant rail then start on.........

Well loads.....new proper road springs, new heater matrix, chrome bumper mounting bolts, etc etc.

More soon folks, its picking up pace.


Tuesday, June 21, 2022

Wire wheel woes

 The trusty Bosch drill finally gave up the ghost.

The Draper grinder was hard to use due to the on switch always wanting to be off.

Then, after finding a Bosch grinder in the shed ( a gift from uncle Bri ) together with a drill chuck Bingo !

Alas not for long. The best wheel for getting to the corners, of which on Rostyles is many, was the acorn shaped brass wheel thing. It would only fit in the drill chuck, not the grinder, or so I thought until I discovered the above.

At that point I vowed only ever to buy Bosch tools, I was impressed by their robustness, build quality and operation. I was in love with them.

But, after using for 10 mins or so that too gave up the ghost. It was vibrating like billyyo.

With the normal wheel or the cup wheel it was fantastic, smooth, quiet and lighter than the Draper monster. The rpm of the Bosch is lower though but with the steel wire wheels it did not matter at all.

That left me with ONE of three tools, the Draper which was no good to get in the corners. 

I was waiting delivery of the Bosch drill brushes and Lo, they arrived monday evening.

So after work I got to grips with replacing the brushes. It was a doddle to replace them, if not a little fiddly. The case popped apart like a dream, no broken tabs or tangs, no loose parts all stuff secured for life.

It went back together even better, with a resounding click and used all the same screws to hold it all together.

I then went on to investigate why the Bosch grinder stopped working. I had a fairly certain idea the vibration had caused a loose or broken wire.

In was correct. A wire from one of the brushes had parted company from its brass end spade. The brushes were held in by a curly clock type spring on each side. I attached a new spade terminal, attached another only this time soldered on and re- assembled.  Bingo.....fast and smooth...game on. 

But not tonight. Monday is the only day I work till six pm, home and fed for seven thirty and it was now nine pm. 

Rather than post more pictures of wheels and tools I thought I'd outline whats been done so far, how and whats left to do on the wheels.

I started by using the drill and circular brass wheel, then brass cup. Changed to grinder with large steel wheel and paint guard for doing round the outer edges. 

I tried to work in a logical and orderly fasion by doing the inside edges tops , outside edges and inner edges bottoms.

Changed to the steel cup wheel in drill for larger edges then the acorn shaped brass wheel in drill for the inner quadrants. I probably changed over several times depending on weather it was the outside or inside wheel face.

Coated with Kurust, left to cure a few days. Coated with primer and left to cure ditto. Sprayed with very bright shiney silver.

So as it stands now not one wheel is complete, yet. The intention is to get all five with paint on them ( Black gloss on inside, very shiney Silver on outside ) then give all the outsides a coat or two in Ford Nimbus grey. 

Then have five new tyres fitted........yay .

Then proceed to paint the quadrants in Satin ( or matt ) Black. 

Wheel one.  up to speed and can wait for the others. Black inner, silver outer.

Wheel two.  Kurusted and primed on back with Black gloss applied. Front primered and Silver sprayed on, badly, a few runs and some slight crazing because I rushed it a bit tonight.

Wheel three. Back kurusted, primered and black gloss applied. Partially wire wheeled old rusty primer off and applied kurust.

Wheel four.  Untouced sice applying primer years ago. Needs lots of work.

Wheel five.  Ditto......I think.

Thats enough of wheels for now.

 I may divert onto the rear cant rail " paper mache" as its looking rather flimsy and "wavy" . I may have to use the same technique but with proper resin and mat directly onto the cant rail. 

I may move on the replacing the door cards with new hardboard.  I have some, but guess what, they are 2" too narrow. Pffft. Hardboard is cheap enough though. And I have the vinyl......oooooh.

Lets wait and see.


Cheers !!!!!!!!!

Thursday, June 16, 2022

Stopped by the brushes...almost

 Day off today so after a leisurely morning coffee and big shop, short nap and lunch I set too on the wheel refurb. Originally done ( well three of them at least ) a good few years ago they had a liberal coating of rust on them. I have already done one withe the drill and several small-ish brass wheel shapes. One has been sprayed black on the inside which has crazed a little but I'll go over it again some time. The outer face was coated with two coats of primer and stored in the car so they don' t absorb any moisture.

First job was to get some real paint on said primer. I only had some silver wheel paint in aerosol form so I used that. Just to get it covered and protected.


Wow. What a silver. A very bright light silver. It looked good though and nice to know l'll not have to wire wheel it again, hopefully. The photo doesn't do it justice. Its very very bright.


It appears there is no exact original Rostyle silver colour. Minis, Range rover, Rovers and Fords all used these style wheels and most have slightly different shades. I'm of the opinion that Ford Nimbus grey is the closest colour shade so maybe I'll  nip to Halfords and give that a try over the bright Silver. Unless one of the cheap poundshop silvers is acceptable, worth the risk for £1 a tin.

One to the next wheel. The one I'd not touched to date. It looked like it had been overpainted too at some stage, but not by me.

After removing the wheel from the car...........phwarrr.

The inside was rusty AF. Look


And that photo was after bothering it for a good hour with the brass wheel in drill.

It was that at this point the drill gave up the ghost. It sounded a bit ropey the other day doing the previous wheel so after a quick disassemble and re-grease it appeared to work ok, for a short while, then only work by shaking violently. Not good. The trusty Bosch drill has lasted me nigh on 20 years, drilled evey hole in the house and lots of other stuff too but, a big decision had to be made.

Do I jump into the 21st century and buy a super battery operated one ( preferably another Bosch) or another unit or try to repair the existing one. Being an extreme tight wad I opted to repair the drill with new brushes. The first ones I selected were only £2.99.........but £20 shipping cost...wtf.

Eventually found some on Amazon for £7.50 delivered.......lets wait and see.

I don't think I've mentioned before but I'm taking early retirement so will finish work mid August. That entails being in reciept of a lump sum which has allowed a boost to the restoraton budget. Yay, and more time to restore, hence the burst in activity and enthusiasm as well as the good weather.

So no more of this malarky.


Back to the wheels. What to use to get the wheels back in shape meanwhile ?
I had no option but to use the scary grinder thing. This thing frightens me to death. Its fast, noisey and brutal. Fitted with the steel wire wheel disc almost lethal. 

That too is slightly f***ed. I have to keep the sliding "on" switch pushed forward to keep the disc spinning at full rpm. Not easy when your weilding it into all the nooks and crannies of the wheel and are already scared of slicing into your wrists and fingers. I had a slight mishap last year with it and skimmed the side of my finger which hurt like hell for weeks and was more than unpleasant.

Anyways, I managed half of the untouched wheel outer and left the hard to get at areas until the drill is back in action. The back had been completed with drill, pre conk out and coated in ku-rust.

Pre Ku-rust coating below.


The untouched wheel prior to bothering with scary grinder.


It did an excellent job though. Much quicker than the drill and a better shinyer finish, but no go in tight areas and hard work due to the " fault" with the switch. So as I said only managed half of the wheel front and gave it a light covering of primer. 

Next up is to purchase a reasonable set of proper chrome bumper springs to refit in place of the MCC I purchased a long time ago when I was young and inexperienced MG wise. This should make the car look and sit level and not nose up.  Oh, and a new heater matrix which has sprung a leak and been bypassed. The heater box also need a clean up and respray as the gloss black used looks shabby now, as does the boot floor after the asrts and crafs episode.Three step forward and one step back and so on.

More soon folks


Sunday, June 12, 2022

Arts and crafts Pt 2

 As usual it started with a diversion. Well the there is so so much to do It would wouldn't it. 

Some time ago, and I mean years, I downloaded a very useful drawing of the rear bumper mounting brackett to hold the sub- brackett directly behind the chrome bumper.


It came from a forum named MG Experience, I think. Its  American and very informative and friendly. After I "aquired" some steel plates, albeit only 1/8" thick, I decided to make four of them and weld two together by puddle welding from the rear plate. 
So spent about 2 days on and off cutting, drilling, bending and grinding. Not tried them yet but they are exactly as the drawing, the holes line up so into the "ready to use, to be fitted when ready" box ( Its getting bigger at least)


Back to the rear cappings. Even though the shape looked good some work was required to the ends. The rearmost areas have an angled rebate I presume the allow it to cover the angled C post covers. The front has two 1/8" thick blocks to allow the whole to sit flat against the inner wall and level with door cappings. The old ones were ok so I simply prized them off and re-stuck to the new ones with PVA and held overnight with a tough spring clamp. I'd taken the liberty the day before of giving both bare wooden shapes a coating of watered down PVA glue to act as a barrier against rot and adhesion promoter for what was to come.


Below shows the pathetic attempt to use the fibre glass fibres and resin to " fill" some rotten areas, large nail holes and damaged straight edges due to rot in the original pallett. It was easy enough to remove. So then I filled with normal body filler, waited 10 mins (:the weather was warm and sunny, for a change), sanded smooth and was overall very happy. Now ready to stick on the vinyl. 


Not having an Industrial stapler or nail gun I bought some small blue head tacks to hold everything together (Wilko's, £2,35) including the piping strip, which was good enough to re-use after a quick clean up with WD 40 and removal of the very rusty small staples. 
I used the old tattered cover as a template and got to work with the Evo-stick aerosol. It went great. The vinyl was pliable and easy to cut with a slight stretch if required. Bobbed in a few tacks to be sure then tacked on the piping. This was not easy to align as the underside is well rounded and I was determined the piping would come out true and straight, otherwise I would have been better using the tatty ones than an half arsed attempt. I wanted better than it looked. The piping was ok but could be better. Someone must have heard me muttering and cursing.

Twaz then that Wifey piped up from the kitchen window " I've got an Industrial stapler, somewhere among my art stuff"
WTF. I didn't know if this was a good or bad thing ! Her "art stuff" is spread over the whole house, shed, attic, bedroom wardrobes and outhouse.

Result!!!!! First place I looked, outhouse ( it was also the nearest). 

It worked a treat, was easy the align the piping straight and true and staple accurately.


The only scary moment came was when a big black cloud hovered over and started to drizzle just as I was putting in the last of the staples, the WD 40 was almost exhausted and so was the Evo-stick. As you may be aware, I have no garage, so all the tools and stuff are stored either in the car or in two large plastic storage boxes. So any downpour is disasterous. But the cloud passed and all is well.


Very happy with all that. A quick clean up with WD 40 and they looked brand new. Hence back in the RTU,TBFWR box.

I gave the spare wheel another coat of primer and stored inside the passenger footwell. Just so you know, car primer is porous ! I'd wire wheeled three wheels a few years ago  and coated with primer, as well as red leading the insides but alas the elements have not been kind to them, they have rusted badly so will need redoing.

Look at the difference between a previously primered one and an untouched original wheel.


More soon folks as I'm buying 2 new tyres so at least 2 wheels need completing, not to mention getting the auto electrician in...hopefully.


Thursday, June 09, 2022

Art and craft episode pt 1

 So, I'm resigned to getting a man in to sort the electrics, or the non starting at least.

Back on with other things, not neccasarily in the order I did them, but I'll try.

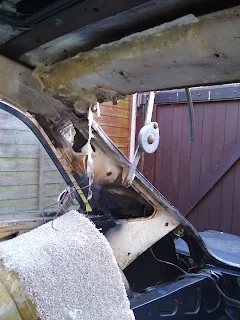
The rear cant rail and cover. Which I don't have !! Never had one, never seen, one can't afford a repro one (They are not very good anyway being a bit flimsy and cheap looking, supposedly) and second hand ones are extortionate.

So, having a naked rear cant rail I did some lateral thinking, in fact lots of weird and off centre thinking.

The result being I thought it would be a doddle to make a fibre glass mould "in-situ". So after watching a few boaty type vids on Youtube and already having most of the stuff off I went.

Its a pity the glass fibre didn't. Went off, that is. This is why !

First I covered the cant rail in cling film, not easy. Modern cling film is not like the old clingy stuff I remember. Anyways, the big tub of resin already mixed with glass fibre strands was a dogs dick to apply. It kept falling off, the cling film kept falling off and I kept falling off . Not good at all so I left it a day or too to go off only partially covered.

 Crap.............. it was literally dropping off as I was shutting up shop ( I mean putting the covers over as I don't have a garage.........yet ! )


So on to plan B.

Use Aluminium baking foil !!  Dead easy to apply and shape and glass fibre won't stick to Aluminium. Dead right, It didn't adhere at all. Even worse result than the clingfilm. What a mess !! 

It was then I discovered my error/s

1/. Don't use resin containing pre mixed fibres

2/. When using resin, mix with a hardener/ catalyst first

So on to plan C

So what can that be ?

It took about 3 weeks to come up with the idea but.........................ping, a lightbulb moment !

Paper-mache !

I covered the cant rail in a light coating of vaseline, applied 1layer of newspaper strips approx 3" x 1"  and applied with what I thought was PVA glue and left it about a week. It looked ok, but had a kind of wooly look with many strips not fully adhered to each other. So a trip to the craft shop for proper PVA glue which cost £2.99, and repeated the process with a ratio of 2:1 water and PVA, result ! Another 2 layers over the next few days with some stratecically placed magnets, clothes pegs and steel rule to keep it in place and bingo, a week later it had set hard and shapely.

It came off without too much faffing with only one area weak.

The plan next is to trim true to shape and fibre glass over this with proper resin and catalyst and real fibre glass matting. Sand, smooth and trial fit next. Thats not done yet though, I got sidetracked.


Up next up is to fibreglass and fit and cover with nice new cream  vinyl. More to come, at some point on this subject.

So more on the diversion. The door and rear seat cappings.
I've had these skulking around the shed in some dark and distant corner, constantly getting the way and hidden in the bowels of all manner of MG stuff. One is damaged too. Its been broken ever since I took it off years ago, right at its weakest point, the thinnest area of the curve. The front drivers and passengers door cappings are fine if a little dirty. 

So I decided to " rescue" the rear broken capping ( held in one piece by the vinyl and upper piping strip ).           
However when extracting from the shed the other one broke in two places. The cappings are made from very coarse MDF and look like they have rotted from the inside out, likely from the poor rear quarterlight seal.

I had the Idea that I could screw a re-enforcing plate behind each fracture after rebating it an good to go after a good clean and polish.

No. Wrong. Very wrong. The plate would not help. The MDF was too rotten, even to accept a liberal dousing of resin ( with catalyst ) and several woodscrews. I had the smart idea to clamp it to a straight edge, let it cure and onwards and upwards. It did not work. The MDF had to go. Fortunately the one with only one fracture could serve as a template and some wood found behind the shed witch was only 1mm thinner.
New skills to master........wood shaping.


And here are the tools I used, with the exception of the jigsaw. 


The wood was part of a dismantled pallet as I had to remove several recessed nails. Also some edges are a little damaged from rot but I'm planning to fill these area with body filler after a pathetic attempt to use yet again resin and filler.
That has yet to be done but they have shaped nicely.

I have also purchased a large roll of black vinyl from AS supplies for about £14.00 delivered because I'm also going to remove the dash top and recover it in said vinyl together with new hardboard door panels.
I'm sure I'll use it on loads of other tatty pieces too.


The dash top looked good when I renewed the hardboard backing last year and stuck back before the windscreen went in.
But the efforts of sorting out the wiring and steel dash installation have taken their toll. The crash pad still looks tatty/ dirty but another harsh scrub should see it looking better.

More very soon.


Wednesday, June 01, 2022

From worse to I F%&^"ing well give up on the electrics, well probably !

 Another frustrating session ended nowhere so I bit the bullet and bought new hazard and indicator flasher units and and and a new battery !

Fitted hazard unit and battery. Still no joy. After checking starter and ignition relays about 30 times I swapped one of them ( forgot which one as this was a few weeks ago )  for a new halfords square thing of same rating and....................

Disater. White smoke. Billowing from the engine bay so off went the ignition key sharpish.

Since I was sat in the car I couldn't tell which relay was smouldering, so I had to repeat the episode, albeit quickly to see whitch one was a bit hot and melting.

What a mess !!!!!!!

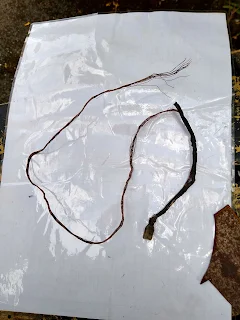
The black wire from the relay and another one going to the fuse box looked like a skinned corpse. 


So just to add to my already frustrating wiring woes, a long and tedious rewiring of said wires from scrap wire ( correct black earth colour of course ).

The only positive notes were the hazards now flash, the indicators don't !, and I did manage to get the engine turning over thanks to John Twist's little tip from his Youtube channel.

I'd also bought a lower starter motor mounting bolt ( the top and bottom are different threads for some unknown BL reason ), however the bolt was in place and I'm sure for a long time it was missing and in the memory bank of my mind that I'd lost it but must remember to replace it ,sometime.

So I did what all top class computer programmers and prime ministers do.............Ignore it and move on to to the next subject.

So I welded on the rear light fillet base top from the rubber to chrome coversion " boat-tails".

I did make these some time ago but could the hell I find them........no, some made some more and got the welder out.


Thats enough for now. Interior to get moving on and lots to tell. 

Stay tuned my faithful followers.